pre
These pages contain a collection of guides, tutorials, and shortcuts for the software I use.
Firefox Shortcuts
- Navigation
- Current Page
- Editing
- Search
- Windows & Tabs
- History
- Bookmarks
- Tools
- PDF Viewer
- Miscellaneous
- Media shortcuts
- Selection of Multiple Tabs
- Developer shortcuts
Navigation
| Command | Shortcut |
|---|---|
| Back | Alt + ← Backspace when browser.backspaceaction is set to 0 (as in the Configuration Editor), which is not the default. |
| Forward | Alt + → Shift + Backspace see above. |
| Home | Alt + Home |
| Open File | Ctrl + O |
| Reload | F5 or Ctrl + R |
| Reload (override cache) | Ctrl + F5 or Ctrl + Shift + R |
| Stop | Esc |
Current Page
| Command | Shortcut |
|---|---|
| Focus Next Link or Input Field | Tab |
| Focus Previous Link or Input Field | Shift + Tab |
| Go Down a Screen | Page Down Space bar |
| Go Up a Screen | Page Up Shift + Space bar |
| Go to Bottom of Page | End Ctrl + ↓ |
| Go to Top of Page | Home Ctrl + ↑ |
| Move to Next Frame, Pop-Up | F6 |
| Move to Previous Frame, Pop-Up | Shift + F6 |
| Ctrl + P | |
| Save Focused Link | Alt + Enter -when browser.altClickSave is set to true (as in the Configuration Editor), which is not the default. |
| Save Page As | Ctrl + S |
| Zoom In | Ctrl + + |
| Zoom Out | Ctrl + - |
| Zoom Reset | Ctrl + 0 |
Editing
| Command | Shortcut |
|---|---|
| Copy | Ctrl + C |
| Cut | Ctrl + X |
| Delete | Del |
| Delete Word to the Left | Ctrl + Backspace |
| Delete Word to the Right | Ctrl + Del |
| Go one Word to the Left | Ctrl + ← |
| Go one Word to the Right | Ctrl + → |
| Go to Beginning of Line | Home Ctrl + ↑ |
| Go to End of Line | End Ctrl + ↓ |
| Go to Beginning of Text | Ctrl + Home |
| Go to End of Text | Ctrl + End |
| Paste | Ctrl + V |
| Paste (as plain text) | Ctrl + Shift + V |
| Redo | Ctrl + Y Ctrl + Shift + Z |
| Select All | Ctrl + A |
| Undo | Ctrl + Z |
| Select link text only | Alt + select link text |
Search
| Command | Shortcut | |
|---|---|---|
| Find in This Page | Ctrl + F | |
| Find Again | F3 Ctrl + G | |
| Find Previous | Shift + F3 Ctrl + Shift + G | |
| Quick Find within link-text only | ' | |
| Quick Find | / | |
| Close the Find or Quick Find bar | Esc - when the Find or Quick Find bar is focused | |
| Switch Search Engine | Alt + ↓ Alt + ↑ - after you have written something (or pressed ↓) in the address bar | |
| Web Search with Default Search Engine | Type ? and a space (or only ?) into empty Address Bar | |
| Focus Address bar for Web Search with Default Search Engine | Ctrl + K Ctrl + E - if search bar is not shown | |
| Focus Search bar | Ctrl + K Ctrl + E - if search bar is shown | |
| Change the Default Search Engine | Ctrl + ↓ Ctrl + ↑ - in the Search bar or the Search field of the New Tab page. | |
| View menu to switch, add or manage search engines | Alt + ↓ Alt + ↑ F4 - when the Search bar is focused |
Windows & Tabs
See also Use tabs to organize lots of websites in a single window.
| Command | Shortcut |
|---|---|
| Close Tab | Ctrl + W Ctrl + F4 - except for Pinned Tabs |
| Close Window | Ctrl + Shift + W Alt + F4 |
| Cycle through Tabs in Recently Used Order | Ctrl + Tab -if enabled in Settings |
| Exit | Ctrl + Shift + Q |
| Go one Tab to the Left | Ctrl + Page Up Ctrl + Shift + Tab see below |
| Go one Tab to the Right | Ctrl + Page Down Ctrl + Tab Note: if the setting Ctrl+Tab cycles through tabs in recently used order is disabled in Settings |
| Go to Tab 1 to 8 | Ctrl + 1 to 8 |
| Go to Last Tab | Ctrl + 9 |
| Move Tab Left | Ctrl + Shift + Page Up |
| Move Tab Right | Ctrl + Shift + Page Down |
| Move Tab to start | Ctrl + Shift + Home - requires the currently selected tab to be "in focus" for instance, by hitting Alt + D to focus the address bar, and then Shift + Tab until you reach the browser tab bar. |
| Move Tab to end | Ctrl + Shift + End - requires the currently selected tab to be "in focus" for instance, by hitting Alt + D to focus the address bar, and then Shift + Tab until you reach the browser tab bar. |
| Mute/Unmute Audio | Ctrl + M |
| New Tab | Ctrl + T |
| New Window | Ctrl + N |
| New Private Window | Ctrl + Shift + P |
| Open Address or Search in New Background Tab | Alt + Shift + Enter - from address bar |
| Open Address or Search in New Foreground Tab | Alt + Enter - from address bar or Search bar |
| Open Address or Search in New Window | Shift + Enter - from address bar or the Search field on the New Tab page |
| Open Search in New Background Tab | Ctrl + Enter - from the Search field on the New Tab page. (see note, below) |
| Open Search in New Foreground Tab | Ctrl + Shift + Enter - from the Search field on the New Tab page. Note: The Foreground and Background Tab shortcuts are switched if the setting When you open a link, image or media in a new tab, switch to it immediately is enabled in Settings |
| Open Focused Bookmark or Link in Current Tab | Enter |
| Open Focused Bookmark in New Foreground Tab | Ctrl + Enter |
| Open Focused Bookmark in New Background Tab | Ctrl + Shift + Enter |
| Open Focused Link in New Background Tab | Ctrl + Enter (see note, below) |
| Open Focused Link in New Foreground Tab | Ctrl + Shift + Enter Note: The Foreground and Background Tab shortcuts are switched if the setting When you open a link, image or media in a new tab, switch to it immediately is enabled in Settings |
| Open Focused Bookmark or Link in New Window | Shift + Enter |
| Show All Tabs | Ctrl + Shift + Tab - if the setting Ctrl+Tab cycles through tabs in recently used order is enabled in Settings |
| Reopen last closed tab or window | Ctrl + Shift + T Note: Reopens last closed tab or window, in the order closed. If there aren't any tabs or windows to reopen, this command restores the previous session. |
| Reopen last closed window | Ctrl + Shift + N |
| Moves the URL left or right (if cursor is in the address bar) | Ctrl + Shift + X |
History
| Command | Shortcut |
|---|---|
| History sidebar | Ctrl + H |
| Library window (History) | Ctrl + Shift + H |
| Clear Recent History | Ctrl + Shift + Del |
Bookmarks
| Command | Shortcut |
|---|---|
| Bookmark All Tabs | Ctrl + Shift + D |
| Bookmark This Page | Ctrl + D |
| Bookmarks sidebar | Ctrl + B |
| Show/hide the Bookmarks toolbar | Ctrl + Shift + B |
| Show All Bookmarks (Library Window) | Ctrl + Shift + O |
| Show List of All Bookmarks | Space - in Empty Search Field in Bookmarks Library Window or Sidebar. |
| Focus Next Bookmark/Folder whose name (or sorted property) starts with a given character or character sequence | Type the character or quickly type the character sequence. - in Bookmarks Library, Bookmarks Toolbar, Bookmarks Menu, Bookmarks Sidebar |
Tools
| Command | Shortcut |
|---|---|
| Downloads | Ctrl + J |
| Add-ons | Ctrl + Shift + A |
| Toggle Developer Tools | F12 Ctrl + Shift + I |
| Web Console | Ctrl + Shift + K |
| Inspector | Ctrl + Shift + C |
| Take a screenshot | Ctrl + Shift + S |
| Style Editor | Shift + F7 |
| Task Manager | Shift + Esc |
| Profiler | Shift + F5 |
| Network | Ctrl + Shift + E |
| Responsive Design View | Ctrl + Shift + M |
| Page Source | Ctrl + U |
| Browser Console | Ctrl + Shift + J |
| Page Info | Ctrl + I |
PDF Viewer
| Command | Shortcut |
|---|---|
| Next page | N or J or → |
| Previous page | P or K or ← |
| Zoom in | Ctrl + + |
| Zoom out | Ctrl + - |
| Automatic Zoom | Ctrl + 0 |
| Rotate the document clockwise | R |
| Rotate counterclockwise | Shift + R |
| Switch to Presentation Mode | Ctrl + Alt + P |
| Choose Text Selection Tool | S |
| Choose Hand Tool | H |
| Focus the Page Number input box | Ctrl + Alt + G |
Miscellaneous
| Command | Shortcut |
|---|---|
| Complete .com Address | Ctrl + Enter |
| Delete Selected Autocomplete Entry | Shift + Del |
| Toggle Full Screen | F11 |
| Toggle Menu Bar activation (showing it temporarily when hidden) | Alt or F10 |
| Toggle Reader Mode | F9 |
| Caret Browsing | F7 |
| Focus Address Bar | F6 Alt + D Ctrl + L |
| Focus Search Field in Library | F6 Ctrl + F |
| Stop Autoscroll Mode | Esc |
| Cancel Drag-and-Drop Operation | Esc |
| Clear Search Field in Library or Sidebar | Esc |
| Close a Menu | Esc Alt F10 |
| Toggle Context Menu | Shift + F10 |
Media shortcuts
See also HTML5 audio and video in Firefox and the list of Picture-in-Picture (PiP) shortcuts.
| Command | Shortcut |
|---|---|
| Toggle Play / Pause | Space bar |
| Decrease volume | ↓ |
| Increase volume | ↑ |
| Mute audio | Ctrl + ↓ |
| Unmute audio | Ctrl + ↑ |
| Seek back 15 seconds | ← |
| Seek back 10 % | Ctrl + ← |
| Seek forward 15 seconds | → |
| Seek forward 10 % | Ctrl + → |
| Seek to the beginning | Home |
| Seek to the end | End |
Selection of Multiple Tabs
These shortcuts require the tab bar to be “in focus”. Currently, the only way to do this is to focus an adjacent object and “tab into” the tab bar, for instance, by hitting Ctrl + L to focus the address bar, and then Shift + Tab repeatedly until the current tab gets a colored border.
| Command | Shortcut |
|---|---|
| Select left, right, first or last tab. Deselect all other tabs. | Arrow Keys Home End |
| Move the colored border to left, right, first or last tab. | Ctrl + Arrow Keys Ctrl + Home Ctrl + End |
| Select or deselect the tab with the colored border. The other tabs stay selected or deselected. | Ctrl + Space |
Developer shortcuts
You can also use keyboard shortcuts with developer tools in Firefox. See the All keyboard shortcuts Firefox Source Docs page.
Chrome Shortcuts
- Windows & Linux
- Open the menu for tab groups
- Move, collapse and expand tab groups
- Google Chrome feature shortcuts
- Address bar shortcuts
- Webpage shortcuts
- Mouse shortcuts
Windows & Linux
Tab & window shortcuts
| Action | Shortcut |
|---|---|
| Open a new window | Ctrl + n |
| Open a new window in Incognito mode | Ctrl + Shift + n |
| Open a new tab, and jump to it | Ctrl + t |
| Reopen previously closed tabs in the order they were closed | Ctrl + Shift + t |
| Jump to the next open tab | Ctrl + Tab or Ctrl + PgDn |
| Jump to the previous open tab | Ctrl + Shift + Tab or Ctrl + PgUp |
| Jump to a specific tab | Ctrl + 1 through Ctrl + 8 |
| Jump to the rightmost tab | Ctrl + 9 |
| Open your home page in the current tab | Alt + Home |
| Open the previous page from your browsing history in the current tab | Alt + Left arrow |
| Open the next page from your browsing history in the current tab | Alt + Right arrow |
| Close the current tab | Ctrl + w or Ctrl + F4 |
| Close the current window | Ctrl + Shift + w or Alt + F4 |
| Minimize the current window | Alt + Space then n |
| Maximize the current window | Alt + Space then x |
| Quit Google Chrome | Alt + f then x |
| Move tabs right or left | Ctrl + Shift + PgUp or Ctrl + Shift + PgDn |
| Turn on full-screen mode | F11 |
| Turn off full-screen mode | F11 or press and hold Esc |
Open the menu for tab groups
- On your Windows computer, open Chrome.
- To move to tab selection, press F6 until your tabs are in focus.
- To switch focus to a specific tab, press Tab to move forward or Shift + Tab to move backward.
- To open the tab group menu, press Menu.
- To make a menu selection:
- To move up or down, press Up arrow
or Down arrow
.
- To move left or right, press Left arrow
or Right arrow
.
- To select a menu option, press Enter.
- To move up or down, press Up arrow
Move, collapse and expand tab groups
You can collapse a tab group so that only the group name or a colored circle shows. You can also expand a tab group so that all tabs show.
To collapse or expand a tab group:
- Switch focus to the tab group header.
- Press Space bar or Enter.
Tip: When a tab group is collapsed, you can only select the group. You can't select individual tabs inside the group.
To move a tab or tab group:
- Switch focus to the tab or tab group.
- Press Ctrl + Left arrow
Google Chrome feature shortcuts
| Action | Shortcut |
|---|---|
| Open the Chrome menu | Alt + f or Alt + e |
| Show or hide the Bookmarks bar | Ctrl + Shift + b |
| Open the Bookmarks Manager | Ctrl + Shift + o |
| Open the History page in a new tab | Ctrl + h |
| Open the Downloads page in a new tab | Ctrl + j |
| Open the Chrome Task Manager | Shift + Esc |
| Set focus on the first item in the Chrome toolbar | Shift + Alt + t |
| Set focus on the rightmost item in the Chrome toolbar | F10 |
| Switch focus to unfocused dialog (if showing) and all toolbars | F6 |
| Open the Find Bar to search the current page | Ctrl + f or F3 |
| Jump to the next match to your Find Bar search | Ctrl + g |
| Jump to the previous match to your Find Bar search | Ctrl + Shift + g |
| Open Developer Tools | Ctrl + Shift + j or F12 |
| Open the Delete Browsing Data options | Ctrl + Shift + Delete |
| Open the Chrome Help Center in a new tab | F1 |
| Log in a different user or browse as a Guest | Ctrl + Shift + m |
| Open a feedback form | Alt + Shift + i |
| Turn on caret browsing | F7 |
| Skip to web contents | Ctrl + F6 |
| Focus on inactive dialogs | Alt + Shift + a |
Address bar shortcuts
Use the following shortcuts in the address bar:
| Action | Shortcut |
|---|---|
| Search with your default search engine | Type a search term + Enter |
| Search using a different search engine | Type a search engine name and press Tab |
Add www. and .com to a site name, and open it in the current tab | Type a site name + Ctrl + Enter |
Add www. and .com to a site name, and open it in a new window | Type a site name + Ctrl + Shift + Enter |
| Open a new tab and perform a Google search | Type a search term + Alt + Enter |
| Jump to the address bar | Ctrl + l or Alt + d or F6 |
| Search from anywhere on the page | Ctrl + k or Ctrl + e |
| Remove predictions from your address bar | Down arrow to highlight then Shift + Delete |
| Move cursor to the address bar | Ctrl + F5 |
Webpage shortcuts
| Action | Shortcut |
|---|---|
| Open options to print the current page | Ctrl + p |
| Open options to save the current page | Ctrl + s |
| Reload the current page | F5 or Ctrl + r |
| Reload the current page, ignoring cached content | Shift + F5 or Ctrl + Shift + r |
| Stop the page loading | Esc |
| Browse clickable items moving forward | Tab |
| Browse clickable items moving backward | Shift + Tab |
| Open a file from your computer in Chrome | Ctrl + o + Select a file |
| Display non-editable HTML source code for the current page | Ctrl + u |
| Save your current webpage as a bookmark | Ctrl + d |
| Save all open tabs as bookmarks in a new folder | Ctrl + Shift + d |
| Make everything on the page bigger | Ctrl and + |
| Make everything on the page smaller | Ctrl and - |
| Return everything on the page to default size | Ctrl + 0 |
| Scroll down a webpage, a screen at a time | Space or PgDn |
| Scroll up a webpage, a screen at a time | Shift + Space or PgUp |
| Go to the top of the page | Home |
| Go to the bottom of the page | End |
| Scroll horizontally on the page | Shift + Scroll your mousewheel |
| Move your cursor to the beginning of the previous word in a text field | Ctrl + Left arrow |
| Move your cursor to the next word | Ctrl + Right arrow |
| Delete the previous word in a text field | Ctrl + Backspace |
| Open the Home page in the current tab | Alt + Home |
Mouse shortcuts
The following shortcuts require you to use your mouse:
| Action | Shortcut |
|---|---|
| Open a link in a current tab (mouse only) | Drag a link to a tab |
| Open a link in new background tab | Ctrl + Click a link |
| Open a link, and jump to it | Ctrl + Shift + Click a link |
| Open a link, and jump to it (mouse only) | Drag a link to a blank area of the tab strip |
| Open a link in a new window | Shift + Click a link |
| Open a tab in a new window (mouse only) | Drag the tab out of the tab strip |
| Move a tab to a current window (mouse only) | Drag the tab into an existing window |
| Return a tab to its original position | Press Esc while dragging |
| Save the current webpage as a bookmark | Drag the web address to the Bookmarks Bar |
| Scroll horizontally on the page | Shift + Scroll your mousewheel |
| Download the target of a link | Alt + Click a link |
| Display your browsing history | Right-click Back  or click & hold Back or click & hold Back Right-click Next  or click & hold Next or click & hold Next |
| Switch between maximized and windowed modes | Double-click a blank area of the tab strip |
| Make everything on the page bigger | Ctrl + Scroll your mousewheel up |
| Make everything on the page smaller | Ctrl + Scroll your mousewheel down |
Cisco Router & Switch Configuration
- Part 1: Configuring a Cisco Router
- 1. Access the Router CLI
- 2. Enter Privileged EXEC Mode
- 3. Enter Global Configuration Mode
- 4. Basic Router Configuration
- 5. Configure Router Interfaces (Assign IP Addresses)
- 6. Configure a Default Route (for Internet Access)
- 7. Save the Configuration
- 8. Verify Configuration (from Privileged EXEC mode #)
- Part 2: Configuring a Cisco Switch
- 1. Access the Switch CLI
- 2. Enter Privileged EXEC Mode
- 3. Enter Global Configuration Mode
- 4. Basic Switch Configuration (Similar to Router)
- 5. Configure VLANs (Virtual Local Area Networks)
- 6. Assign Access Ports to VLANs
- 7. Configure Trunk Ports (for inter-VLAN communication between switches/routers)
- 8. Configure a Management IP Address (Switched Virtual Interface - SVI)
- 9. Configure a Default Gateway (for management to reach other subnets)
- 10. Save the Configuration
- 11. Verify Configuration (from Privileged EXEC mode #)
Part 1: Configuring a Cisco Router
Routers operate at Layer 3 (Network Layer) and are responsible for forwarding packets between different networks (IP subnets).
Assumptions:
- You have a Cisco router (physical or in Packet Tracer/GNS3).
- You have a console cable connected from your PC's serial port (or USB-to-serial adapter) to the router's console port.
- You are using a terminal emulation program (like PuTTY, Tera Term, or Packet Tracer's Terminal app) with settings typically
9600 baud, 8 data bits, no parity, 1 stop bit, no flow control.
1. Access the Router CLI
- Power on the router.
- Open your terminal emulation program and connect to the console port.
- You'll likely see a boot-up sequence. If it asks "Would you like to enter the initial configuration dialog? [yes/no]:", type
noand press Enter. - You'll arrive at the User EXEC mode:
Router>
2. Enter Privileged EXEC Mode
- From
Router>, typeenableoren. - Press Enter.
- The prompt changes to
Router#. This mode allows you to view system information and enter global configuration mode.
3. Enter Global Configuration Mode
- From
Router#, typeconfigure terminalorconf t. - Press Enter.
- The prompt changes to
Router(config)#. This mode allows you to make system-wide changes.
4. Basic Router Configuration
-
Set a Hostname:
Router(config)# hostname MyBranchRouter
MyBranchRouter(config)#
(The prompt changes immediately)
-
Secure Privileged EXEC Mode (Encrypts password):
MyBranchRouter(config)# enable secret YourStrongPassword(This password will be requested when typing
enable) -
Secure Console Line (Local Login for Console):
MyBranchRouter(config)# line console 0
MyBranchRouter(config-line)# password ConsolePass
MyBranchRouter(config-line)# login
MyBranchRouter(config-line)# exit
(This password will be requested when connecting via console)
-
Secure VTY Lines (for Telnet/SSH access): VTY lines allow remote access. A common range is
0 4(allowing 5 simultaneous sessions).MyBranchRouter(config)# line vty 0 4 MyBranchRouter(config-line)# password VTYPass MyBranchRouter(config-line)# login MyBranchRouter(config-line)# exit(These passwords will be requested when connecting via Telnet/SSH)
-
Encrypt all plaintext passwords:
MyBranchRouter(config)# service password-encryption(This encrypts passwords set using
passwordcommand, notenable secretwhich is already hashed) -
Set a Banner (Message of the Day):
MyBranchRouter(config)# banner motd # Unauthorized access is prohibited #(The
#is a delimiter; you can use any character not in the message)
5. Configure Router Interfaces (Assign IP Addresses)
Routers have physical interfaces (e.g., GigabitEthernet, FastEthernet, Serial). Each interface usually connects to a different network segment.
-
Identify Interfaces: In Privileged EXEC mode (
MyBranchRouter#), you can use:show ip interface briefThis shows all interfaces, their IP addresses (if any), and their status.
-
Enter Interface Configuration Mode:
MyBranchRouter(config)# interface GigabitEthernet0/0 (or FastEthernet0/0, or Serial0/0/0 etc.) MyBranchRouter(config-if)# -
Assign IP Address and Subnet Mask:
MyBranchRouter(config-if)# ip address 192.168.1.1 255.255.255.0 -
Activate the Interface: By default, interfaces are administratively down.
MyBranchRouter(config-if)# no shutdown(You should see a message about the interface changing state to up)
-
Exit Interface Mode:
MyBranchRouter(config-if)# exit
MyBranchRouter(config)#
(Repeat for all interfaces you need to configure)
6. Configure a Default Route (for Internet Access)
If your router connects to the internet (or another router that leads to the internet), you'll need a default route. This tells the router where to send packets if it doesn't have a specific route for the destination network.
-
0.0.0.0 0.0.0.0represents "any network, any subnet mask." -
10.0.0.1would be the IP address of the "next-hop" router (e.g., your ISP's router or your main home router).MyBranchRouter(config)# ip route 0.0.0.0 0.0.0.0 10.0.0.1
7. Save the Configuration
Changes made in config modes are only in the running-configuration (RAM). To save them permanently so they survive a reboot, you need to copy them to startup-configuration (NVRAM).
-
From
MyBranchRouter(config)#, typeexitto go back to Privileged EXEC mode.MyBranchRouter(config)# exit MyBranchRouter# -
Save the configuration:
MyBranchRouter# copy running-config startup-config
Destination filename [startup-config]? (Press Enter)
Building configuration...
8. Verify Configuration (from Privileged EXEC mode #)
show running-config: Shows the current active configuration in RAM.show ip interface brief: Shows a summary of all interfaces, their IP addresses, and status.show ip route: Shows the routing table.ping <destination_ip>: Test connectivity (e.g.,ping 192.168.1.254).
Part 2: Configuring a Cisco Switch
Switches primarily operate at Layer 2 (Data Link Layer) and are responsible for forwarding frames within the same local network (LAN) based on MAC addresses.
Assumptions:
- You have a Cisco switch (physical or in Packet Tracer/GNS3).
- You have a console cable connected from your PC's serial port to the switch's console port.
- You are using a terminal emulation program (like PuTTY, Tera Term, or Packet Tracer's Terminal app).
1. Access the Switch CLI
- Power on the switch.
- Open your terminal emulation program and connect to the console port.
- You'll likely see a boot-up sequence.
- You'll arrive at the User EXEC mode:
Switch>
2. Enter Privileged EXEC Mode
- From
Switch>, typeenableoren. - Press Enter.
- The prompt changes to
Switch#.
3. Enter Global Configuration Mode
- From
Switch#, typeconfigure terminalorconf t. - Press Enter.
- The prompt changes to
Switch(config)#.
4. Basic Switch Configuration (Similar to Router)
-
Set a Hostname:
Switch(config)# hostname MyFloorSwitch MyFloorSwitch(config)# -
Secure Privileged EXEC Mode:
MyFloorSwitch(config)# enable secret YourStrongPassword -
Secure Console Line:
MyFloorSwitch(config)# line console 0 MyFloorSwitch(config-line)# password ConsolePass MyFloorSwitch(config-line)# login MyFloorSwitch(config-line)# exit -
Secure VTY Lines (for Telnet/SSH access):
MyFloorSwitch(config)# line vty 0 15 (Switches typically have more VTY lines than routers, up to 16) MyFloorSwitch(config-line)# password VTYPass MyFloorSwitch(config-line)# login MyFloorSwitch(config-line)# exit -
Encrypt all plaintext passwords:
MyFloorSwitch(config)# service password-encryption -
Set a Banner:
MyFloorSwitch(config)# banner motd # Authorized access only #
5. Configure VLANs (Virtual Local Area Networks)
VLANs segment a broadcast domain. By default, all ports are in VLAN 1.
-
Create a new VLAN:
MyFloorSwitch(config)# vlan 10
MyFloorSwitch(config-vlan)# name Sales_VLAN
MyFloorSwitch(config-vlan)# exit
(Repeat for other VLANs as needed, e.g., vlan 20 name IT_VLAN)
6. Assign Access Ports to VLANs
Access ports carry traffic for a single VLAN.
-
Enter Interface Configuration Mode for the port:
MyFloorSwitch(config)# interface FastEthernet0/1 (or GigabitEthernet0/1 etc.) MyFloorSwitch(config-if)# -
Set port mode to access:
MyFloorSwitch(config-if)# switchport mode access -
Assign the port to a VLAN:
MyFloorSwitch(config-if)# switchport access vlan 10
MyFloorSwitch(config-if)# exit
(Repeat for all access ports)
7. Configure Trunk Ports (for inter-VLAN communication between switches/routers)
Trunk ports carry traffic for multiple VLANs, typically connecting switches to other switches or to routers (for inter-VLAN routing).
-
Enter Interface Configuration Mode for the trunk port:
MyFloorSwitch(config)# interface GigabitEthernet0/1 (Commonly use GigE for trunks) MyFloorSwitch(config-if)# -
Set encapsulation type (usually Dot1Q):
MyFloorSwitch(config-if)# switchport trunk encapsulation dot1q -
Set port mode to trunk:
MyFloorSwitch(config-if)# switchport mode trunk -
Allow specific VLANs on the trunk (optional, good practice):
MyFloorSwitch(config-if)# switchport trunk allowed vlan 1,10,20(VLAN 1 is the default and usually remains allowed)
-
Exit Interface Mode:
MyFloorSwitch(config-if)# exit
8. Configure a Management IP Address (Switched Virtual Interface - SVI)
Switches are Layer 2 devices, but for remote management (Telnet/SSH) they need an IP address. This is done by creating a Switched Virtual Interface (SVI) for a VLAN.
-
Enter Interface VLAN mode:
MyFloorSwitch(config)# interface vlan 1 (VLAN 1 is the default management VLAN) MyFloorSwitch(config-if)# -
Assign IP Address and Subnet Mask:
MyFloorSwitch(config-if)# ip address 192.168.1.254 255.255.255.0 -
Activate the Interface:
MyFloorSwitch(config-if)# no shutdown(You should see a message about the interface changing state to up)
-
Exit Interface Mode:
MyFloorSwitch(config-if)# exit
9. Configure a Default Gateway (for management to reach other subnets)
For the switch to be managed from another network (e.g., from a PC on a different VLAN or the internet), it needs a default gateway (the IP address of the router connected to that VLAN).
-
MyFloorSwitch(config)# ip default-gateway 192.168.1.1
10. Save the Configuration
-
From
MyFloorSwitch(config)#, typeexitto go back to Privileged EXEC mode.MyFloorSwitch(config)# exit MyFloorSwitch# -
Save the configuration:
MyFloorSwitch# copy running-config startup-config
Destination filename [startup-config]? (Press Enter)
Building configuration...
11. Verify Configuration (from Privileged EXEC mode #)
show running-config: Shows the current active configuration in RAM.show ip interface brief: Shows a summary of VLAN interfaces and their IP addresses.show vlan brief: Shows a summary of all VLANs and port assignments.show mac address-table: Shows the MAC address table.ping <ip_address>: Test connectivity (e.g.,ping 192.168.1.1).
Common Cisco IOS Commands for Routers and Switches
- Navigation and Basic System Commands
- Basic Device Configuration
- Interface Configuration
- VLANs (Switches Only)
- Routing (Routers Primarily)
- Security
- Monitoring and Verification (Show Commands)
- Troubleshooting Commands
- Configuration Management
This list covers fundamental and frequently used commands.
Navigation and Basic System Commands
-
Router>: User EXEC mode prompt (limited commands). -
Switch>: User EXEC mode prompt (limited commands). -
Router#: Privileged EXEC mode prompt (all monitoring commands, allows entry to config modes). -
Switch#: Privileged EXEC mode prompt (all monitoring commands, allows entry to config modes). -
Router(config)#: Global Configuration mode prompt. -
Switch(config)#: Global Configuration mode prompt. -
enable: Enter privileged EXEC mode from user EXEC mode. -
disable: Exit privileged EXEC mode to user EXEC mode. -
configure terminal(orconfig t): Enter global configuration mode. -
exit: Exit the current configuration mode or log out from user EXEC mode. -
end: Exit all configuration modes and return to privileged EXEC mode. -
logout: Log out from the current session. -
?: Displays context-sensitive help for commands. -
<command> ?: Displays arguments for a command. -
<command> <partial-argument>?: Displays options for a partial argument. -
<command>(tab): Autocompletes a command.
Basic Device Configuration
hostname <name>: Sets the hostname of the device (Global config).enable secret <password>: Sets an encrypted privileged EXEC mode password (Global config).enable password <password>: Sets a clear-text privileged EXEC mode password (less secure, Global config).service password-encryption: Encrypts all clear-text passwords in the configuration (Global config).banner motd #<text>#: Configures a Message Of The Day banner (Global config). The#can be any character not in the text.line console 0: Enters console line configuration mode (Global config).password <password>: Sets a password for the line (Line config).login: Requires password authentication for the line (Line config).exec-timeout <minutes> <seconds>: Sets the inactivity timeout for the line (Line config).logging synchronous: Prevents console messages from interrupting command input (Line config).line vty 0 4: Enters virtual terminal (Telnet/SSH) line configuration mode (Global config).0 4typically means 5 VTY lines.
Interface Configuration
interface <type> <number>(e.g.,interface GigabitEthernet0/1,interface FastEthernet0/0): Enters interface configuration mode (Global config).ip address <ip-address> <subnet-mask>: Assigns an IP address and subnet mask to the interface (Interface config).no shutdown: Activates the interface (Interface config).shutdown: Deactivates the interface (Interface config).description <text>: Adds a description to the interface (Interface config).ipv6 address <ipv6-address>/<prefix-length>: Assigns an IPv6 address to the interface (Interface config).ipv6 address autoconfig: Enables IPv6 stateless autoconfiguration (SLAAC) on the interface (Interface config).duplex <auto|full|half>: Sets the duplex mode (Interface config).speed <auto|10|100|1000>: Sets the interface speed (Interface config).
VLANs (Switches Only)
vlan <vlan-id>: Creates a VLAN and enters VLAN configuration mode (Global config).name <vlan-name>: Assigns a name to the VLAN (VLAN config).interface <type> <number>: Selects an interface (Global config).switchport mode access: Configures the interface as an access port (Interface config).switchport access vlan <vlan-id>: Assigns the access port to a specific VLAN (Interface config).switchport mode trunk: Configures the interface as a trunk port (Interface config).switchport trunk encapsulation <dot1q|isl>: Specifies the trunking encapsulation (Interface config).switchport trunk allowed vlan <vlan-list>: Allows specific VLANs on the trunk (Interface config).switchport trunk native vlan <vlan-id>: Sets the native VLAN for the trunk (Interface config).no vlan <vlan-id>: Deletes a VLAN (Global config).
Routing (Routers Primarily)
Static Routing
ip route <destination-network> <subnet-mask> <next-hop-ip | exit-interface>: Configures a static route (Global config).ip route 0.0.0.0 0.0.0.0 <next-hop-ip | exit-interface>: Configures a default route (Global config).no ip route <destination-network> <subnet-mask> <next-hop-ip | exit-interface>: Removes a static route (Global config).
OSPF (Open Shortest Path First)
router ospf <process-id>: Enables OSPF routing process (Global config).network <network-address> <wildcard-mask> area <area-id>: Specifies networks to be included in the OSPF process and their area (Router config).passive-interface <interface-type> <number>: Prevents OSPF updates from being sent out a specific interface (Router config).
EIGRP (Enhanced Interior Gateway Routing Protocol)
router eigrp <asn>: Enables EIGRP routing process (Global config).asnis the Autonomous System Number.network <network-address>: Specifies networks to be included in the EIGRP process (Router config).no auto-summary: Disables automatic summarization of networks (Router config).
Security
Access Control Lists (ACLs)
access-list <acl-number> <permit|deny> <source-ip> <source-wildcard>(Standard ACL): Creates a standard IP ACL (Global config).access-list <acl-number> <permit|deny> <protocol> <source-ip> <source-wildcard> <destination-ip> <destination-wildcard> [eq|gt|lt|neq] <port>(Extended ACL): Creates an extended IP ACL (Global config).ip access-group <acl-number> <in|out>: Applies an ACL to an interface (Interface config).ip access-list standard <acl-name>: Creates a named standard ACL (Global config).ip access-list extended <acl-name>: Creates a named extended ACL (Global config).permit|deny <conditions>: Adds permit/deny statements within a named ACL (Named ACL config).
Port Security (Switches Only)
interface <type> <number>: Selects an interface (Global config).switchport mode access: Configures the interface as an access port (Interface config).switchport port-security: Enables port security on the interface (Interface config).switchport port-security maximum <number>: Sets the maximum number of secure MAC addresses (Interface config).switchport port-security mac-address sticky: Enables sticky learning of MAC addresses (Interface config).switchport port-security violation <shutdown|restrict|protect>: Sets the violation mode (Interface config).
SSH Configuration
ip domain-name <domain-name>: Configures the domain name (Global config).crypto key generate rsa: Generates RSA keys for SSH (Global config).username <username> secret <password>: Creates a local user (Global config).line vty 0 4: Enters VTY line configuration mode (Global config).transport input ssh: Allows only SSH connections on VTY lines (Line config).login local: Requires local authentication (Line config).
Monitoring and Verification (Show Commands)
These commands are typically run from Privileged EXEC mode (#).
show version: Displays system hardware, software version, and uptime.show running-config(orsh run): Displays the current active configuration in RAM.show startup-config(orsh start): Displays the configuration saved in NVRAM (loaded at boot).show ip interface brief(orsh ip int brie): Displays a summary of interface IP addresses and status (up/down).show interfaces <type> <number>: Displays detailed status and statistics for a specific interface.show ip route: Displays the IP routing table.show cdp neighbors detail: Displays detailed information about directly connected Cisco devices.show mac address-table(orshow mac address-table dynamic): Displays the MAC address table on a switch.show vlan brief: Displays a summary of VLANs and their assigned ports.show interfaces trunk: Displays trunk port status and allowed VLANs.show ip protocols: Displays information about active routing protocols.show controllers <type> <number>: Displays hardware-specific information for an interface.show log: Displays system log messages.show users: Displays current console and VTY users.show history: Displays previously entered commands.show flash:: Displays contents of flash memory.
Troubleshooting Commands
ping <ip-address|hostname>: Tests IP connectivity.traceroute <ip-address|hostname>: Traces the path packets take to a destination.telnet <ip-address|hostname>: Opens a Telnet connection to another device.debug <feature>: Enables debugging output for a specific feature (use with caution, can impact performance).no debug allorundebug all(oru all): Disables all debugging.clear ip route *: Clears the IP routing table (use with caution).clear mac address-table dynamic: Clears dynamically learned MAC addresses.clear line <line-number>: Clears a VTY or console line.
Configuration Management
copy running-config startup-config(orwr memorcopy run start): Saves the running configuration to NVRAM.copy running-config tftp:: Copies the running configuration to a TFTP server.copy tftp: running-config: Copies a configuration file from a TFTP server to running-config.erase startup-config: Erases the startup configuration from NVRAM.reload: Reboots the device.archive log config: Configures logging of configuration changes.show archive log config all: Shows the history of configuration changes.
Git
Git Commands
Documentation can be found here
Git Configuration & Setup
| Commands | Description |
|---|---|
| git config –global user.name “Your Name” | Set your username globally. |
| git config –global user.email “youremail@example.com” | Set your email globally. |
| git config –global color.ui auto – | Set to display colored output in the terminal |
| git help | Display the main help documentation, showing a list of commonly used Git commands. |
Initializing a Repository
| Commands | Description |
|---|---|
| git init | Initializes a new Git repository in the current directory. |
| git init <directory> | Creates a new Git repository in the specified directory. |
| git clone <repository_url> | this Clones a repository from a remote server to your local machine. |
| git clone –branch <branch_name> <repository_url> | Clones a specific branch from a repository. |
Basic Git Commands
| Commands | Description |
|---|---|
| git add <file> | Adds a specific file to the staging area. |
| git add . or git add –all | Adds all modified and new files to the staging area. |
| git status | Shows the current state of your repository, including tracked and untracked files, modified files, and branch information. |
| git status –ignored | Displays ignored files in addition to the regular status output. |
| git diff | Shows the changes between the working directory and the staging area (index). |
| git diff <commit1> <commit2> | Displays the differences between two commits. |
| git diff –staged or git diff –cached | Displays the changes between the staging area (index) and the last commit. |
| git diff HEAD | Display the difference between the current directory and the last commit |
| git commit | Creates a new commit with the changes in the staging area and opens the default text editor for adding a commit message. |
| git commit -m “<message>” or git commit –message “<message>” | Creates a new commit with the changes in the staging area and specifies the commit message inline. |
| git commit -a or git commit –all | Commits all modified and deleted files in the repository without explicitly using git add to stage the changes. |
| git notes add | Creates a new note and associates it with an object (commit, tag, etc.). |
| git restore <file> | Restores the file in the working directory to its state in the last commit. |
| git reset <commit> | Moves the branch pointer to a specified commit, resetting the staging area and the working directory to match the specified commit. |
| git reset –soft <commit> | Moves the branch pointer to a specified commit, preserving the changes in the staging area and the working directory. |
| git reset –hard <commit> | Moves the branch pointer to a specified commit, discarding all changes in the staging area and the working directory, effectively resetting the repository to the specified commit. |
| git rm <file> | Removes a file from both the working directory and the repository, staging the deletion. |
| git mv | Moves or renames a file or directory in your Git repository. |
Git Commit (Updated Commands)
| Commands | Description |
|---|---|
| git commit -m “feat: message” | Create a new commit in a Git repository with a specific message to indicate a new feature commit in the repository. |
| git commit -m “fix: message” | Create a new commit in a Git repository with a specific message to fix the bugs in codebases |
| git commit -m “chore: message” | Create a new commit in a Git repository with a specific message to show routine tasks or maintenance. |
| git commit -m “refactor: message” | Create a new commit in a Git repository with a specific message to change the code base and improve the structure. |
| git commit -m “docs: message” | Create a new commit in a Git repository with a specific message to change the documentation. |
| git commit -m “style: message” | Create a new commit in a Git repository with a specific message to change the styling and formatting of the codebase. |
| git commit -m “test: message” | Create a new commit in a Git repository with a specific message to indicate test-related changes. |
| git commit -m “perf: message” | Create a new commit in a Git repository with a specific message to indicate performance-related changes. |
| git commit -m “ci: message” | Create a new commit in a Git repository with a specific message to indicate the continuous integration (CI) system-related changes. |
| git commit -m “build: message” | Create a new commit in a Git repository with a specific message to indicate the changes related to the build process. |
| git commit -m “revert: message” | Create a new commit in a Git repository with a specific message to indicate the changes related to revert a previous commit. |
Branching and Merging
| Commands | Description |
|---|---|
| git branch | Lists all branches in the repository. |
| git branch <branch-name> | Creates a new branch with the specified name. |
| git branch -d <branch-name> | Deletes the specified branch. |
| git branch -a | Lists all local and remote branches. |
| git branch -r | Lists all remote branches. |
| git checkout <branch-name> | Switches to the specified branch. |
| git checkout -b <new-branch-name> | Creates a new branch and switches to it. |
| git checkout — <file> | Discards changes made to the specified file and revert it to the version in the last commit. |
| git merge <branch> | Merges the specified branch into the current branch. |
| git log | Displays the commit history of the current branch. |
| git log <branch-d | Displays the commit history of the specified branch. |
| git log –follow <file> | Displays the commit history of a file, including its renames. |
| git log –all | Displays the commit history of all branches. |
| git stash | Stashes the changes in the working directory, allowing you to switch to a different branch or commit without committing the changes. |
| git stash list | Lists all stashes in the repository. |
| git stash pop | Applies and removes the most recent stash from the stash list. |
| git stash drop | Removes the most recent stash from the stash list. |
| git tag | Lists all tags in the repository. |
| git tag <tag-name> | Creates a lightweight tag at the current commit. |
| git tag <tag-name> <commit> | Creates a lightweight tag at the specified commit. |
| git tag -a <tag-name> -m “<message>” | Creates an annotated tag at the current commit with a custom message. |
Remote Repositories
| Commands | Description |
|---|---|
| git fetch | Retrieves change from a remote repository, including new branches and commit. |
| git fetch <remote> | Retrieves change from the specified remote repository. |
| git fetch –prune | Removes any remote-tracking branches that no longer exist on the remote repository. |
| git pull | Fetches changes from the remote repository and merges them into the current branch. |
| git pull <remote> | Fetches changes from the specified remote repository and merges them into the current branch. |
| git pull –rebase | Fetches changes from the remote repository and rebases the current branch onto the updated branch. |
| git push | Pushes local commits to the remote repository. |
| git push <remote> | Pushes local commits to the specified remote repository. |
| git push <remote> <branch> | Pushes local commits to the specified branch of the remote repository. |
| git push –all | Pushes all branches to the remote repository. |
| git remote | Lists all remote repositories. |
| git remote add <name> <url> | Adds a new remote repository with the specified name and URL. |
Git Comparison
| Commands | Description |
|---|---|
| git show | Shows the details of a specific commit, including its changes. |
| git show <commit> | Shows the details of the specified commit, including its changes. |
Git Managing History
| Commands | Description |
|---|---|
| git revert <commit> | Creates a new commit that undoes the changes introduced by the specified commit. |
| git revert –no-commit <commit> | Undoes the changes introduced by the specified commit, but does not create a new commit. |
| git rebase <branch> | Reapplies commits on the current branch onto the tip of the specified branch. |
GitHub CLI
GitHub CLI, or gh, is a command-line interface to GitHub and GitHub-Gist for use in your terminal or your scripts. Manual is found here and the GitHub page is here.
Install:
winget install --id GitHub.cli
Plugins is found here.
Completions
Add the following to your powershell profile:
Invoke-Expression -Command $(gh completion -s powershell | Out-String)
Examples
Create a repository
-
create a repository interactively
gh repo create -
create a new remote repository and clone it locally
gh repo create my-project --public --clone -
create a new remote repository in a different organization
gh repo create my-org/my-project --public -
create a remote repository from the current directory
gh repo create my-project --private --source=. --remote=upstream
Clone a repository
-
Clone a repository from a specific org
gh repo clone cli/cli -
Clone a repository from your own account
gh repo clone myrepo -
Clone a repo, overriding git protocol configuration
gh repo clone https://github.com/cli/cli
gh repo clone git@github.com:cli/cli.git -
Clone a repository to a custom directory
gh repo clone cli/cli workspace/cli -
Clone a repository with additional git clone flags
gh repo clone cli/cli -- --depth=1
Misc
Global .gitignore
Set up a global core.excludesfile configuration file and point it to a global .gitignore file located in your home or user directory. Check if you already have this config:
git config --get core.excludesfile
If you have a .gitignore located in your home or user directory:
nix or Windows git bash:
git config --global core.excludesFile '~/.gitignore'
Windows cmd:
git config --global core.excludesFile "%USERPROFILE%\.gitignore"
Windows PowerShell:
git config --global core.excludesFile "$Env:USERPROFILE\.gitignore"
For Windows it is set to the location C:\Users\%username%\.gitignore. You can verify that the config value is correct by doing:
git config --global core.excludesFile
The result should be the expanded path to your user profile's .gitignore. Ensure that the value does not contain the unexpanded %USERPROFILE% string.
Important: The above commands will only set the location of the ignore file that git will use. The file has to still be manually created in that location and populated with the ignore list.
Hyper-V Keyboard Shortcuts
General Shortcuts
By default, the keyboard input and mouse clicks are sent to the virtual machine. So you may need to press CTRL + ALT + LEFT arrow before you use the following shortcut keys.
- Ctrl + N: Create a new virtual machine.
- Ctrl + O: Open an existing virtual machine.
- Ctrl + S: Save the current state of the virtual machine.
- Ctrl + P: Pause the virtual machine.
- Ctrl + R: Reset the virtual machine.
- Ctrl + L: Open the Virtual Machine Connection window for a selected VM.
- Delete: Delete the selected virtual machine.
Virtual Machine Management
- Ctrl + Shift + M: Open the Virtual Machine Settings for the selected VM.
- Ctrl + Shift + I: Open the "Inspect" options for a selected virtual machine.
- Ctrl + Shift + C: Connect to the selected virtual machine.
Snapshot Management
- Ctrl + N: Create a new snapshot of the selected virtual machine.
- Ctrl + Shift + D: Delete the selected snapshot.
- Ctrl + Shift + R: Restore the selected snapshot.
Virtual Switch Management
- Ctrl + Shift + S: Open the Virtual Switch Manager.
- Ctrl + D: Delete the selected virtual switch.
Console Interaction
- Ctrl + Alt + Delete: Send Ctrl + Alt + Delete to the VM.
- Ctrl + Alt + Enter: Toggle full-screen mode for the VM console.
Navigation
- Tab: Move focus to the next item in the interface.
- Shift + Tab: Move focus to the previous item in the interface.
- Arrow Keys: Navigate through the list of virtual machines and settings.
Bash Scripting
- Bash script checker
- Objectives
- User Management Script Assignment Outline
- Script
- User Management Bash Script
Bash script checker
Check your script on https://www.shellcheck.net/
Objectives
Create a bash script to perform user management tasks as outlined below:
-
Create a new group. Each group must have a unique name. The script must check to ensure that no duplicate group names exist on the system. If a duplicate is found, an error needs to be reported, and the administrator must try another group name.
-
Create a new user. Each user must have a unique name. The script must check to ensure that no duplicate usernames exist on the system. If a duplicate is found, an error needs to be reported and the administrator must try another username. The user will have a Bash login shell and belong to the group that was created in the previous step.
-
Create a password for each user that is created.
-
Ensure that the new user created is a member of the new group created.
-
Create a directory at the root / of the file system with same name as the user created.
-
Set the ownership of the directory to the user and group created.
-
Set the permissions of the directory to full control for the owner and full control for the group created.
-
Set the permissions to ensure that only the owner of a file can delete it from the directory.
-
Ensure that the script is executable.
User Management Script Assignment Outline
| Objective | Description | Commands/Concepts Used |
|---|---|---|
| 1. Create New Group | Create a new group with a unique name. Check for duplicates and report errors if found. | getent group, groupadd, $? (exit status check) |
| 2. Create New User | Create a new user with a unique name. Check for duplicates and report errors if found. User should have a Bash login shell and belong to the new group. | id -u, useradd -m -s /bin/bash -g <groupname>, $? |
| 3. Create Password for User | Set a password for the newly created user. | passwd, `echo "username:password" |
| 4. Ensure User is Member of Group | Verify that the new user is correctly assigned to the new group. (This is typically handled by useradd -g). | groups <username> (for verification) |
5. Create User-Named Directory at / | Create a directory at the root (/) of the file system, named after the user. | mkdir, $? |
| 6. Set Directory Ownership | Assign ownership of the new directory to the created user and group. | chown <user>:<group>, $? |
| 7. Set Directory Permissions (Owner & Group) | Grant full control (read, write, execute) to both the owner and the group for the new directory. | chmod 770, $? |
| 8. Set Sticky Bit on Directory | Ensure that only the owner of a file can delete it from the directory, even if others have write permissions. | chmod +t, $? |
| 9. Script Executability | The script file itself must be made executable. | chmod +x <script_name.sh> (performed manually once after script creation) |
| Accept Any Username/Group Name | The script should use variables for user and group names, not hardcoded values. | Bash variables, read command for input. |
| Error Checking | Implement checks for the success of each command using the exit status. | $? (checks the exit status of the most recently executed foreground command) |
Script
#!/bin/bash
# Shebang: Specifies that this script should be executed with bash.

# --- Function to display error messages and exit ---
error_exit() {
    echo "ERROR: $1" >&2  # Print the error message to standard error (>&2).
    exit 1               # Exit the script with a non-zero status code (1) to indicate an error.
}

# --- Check if the script is run as root ---
# User management commands require root privileges.
if [[ $EUID -ne 0 ]]; then # Check if the Effective User ID (EUID) is not 0 (root).
   error_exit "This script must be run as root. Please use 'sudo'." # If not root, call error_exit and terminate.
fi

echo "--- User and Group Management Script ---" # Informative header for the script output.

# --- Prompt for Group Name ---
read -rp "Enter the new group name: " GROUP_NAME # Prompt the user and read the input into GROUP_NAME.

# --- Validate Group Name ---
if [[ -z "$GROUP_NAME" ]]; then # Check if the GROUP_NAME variable is empty (-z checks for empty string).
    error_exit "Group name cannot be empty." # If empty, report an error.
fi

# --- Check for Duplicate Group Name ---
# 'getent group "$GROUP_NAME"' attempts to retrieve information about the group.
# '&>/dev/null' redirects both standard output and standard error to /dev/null, suppressing command output.
# If 'getent' finds the group, its exit status is 0 (success).
if getent group "$GROUP_NAME" &>/dev/null; then
    error_exit "Group '$GROUP_NAME' already exists. Please choose a unique group name." # If group exists, report error.
fi

# --- Create New Group ---
echo "Creating group '$GROUP_NAME'..." # Inform the user about group creation.
groupadd "$GROUP_NAME" # Attempt to create the group.
if [[ $? -ne 0 ]]; then # Check the exit status of the *previous* command (groupadd). $? stores the exit status.
# Correction: The original script had a redundant 'groupadd "$GROUP_NAME"' in the if condition,
# which would attempt to create the group twice or cause a syntax error depending on strictness.
# Checking '$?' after the command is the correct way.
    error_exit "Failed to create group '$GROUP_NAME'." # If groupadd failed, report error.
fi
echo "Group '$GROUP_NAME' created successfully." # Confirm group creation.

# --- Prompt for User Name ---
read -rp "Enter the new user name: " USER_NAME # Prompt the user and read the input into USER_NAME.

# --- Validate User Name ---
if [[ -z "$USER_NAME" ]]; then # Check if the USER_NAME variable is empty.
    error_exit "User name cannot be empty." # If empty, report an error.
fi

# --- Check for Duplicate User Name ---
# 'id -u "$USER_NAME"' attempts to get the user ID.
# '&>/dev/null' suppresses command output.
# If 'id -u' finds the user, its exit status is 0.
if id -u "$USER_NAME" &>/dev/null; then
    error_exit "User '$USER_NAME' already exists. Please choose a unique user name." # If user exists, report error.
fi

# --- Create New User ---
echo "Creating user '$USER_NAME' and adding to group '$GROUP_NAME'..." # Inform the user about user creation.
# 'useradd': command to create a new user.
# '-m': Creates the user's home directory if it doesn't exist.
# '-s /bin/bash': Sets Bash as the user's default login shell.
# '-g "$GROUP_NAME"': Assigns the newly created group as the user's primary group.
useradd -m -s /bin/bash -g "$GROUP_NAME" "$USER_NAME" # Attempt to create the user.
if [[ $? -ne 0 ]]; then # Check the exit status of the 'useradd' command.
# Correction: The original script had a redundant 'useradd "$USER_NAME"' in the if condition.
    error_exit "Failed to create user '$USER_NAME'." # If useradd failed, report error.
fi
echo "User '$USER_NAME' created successfully." # Confirm user creation.

# --- Set Password for the New User ---
echo "Setting password for user '$USER_NAME'..." # Inform the user about password setting.
passwd "$USER_NAME" # Prompts for and sets the password for the new user interactively.
if [[ $? -ne 0 ]]; then # Check the exit status of the 'passwd' command.
# Correction: The original script had 'passwd "USER_NAME"' which uses a literal string, not the variable.
# It should check the exit status of 'passwd "$USER_NAME"'.
    error_exit "Failed to set password for user '$USER_NAME'. You might need to set it manually." # If passwd failed, report error.
fi
echo "Password set successfully for user '$USER_NAME'." # Confirm password set.

# --- Verify User is Member of Group (Optional but good practice) ---
# 'id -nG "$USER_NAME"': Lists all groups (names only) the user belongs to.
# 'grep -qw "$GROUP_NAME"': Searches for the exact group name quietly (-q) and as a whole word (-w).
# '!': Inverts the exit status, so the 'if' block runs if grep *fails* to find the group (i.e., user is NOT a member).
if ! id -nG "$USER_NAME" | grep -qw "$GROUP_NAME"; then
    echo "Warning: User '$USER_NAME' does not appear to be a member of group '$GROUP_NAME'." # Warn if not a member.
    echo "Attempting to add user to group (if not already done)..." # Inform about attempting to add.
    # 'usermod -aG "$GROUP_NAME" "$USER_NAME"': Adds the user to the specified supplementary group.
    # '-a': Appends the user to the group.
    # '-G': Specifies the supplementary group(s).
    usermod -aG "$GROUP_NAME" "$USER_NAME" # Attempt to add user to the group.
    if [[ $? -ne 0 ]]; then # Check the exit status of the 'usermod' command.
    # Correction: The original script had 'usermod "GROUP_NAME"' which is incorrect.
        error_exit "Failed to add user '$USER_NAME' to group '$GROUP_NAME'." # If usermod failed, report error.
    fi
fi
echo "User '$USER_NAME' is a member of group '$GROUP_NAME'." # Confirm user is in the group.

# --- Create User-Named Directory at Root ---
DIRECTORY_PATH="/$USER_NAME" # Define the path for the new directory.
echo "Creating directory '$DIRECTORY_PATH'..." # Inform the user about directory creation.
# 'mkdir -p "$DIRECTORY_PATH"': Creates the directory.
# '-p': Creates parent directories if they don't exist and doesn't report an error if the directory already exists.
mkdir -p "$DIRECTORY_PATH"
if [[ $? -ne 0 ]]; then # Check the exit status of the 'mkdir' command.
# Correction: The original script had 'mkdir -p "DIRECTORY_PATH"' which uses a literal string, not the variable.
    error_exit "Failed to create directory '$DIRECTORY_PATH'." # If mkdir failed, report error.
fi
echo "Directory '$DIRECTORY_PATH' created successfully." # Confirm directory creation.

# --- Set Ownership of the Directory ---
echo "Setting ownership of '$DIRECTORY_PATH' to '$USER_NAME:$GROUP_NAME'..." # Inform about ownership change.
# 'chown "$USER_NAME":"$GROUP_NAME" "$DIRECTORY_PATH"': Changes ownership to the specified user and group.
chown "$USER_NAME":"$GROUP_NAME" "$DIRECTORY_PATH"
if [[ $? -ne 0 ]]; then # Check the exit status of the 'chown' command.
# Correction: The original script had 'chown "USER_NAME"' which is incorrect.
    error_exit "Failed to set ownership for '$DIRECTORY_PATH'." # If chown failed, report error.
fi
echo "Ownership set successfully." # Confirm ownership change.

# --- Set Permissions of the Directory ---
echo "Setting permissions for '$DIRECTORY_PATH' to 770 (rwx for owner and group)..." # Inform about permissions.
# 'chmod 770 "$DIRECTORY_PATH"': Sets permissions.
# '770': Read, write, execute for owner (7); read, write, execute for group (7); no permissions for others (0).
chmod 770 "$DIRECTORY_PATH"
if [[ $? -ne 0 ]]; then # Check the exit status of the 'chmod' command.
# Correction: The original script had 'chmod 770 "DIRECTORY_PATH"' which uses a literal string.
    error_exit "Failed to set permissions for '$DIRECTORY_PATH'." # If chmod failed, report error.
fi
echo "Permissions set successfully to 770." # Confirm permissions set.

# --- Set Sticky Bit on the Directory ---
echo "Setting sticky bit on '$DIRECTORY_PATH'..." # Inform about sticky bit.
# 'chmod +t "$DIRECTORY_PATH"': Sets the sticky bit.
# The sticky bit on a directory means that only the owner of a file (or the directory owner/root)
# can rename or delete files within that directory, even if others have write permissions to the directory.
chmod +t "$DIRECTORY_PATH"
if [[ $? -ne 0 ]]; then # Check the exit status of the 'chmod' command.
# Correction: The original script had 'chmod +t "DIRECTORY_PATH"' which uses a literal string.
    error_exit "Failed to set sticky bit for '$DIRECTORY_PATH'." # If chmod failed, report error.
fi
echo "Sticky bit set successfully on '$DIRECTORY_PATH'." # Confirm sticky bit set.

echo "--- User and group management complete for '$USER_NAME' and '$GROUP_NAME'. ---" # Final success message.
Script without comments
#!/bin/bash

error_exit() {
    echo "ERROR: $1" >&2
    exit 1
}

if [[ $EUID -ne 0 ]]; then
   error_exit "This script must be run as root. Please use 'sudo'."
fi

echo "--- User and Group Management Script ---"

read -rp "Enter the new group name: " GROUP_NAME

if [[ -z "$GROUP_NAME" ]]; then
    error_exit "Group name cannot be empty."
fi

if getent group "$GROUP_NAME" &>/dev/null; then
    error_exit "Group '$GROUP_NAME' already exists. Please choose a unique group name."
fi

echo "Creating group '$GROUP_NAME'..."
groupadd "$GROUP_NAME"
if [[ $? -ne 0 ]]; then
    error_exit "Failed to create group '$GROUP_NAME'."
fi
echo "Group '$GROUP_NAME' created successfully."

read -rp "Enter the new user name: " USER_NAME

if [[ -z "$USER_NAME" ]]; then
    error_exit "User name cannot be empty."
fi

if id -u "$USER_NAME" &>/dev/null; then
    error_exit "User '$USER_NAME' already exists. Please choose a unique user name."
fi

echo "Creating user '$USER_NAME' and adding to group '$GROUP_NAME'..."
useradd -m -s /bin/bash -g "$GROUP_NAME" "$USER_NAME"
if [[ $? -ne 0 ]]; then
    error_exit "Failed to create user '$USER_NAME'."
fi
echo "User '$USER_NAME' created successfully."

echo "Setting password for user '$USER_NAME'..."
passwd "$USER_NAME"
if [[ $? -ne 0 ]]; then
    error_exit "Failed to set password for user '$USER_NAME'. You might need to set it manually."
fi
echo "Password set successfully for user '$USER_NAME'."

if ! id -nG "$USER_NAME" | grep -qw "$GROUP_NAME"; then
    echo "Warning: User '$USER_NAME' does not appear to be a member of group '$GROUP_NAME'."
    echo "Attempting to add user to group (if not already done)..."
    usermod -aG "$GROUP_NAME" "$USER_NAME"
    if [[ $? -ne 0 ]]; then
        error_exit "Failed to add user '$USER_NAME' to group '$GROUP_NAME'."
    fi
fi
echo "User '$USER_NAME' is a member of group '$GROUP_NAME'."

DIRECTORY_PATH="/$USER_NAME"
echo "Creating directory '$DIRECTORY_PATH'..."
mkdir -p "$DIRECTORY_PATH"
if [[ $? -ne 0 ]]; then
    error_exit "Failed to create directory '$DIRECTORY_PATH'."
fi
echo "Directory '$DIRECTORY_PATH' created successfully."

echo "Setting ownership of '$DIRECTORY_PATH' to '$USER_NAME:$GROUP_NAME'..."
chown "$USER_NAME":"$GROUP_NAME" "$DIRECTORY_PATH"
if [[ $? -ne 0 ]]; then
    error_exit "Failed to set ownership for '$DIRECTORY_PATH'."
fi
echo "Ownership set successfully."

echo "Setting permissions for '$DIRECTORY_PATH' to 770 (rwx for owner and group)..."
chmod 770 "$DIRECTORY_PATH"
if [[ $? -ne 0 ]]; then
    error_exit "Failed to set permissions for '$DIRECTORY_PATH'."
fi
echo "Permissions set successfully to 770."

echo "Setting sticky bit on '$DIRECTORY_PATH'..."
chmod +t "$DIRECTORY_PATH"
if [[ $? -ne 0 ]]; then
    error_exit "Failed to set sticky bit for '$DIRECTORY_PATH'."
fi
echo "Sticky bit set successfully on '$DIRECTORY_PATH'."

echo "--- User and group management complete for '$USER_NAME' and '$GROUP_NAME'. ---"
User Management Bash Script
Remember to save this as a .sh file (e.g., user_manager.sh) and make it executable using chmod +x user_manager.sh before running it.
This script is designed to be robust by checking for existing users and groups, handling potential errors, and setting the correct permissions and ownership.
To execute the script you would perform the following steps in a terminal:
- Save the script: Copy the code above and save it to a file, e.g.,
user_manager.sh. - Make it executable:
chmod +x user_manager.sh
- Run with new unique user/group:
sudo ./user_manager.sh
(Then follow the prompts to enter a new unique user and group name, and set the password.)
- Show the error for duplicate user/group:
sudo ./user_manager.sh
(Then enter a user or group name that you just created in the previous step, and observe the error message.)
Bash
🛠 Bash Test Operator Cheat Sheet
🔤 String Comparisons
| Operator | Meaning | Example |
|---|---|---|
= / == | Strings are equal | [[ $a == "yes" ]] |
!= | Strings are NOT equal | [[ $a != "no" ]] |
=~ | Left side matches regex on right | [[ $name =~ ^[A-Z] ]] |
< / > | Lexicographic (alphabetical) compare | [[ $a < $b ]] |
🔢 Integer Comparisons
(Use - style operators for numbers)
| Operator | Meaning | Example |
|---|---|---|
-eq | equal to | [ $x -eq 5 ] |
-ne | not equal to | [ $x -ne 10 ] |
-lt | less than | [ $x -lt 3 ] |
-le | less than or equal to | [ $x -le 7 ] |
-gt | greater than | [ $x -gt 100 ] |
-ge | greater than or equal to | [ $x -ge 18 ] |
📂 File Tests
| Operator | Meaning | Example |
|---|---|---|
-e | file exists | [ -e /path/file ] |
-f | regular file | [ -f myfile.txt ] |
-d | directory exists | [ -d /etc ] |
-r | file is readable | [ -r secret.txt ] |
-w | file is writable | [ -w /tmp/file ] |
-x | file is executable | [ -x script.sh ] |
🌀 Regex Examples with =~
| Pattern | Matches | Doesn’t Match |
|---|---|---|
^[A-Z] | "Hello", "Zebra" | "apple", "1start" |
^[0-9]+$ | "123", "007" | "12a", "abc" |
foo|bar | "foo", "barbecue" | "baz" |
^[a-z]{3}$ | "cat", "dog" | "cats", "do" |
\.(jpg|png)$ | "file.jpg", "img.png" | "pic.jpeg", "file.JPG" |
💡 Pro Tips
- Prefer
[[ ... ]]over[ ... ]— it’s safer and supports=~regex matching. - Don’t quote the regex pattern on the right side of
=~— quoting forces a literal match. - Prefix a test with
!to invert it (logical NOT). - Combine tests with
&&(AND) and||(OR) for complex conditions.
List of Common Ubuntu Commands
- File and Directory Management
- System Information
- Package Management
- User Management
- Networking
- Disk Management
- Search and Find
- Miscellaneous
File and Directory Management
ls- List directory contentsls -a- List all files, including hidden filesls -lh- List files with human-readable sizesls -R- List files in directories and subdirectoriescd [directory]- Change the current directorycd ..- Move up one directorycd -- Switch to the previous directorycd ~- Change to the home directorypwd- Print the current working directorymkdir [directory]- Create a new directorymkdir -p [path/to/directory]- Create parent directories as neededrmdir [directory]- Remove an empty directoryrm [file]- Remove a filerm -r [directory]- Remove a directory and its contents recursivelyrm -f [file]- Force remove a file without confirmationcp [source] [destination]- Copy files and directoriescp -r [source] [destination]- Copy directories recursivelymv [source] [destination]- Move or rename files and directoriestouch [file]- Create an empty file or update the timestamp of a filecat [file]- Concatenate and display file contenthead [file]- Display the first 10 lines of a filetail [file]- Display the last 10 lines of a filetail -f [file]- Follow the end of a file in real-timefind [path] -name [filename]- Search for files by namefind [path] -type f -name '*.txt'- Find all text filesfile [filename]- Determine the file typeln -s [target] [link]- Create a symbolic linkdu -sh [directory]- Display disk usage of a directory in human-readable formatstat [file]- Display file or file system statustree- Display a directory structure in a tree format (requires installation)xargs- Build and execute command lines from standard input
System Information
uname -a- Display system informationtop- Display active processeshtop- Interactive process viewer (requires installation)df -h- Show disk space usagefree -h- Show memory usageuptime- Show how long the system has been runninglscpu- Display CPU architecture informationlsblk- List block devicesdmesg- Show kernel ring buffer messagesps aux- Display all running processeswhoami- Show the current userlast- Show last logged in userscat /proc/cpuinfo- Display CPU informationcat /proc/meminfo- Display memory informationvmstat- Report information about processes, memory, paging, block I/O, traps, and CPU activitylsof- List open files and the processes that opened themuptime- Show system load averages and uptimehostname- Display the system's hostname
Package Management
sudo apt update- Update package listssudo apt upgrade- Upgrade installed packagessudo apt dist-upgrade- Upgrade packages, handling dependenciessudo apt install [package]- Install a packagesudo apt remove [package]- Remove a packageapt search [keyword]- Search for a packagesudo apt autoremove- Remove unnecessary packagesapt list --installed- List all installed packagesapt show [package]- Display information about a packageapt-cache policy [package]- Show package version informationdpkg -l- List all installed packages using dpkgsudo apt purge [package]- Remove a package and its configuration filessudo apt-get clean- Clear local repository of retrieved package filessudo dpkg -i [package.deb]- Install a .deb packagesudo apt-mark hold [package]- Prevent a package from being upgradedapt-file search [filename]- Search for a file in available packages (requires installation)sudo apt edit-sources- Edit the sources list for package management
User Management
adduser [username]- Add a new userdeluser [username]- Delete a userpasswd [username]- Change a user's passwordgroups [username]- List groups a user belongs towho- Show who is logged inlast- Show last logged in usersusermod -aG [group] [username]- Add a user to a groupsudo su - [username]- Switch to another userfinger [username]- Show information about a userchage -l [username]- Show password aging informationsudo visudo- Edit the sudoers fileuserdel -r [username]- Delete a user and their home directoryid [username]- Show user ID and group ID informationnewgrp [group]- Log in to a new groupgroups- List groups for the current usersudo usermod -d [new_home] [username]- Change a user’s home directory
Networking
ifconfig- Display network interfaces (deprecated; useip addr)ip addr- Show IP address and network detailsping [host]- Check connectivity to a hostcurl [URL]- Transfer data from or to a serverwget [URL]- Download files from the webnetstat -tuln- Display listening portstraceroute [host]- Trace the route to a network hostnslookup [domain]- Query DNS for a domaindig [domain]- Perform DNS lookup (requires installation)whois [domain]- Retrieve domain registration informationssh [user]@[host]- Securely connect to a remote serverscp [file] [user]@[host]:[path]- Securely copy files to a remote serverftp [host]- Connect to an FTP servertelnet [host] [port]- Connect to a host via Telnet (if installed)route -n- Display the routing tableip link show- Show all network interfacesnmap [host]- Network exploration tool and security/port scanner (requires installation)
Disk Management
mount- List mounted filesystemsumount [device]- Unmount a filesystemfdisk -l- List disk partitionsdf -i- Show inode usagedu -h [directory]- Show directory size in human-readable formatlsblk- List block devices with mount pointsbadblocks [device]- Check for bad sectors on a diskfsck [device]- Check and repair a filesystemmkfs.ext4 [device]- Create an ext4 filesystem on a deviceresize2fs [device]- Resize an ext2/ext3/ext4 filesystemdd if=[source] of=[destination]- Copy and convert files (use with caution)parted [device]- Manage disk partitions interactivelymount -o loop [file] [mountpoint]- Mount an image filepvcreate [device]- Initialize a physical volume for LVMvgcreate [volume-group] [device]- Create a volume group in LVM
Search and Find
find [path] -name [filename]- Search for files by namegrep [pattern] [file]- Search for a pattern in a filelocate [filename]- Find files by name quicklywhich [command]- Show the full path of a commandwhereis [command]- Locate the binary, source, and manual page fileshistory- Show command historyecho [text]- Print text to the terminalsed 's/[old]/[new]/g' [file]- Replace text in a fileawk '{print $1}' [file]- Print the first column of a filegrep -r [pattern] [directory]- Recursively search for a pattern in a directoryfind [path] -type f -exec [command] {} \;- Execute a command on found filesxargs- Build and execute command lines from standard inputfuzzyfind [pattern]- Fuzzy search for files (requires installation)
Miscellaneous
clear- Clear the terminal screenman [command]- Display the manual for a commandalias [name]='[command]'- Create an alias for a commandunalias [name]- Remove an aliasexit- Exit the terminal sessionchmod [permissions] [file]- Change file permissionschown [user]:[group] [file]- Change file owner and grouptar -cvf [archive.tar] [directory]- Create a tar archivetar -xvf [archive.tar]- Extract a tar archivezip [archive.zip] [file]- Create a zip archiveunzip [archive.zip]- Extract a zip archivedate- Display the current date and timecal- Display a calendarexport [variable]=[value]- Set an environment variableenv- Display environment variablesecho $PATH- Display the current PATH variablecrontab -e- Edit the cron jobs for the current user
Firewall
- Ubuntu Firewall (UFW) Secure Baseline Configuration
- SSH (adjust port if not using 22)
- HTTP/HTTPS (for web servers)
- DNS
- NTP (Time sync)
- SMTP (Email)
- Rate limiting for SSH (prevent brute force)
- ICMP (ping) - enable carefully
- Block common attack vectors
- Application-Specific
- Finalize
- Check logs
- My ufw
Ubuntu Firewall (UFW) Secure Baseline Configuration
sudo ufw reset
sudo ufw default deny incoming
sudo ufw default allow outgoing
SSH (adjust port if not using 22)
sudo ufw allow 22/tcp comment 'SSH access'
HTTP/HTTPS (for web servers)
sudo ufw allow 80/tcp comment 'HTTP'
sudo ufw allow 443/tcp comment 'HTTPS'
DNS
sudo ufw allow 53 comment 'DNS'
NTP (Time sync)
sudo ufw allow 123/udp comment 'NTP'
SMTP (Email)
sudo ufw allow 25/tcp comment 'SMTP'
sudo ufw allow 587/tcp comment 'SMTP Submission'
sudo ufw allow 465/tcp comment 'SMTPS'
Rate limiting for SSH (prevent brute force)
sudo ufw limit 22/tcp
ICMP (ping) - enable carefully
sudo ufw allow proto icmp comment 'ICMP (ping)'
Block common attack vectors
sudo ufw deny 23/tcp comment 'Block Telnet'
sudo ufw deny 135:139/tcp comment 'Block NetBIOS'
sudo ufw deny 445/tcp comment 'Block SMB'
sudo ufw deny 1433:1434/tcp comment 'Block MS-SQL'
Application-Specific
sudo ufw allow 2375/tcp comment 'Docker API'
sudo ufw allow 2376/tcp comment 'Docker TLS'
sudo ufw allow 6443/tcp comment 'Kubernetes API'
sudo ufw allow 10250/tcp comment 'Kubelet API'
Finalize
sudo ufw enable
sudo ufw status numbered
sudo systemctl enable ufw
Check logs
sudo tail -f /var/log/ufw.log
To delete a rule:
sudo ufw delete [RULE_NUMBER]
My ufw
sudo ufw reset
sudo ufw default deny incoming
sudo ufw default allow outgoing
sudo ufw allow 22/tcp comment 'SSH access'
sudo ufw allow 443/tcp comment 'HTTPS'
sudo ufw allow 123/udp comment 'NTP'
sudo ufw allow 25/tcp comment 'SMTP'
sudo ufw allow 53 comment 'DNS'
sudo ufw allow 587/tcp comment 'SMTP Submission'
sudo ufw allow 465/tcp comment 'SMTPS'
sudo ufw limit 22/tcp
sudo ufw deny 23/tcp comment 'Block Telnet'
sudo ufw deny 135:139/tcp comment 'Block NetBIOS'
sudo ufw deny 445/tcp comment 'Block SMB'
sudo ufw deny 1433:1434/tcp comment 'Block MS-SQL'
sudo ufw enable
sudo ufw status numbered
sudo systemctl enable ufw
Keyboard Shortcuts
- I. General Desktop Environment Shortcuts
- II. Terminal (Bash/Zsh/Shell) Shortcuts
- III. System/Boot Level Shortcuts
I. General Desktop Environment Shortcuts
These shortcuts often use the Super key (usually the Windows key on most keyboards) or a combination of Ctrl + Alt.
Window Management
- Alt + Tab: Switch between open applications/windows (hold Alt and repeatedly press Tab to cycle; release Alt to select). Use Alt + Shift + Tab for reverse order.
- Super + Tab: (GNOME) Similar to Alt + Tab, often integrated with Activities overview.
- Super + D or Ctrl + Alt + D: Show/Hide Desktop (minimize/restore all windows).
- Alt + F4: Close the current application window.
- Ctrl + Alt + Esc: Force quit an unresponsive application (changes cursor to a "kill" icon).
- Super + Left Arrow: Snap window to left half of the screen (tiling).
- Super + Right Arrow: Snap window to right half of the screen (tiling).
- Super + Up Arrow: Maximize window.
- Super + Down Arrow: Restore/Minimize window.
Workspace Management (Virtual Desktops)
- Ctrl + Alt + Left Arrow: Switch to the left workspace.
- Ctrl + Alt + Right Arrow: Switch to the right workspace.
- Shift + Ctrl + Alt + Left Arrow: Move the current window to the left workspace.
- Shift + Ctrl + Alt + Right Arrow: Move the current window to the right workspace.
- Super + Page Down: (GNOME) Switch to the next workspace.
- Super + Page Up: (GNOME) Switch to the previous workspace.
- Shift + Super + Page Down: (GNOME) Move current window to the next workspace.
- Shift + Super + Page Up: (GNOME) Move current window to the previous workspace.
System Actions
- Ctrl + Alt + T: Open a new terminal window.
- Alt + F2: Open a "Run Command" dialog (e.g., KRunner in KDE).
- Ctrl + Alt + L or Super + L: Lock the screen.
- Print Screen (PrtSc): Take a screenshot of the entire screen.
- Alt + Print Screen: Take a screenshot of the active window.
- Shift + Print Screen: Take a screenshot of a selected area.
- Ctrl + Alt + Delete: Bring up shutdown/logout options.
- Super key (just press it): Opens the Activities overview, application launcher, or main menu, depending on your DE (e.g., GNOME Activities, KDE Plasma's Application Launcher).
Universal Text Editing (GUI Applications)
- Ctrl + C: Copy selected text.
- Ctrl + X: Cut selected text.
- Ctrl + V: Paste text.
- Ctrl + Z: Undo the last action.
- Ctrl + Y or Ctrl + Shift + Z: Redo the last undone action.
- Ctrl + A: Select all.
- Ctrl + S: Save.
- Ctrl + N: New document/file/window.
- Ctrl + O: Open file.
- Ctrl + P: Print.
- Ctrl + F: Find (in current document/application).
- F1: Open help.
II. Terminal (Bash/Zsh/Shell) Shortcuts
These shortcuts are primarily for navigating and editing text within the command line itself.
Cursor Movement
- Ctrl + A (or Home): Move cursor to the beginning of the line.
- Ctrl + E (or End): Move cursor to the end of the line.
- Ctrl + B (or Left Arrow): Move cursor backward one character.
- Ctrl + F (or Right Arrow): Move cursor forward one character.
- Alt + B (or Ctrl + Left Arrow): Move cursor backward one word.
- Alt + F (or Ctrl + Right Arrow): Move cursor forward one word.
- Ctrl + X (tap twice quickly): Toggle between the start of the line and the current cursor position.
Text Editing/Deletion
- Ctrl + H (or Backspace): Delete character before cursor.
- Ctrl + D (or Delete): Delete character under cursor.
- Alt + Backspace or Ctrl + W: Delete the word before the cursor.
- Alt + D: Delete the word from the cursor to the end of the word.
- Ctrl + U: Delete (cut) everything from the cursor to the beginning of the line.
- Ctrl + K: Delete (cut) everything from the cursor to the end of the line.
- Ctrl + Y: Paste the last deleted/cut text.
- Ctrl + T: Transpose (swap) the last two characters before the cursor.
- Alt + T: Transpose (swap) the last two words before the cursor.
- Alt + U: Uppercase from cursor to end of word.
- Alt + L: Lowercase from cursor to end of word.
- Alt + C: Capitalize the first character of the word.
History Navigation & Search
- Up Arrow / Down Arrow: Scroll through previous/next commands in history.
- Ctrl + R: Reverse incremental search through command history (type to search, Ctrl + R again for next match, Enter to execute, Esc to exit).
- Ctrl + G: Exit history search mode.
- !!: Execute the last command.
- !string: Execute the last command starting with "string".
- !$: Use the last argument of the previous command.
Terminal Control
- Tab: Autocomplete commands, filenames, or directory names (press twice for options if ambiguous).
- Ctrl + C: Interrupt/terminate the currently running foreground process.
- Ctrl + D: Send an End-of-File (EOF) marker (can log you out or exit a program).
- Ctrl + Z: Suspend the current foreground process.
- Ctrl + L: Clear the terminal screen.
- Ctrl + S: Pause terminal output.
- Ctrl + Q: Resume terminal output.
- Ctrl + Shift + C: Copy selected text from the terminal.
- Ctrl + Shift + V: Paste text into the terminal.
- Shift + Insert: Alternative paste (often uses the primary selection buffer).
III. System/Boot Level Shortcuts
These shortcuts are less common for daily use but are useful for troubleshooting or direct system interaction.
- Ctrl + Alt + F1 to F6: Switch to a virtual console (text-based login screen). Use F7 or F8 to return to the graphical desktop.
- Ctrl + Alt + Backspace: Kills the X server, returning to the login screen (often disabled by default).
- Magic SysRq Key: A powerful kernel-level debugging tool for emergencies (requires SysRq key, often shared with Print Screen). Use with extreme caution!
- Alt + SysRq + R: Raw (take keyboard control).
- Alt + SysRq + E: Terminate (send SIGTERM to processes).
- Alt + SysRq + I: Kill (send SIGKILL to processes).
- Alt + SysRq + S: Sync (sync disk).
- Alt + SysRq + U: Unmount (remount all filesystems read-only).
- Alt + SysRq + B: Reboot (immediate reboot).
- Common mnemonic for a safe reboot: R E I S U B (Raising Elephants Is So Utterly Boring)
Terminal Applications
Quick Install
sudo apt install bat zoxide fd-find ripgrep
bat
Important: If you install bat this way, please note that the executable may be installed as batcat instead of bat (due to a name clash with another package). You can set up a bat -> batcat symlink or alias to prevent any issues that may come up because of this and to be consistent with other distributions:
mkdir -p ~/.local/bin
ln -s /usr/bin/batcat ~/.local/bin/bat
More info at https://github.com/sharkdp/bat
fzf
To get the most up-to-date version on Ubuntu Server 24.04:
git clone --depth 1 https://github.com/junegunn/fzf.git ~/.fzf
~/.fzf/install
Add the following line to your shell configuration file.
bash:
eval "$(fzf --bash)"
More info at https://github.com/junegunn/fzf
zoxide
Set up the repo:
curl -fsSL https://apt.cli.rs/pubkey.asc | sudo tee -a /usr/share/keyrings/rust-tools.asc
curl -fsSL https://apt.cli.rs/rust-tools.list | sudo tee /etc/apt/sources.list.d/rust-tools.list
sudo apt update
You might need to run sudo apt install zoxide again.
bash:
Add this to the end of your config file (usually ~/.bashrc):
eval "$(zoxide init bash)"
More info at https://github.com/ajeetdsouza/zoxide
intelli-shell
Download repo:
curl -sSf https://raw.githubusercontent.com/lasantosr/intelli-shell/main/install.sh | bash
Enable hotkeys:
mkdir -p ~/.local/share/intelli-shell/bin
curl -sSf https://raw.githubusercontent.com/lasantosr/intelli-shell/main/intelli-shell.sh > ~/.local/share/intelli-shell/bin/intelli-shell.sh
More info at https://github.com/lasantosr/intelli-shell
fd
Note that the binary is called fdfind as the binary name fd is already used by another package. It is recommended that after installation, you add a link to fd by executing command..
ln -s $(which fdfind) ~/.local/bin/fd
.. in order to use fd in the same way as in this documentation. Make sure that $HOME/.local/bin is in your $PATH.
You can use fd to generate input for the command-line fuzzy finder fzf:
export FZF_DEFAULT_COMMAND='fd --type file' export FZF_CTRL_T_COMMAND="$FZF_DEFAULT_COMMAND"
Then, you can type vim <Ctrl-T> on your terminal to open fzf and search through the fd-results.
More info at https://github.com/sharkdp/fd and see the Tips section of the fzf README.
ripgrep
Info at https://github.com/BurntSushi/ripgrep and user guide here: https://github.com/BurntSushi/ripgrep/blob/master/GUIDE.md
eza
Eza is available from deb.gierens.de. The GPG public key is in this repo under deb.asc.
First make sure you have the gpg command, and otherwise install it via:
sudo apt update sudo apt install -y gpg
Then install eza via:
sudo mkdir -p /etc/apt/keyrings wget -qO- https://raw.githubusercontent.com/eza-community/eza/main/deb.asc | sudo gpg --dearmor -o /etc/apt/keyrings/gierens.gpg echo "deb [signed-by=/etc/apt/keyrings/gierens.gpg] http://deb.gierens.de stable main" | sudo tee /etc/apt/sources.list.d/gierens.list sudo chmod 644 /etc/apt/keyrings/gierens.gpg /etc/apt/sources.list.d/gierens.list sudo apt update sudo apt install -y eza
Add an alias and config to bash:
alias e='eza -lha --icons --git --time-style=long-iso --header --group-directories-first'
Note: In strict apt environments, you may need to add the target: echo "deb [arch=amd64 signed-by=...
More info at https://github.com/eza-community/eza
User management
- Case Scenario
- Setting Up the Departments 💻
- Step 1: Create Directories and Groups
- Step 2: Create Users and Passwords
- Password Security Best Practices
- Step 3: Configure Directory Ownership and Permissions
- Sticky bit, SUID & SGID
- Special Permission Bit Differences
- Step 4: Create Confidential Documents
- Deliverables: Verification Commands ✅
- Cleanup
Case Scenario
As the Linux Administrator for fast-growing company, you have been tasked with creating, modifying, and removing user accounts from the Linux server. The company has just hired 9 new employees to fill 3 newly designed departments. The departments that have been created are Engineering, Sales and IS. The server must be setup with the appropriate files, folders, users, groups and permissions to ensure a successful launch of the newly designed departments.
Setting Up the Departments 💻
To set up the new departments, we'll follow a series of steps to create the necessary directories, users, and groups, and then configure the permissions to meet the specified security requirements.
| Department | Administrator User | Additional Users | Group | Directory |
|---|---|---|---|---|
| Engineering | engadmin | enguser1, enguser2 | engineering | /engineering |
| Sales | salsadmin | saluser1, saluser2 | sales | /sales |
| IS | isadmin | isuser1, isuser2 | is | /is |
Step 1: Create Directories and Groups
First, we need to create the directories and groups for each department.
Commands:
sudo mkdir /engineering /sales /is(Creates the department directories at the root level).sudo groupadd engineering(Creates theengineeringgroup).sudo groupadd sales(Creates thesalesgroup).sudo groupadd is(Creates theisgroup).sudo groupdel 'group'(Removes group).
Step 2: Create Users and Passwords
Next, we'll create the administrative and normal users for each department, ensuring they have a Bash login shell and are assigned to their respective primary groups.
Commands:
-m create the user's home directory.
-g name or ID of the primary group of the new account(group).
Use -mg for both options.
sudo useradd -m -g engineering -s /bin/bash engadmin(Creates theengadminuser with the primary groupengineeringand a home directory).sudo useradd -m -g engineering -s /bin/bash enguser1sudo useradd -m -g engineering -s /bin/bash enguser2sudo useradd -m -g sales -s /bin/bash salsadmin(Creates thesalsadminuser with the primary groupsalesand a home directory).sudo useradd -m -g sales -s /bin/bash saluser1sudo useradd -m -g sales -s /bin/bash saluser2sudo useradd -m -g is -s /bin/bash isadmin(Creates theisadminuser with the primary groupisand a home directory).sudo useradd -m -g is -s /bin/bash isuser1sudo useradd -m -g is -s /bin/bash isuser2sudo userdel 'user'(Removes user).
sudo passwd engadminsudo passwd enguser1sudo passwd enguser2sudo passwd salsadminsudo passwd saluser1sudo passwd saluser2sudo passwd isadminsudo passwd isuser1sudo passwd isuser2
After you run each command, the terminal will prompt you to input and confirm the new password for the specified user.
Password Security Best Practices
When setting passwords, it's a good practice to enforce security policies to protect the system. Linux systems have a variety of tools to manage password policies, such as:
- Password aging: Forcing users to change their passwords after a certain period.
- Complexity requirements: Requiring passwords to meet specific criteria, like a minimum length and the inclusion of special characters.
- Locking accounts: Automatically locking accounts after a certain number of failed login attempts.
These policies can be configured in files like /etc/login.defs and /etc/pam.d/common-password to enhance overall system security.
Step 3: Configure Directory Ownership and Permissions
This step ensures that the department directories have the correct ownership and permissions. We will set the department administrator as the owner, the department group as the group owner, and apply special permissions.
sudo chown engadmin:engineering /engineering(Changes the ownership of the/engineeringdirectory).sudo chown salsadmin:sales /sales(Changes the ownership of the/salesdirectory).sudo chown isadmin:is /is(Changes the ownership of the/isdirectory).
engadmin:engineering: This is the new ownership specification.
engadmin: The name before the colon is the new user owner. All files and directories have a user owner, and in this case, the /engineering directory's owner is being set to the engadmin user.
:engineering: The name after the colon specifies the new group owner. All files and directories also have a group owner. By setting the group owner to engineering, all users who are members of the engineering group will inherit the group's permissions for this directory.
/engineering: This is the target directory. This command will apply the ownership changes to the /engineering directory.
Now, we will set the permissions. The chmod command is used to set the permissions of files and directories. Permissions can be represented in either symbolic or octal (numeric) form. The octal representation is often clearer for complex permissions. A three-digit octal code represents the permissions for the owner, the group, and others, respectively. The octal values are derived from the sum of the permissions: read (r) is 4, write (w) is 2, and execute (x) is 1.
For example, 7 represents rwx (4+2+1), 5 represents r-x (4+0+1), and 6 represents rw- (4+2+0). The fourth octal digit, if present, is for special permissions.
To meet the requirements, we'll use a combination of standard and special permissions. The sticky bit (t or 1 in the first octal digit) is a special permission that, when applied to a directory, prevents users from deleting files they don't own, even if they have write permissions to the directory. This is exactly what the prompt requires. The first 2 in our command will set the SGID (Set Group ID) bit, which ensures that any new file created in the directory will inherit the group ownership of the directory (engineering, sales, or is).
Commands:
sudo chmod 2770 /engineering- 2: Sets the SGID bit. This means any new file or subdirectory created within
/engineeringwill automatically belong to theengineeringgroup. - 7:
rwx(read, write, execute) for the owner (engadmin). - 7:
rwx(read, write, execute) for the group (engineering). - 0: No permissions for others.
- 2: Sets the SGID bit. This means any new file or subdirectory created within
sudo chmod 2770 /salessudo chmod 2770 /issudo chmod +t /engineering(Adds the sticky bit to the/engineeringdirectory, allowing only file owners to delete their own files).sudo chmod +t /salessudo chmod +t /is
Sticky bit, SUID & SGID
Here's a breakdown of the differences between 1770, 2770, and 4770 permissions, with a focus on their special bits.
The numbers 1, 2, and 4 in the first position of the octal permission code represent special permission bits that affect how a file or directory behaves. The 770 part always means that the owner and the group have full read, write, and execute permissions (rwx), while others have no permissions (---).
Special Permission Bit Differences
| Octal Code | Special Bit | Meaning and Impact |
|---|---|---|
1770 | Sticky Bit (1) 📌 | Applies to Directories: When set on a directory, users can create files and subdirectories within it, but they can only delete or rename files they own (or files owned by the directory owner). This is crucial for shared directories like /tmp to prevent users from deleting others' content. |
2770 | Set Group ID (SGID) Bit (2) 👥 | Applies to Directories: When set on a directory, any new files or subdirectories created within it will inherit the group ownership of the parent directory, rather than the primary group of the user who created them. This is very useful for collaborative projects where all files should belong to a specific project group. Applies to Executable Files: When set on an executable file, the process will run with the effective group ID of the file's group owner, not the primary group of the user executing it. |
4770 | Set User ID (SUID) Bit (4) 👤 | Applies to Executable Files: When set on an executable file, the process will run with the effective user ID of the file's owner, not the user who is executing it. A classic example is the passwd command, which allows a non-root user to change their password by temporarily assuming the root user's permissions to modify system files. Applies to Directories: The SUID bit on a directory is generally ignored by most modern Linux systems and doesn't have a standard or widely recognized behavior. |
In all these cases, the 770 indicates rwx (read, write, execute) for the user owner, rwx for the group owner, and --- (no permissions) for others. The first digit is what changes the fundamental behavior regarding ownership or deletion within a directory, or execution privileges for a file.
Step 4: Create Confidential Documents
Now we will create the required documents in each department's directory and set the appropriate ownership and permissions.
Commands:
sudo su engadmin -c "echo 'This file contains confidential information for the engineering department.' > /engineering/confidential.txt"(Creates the file and writes the text asengadmin).sudo su salsadmin -c "echo 'This file contains confidential information for the sales department.' > /sales/confidential.txt"(Creates the file assalsadmin).sudo su isadmin -c "echo 'This file contains confidential information for the IS department.' > /is/confidential.txt"(Creates the file asisadmin).
-c: This option tells su to execute a single command (the one that follows) instead of starting a new interactive shell.
"...": The double quotes are crucial. They enclose the command string that you want to execute as the engadmin user. This ensures that the entire command, including any pipes or redirections, is treated as a single unit and executed in the context of the new user's shell.
Modify file permissions:
sudo su engadmin -c "chmod 640 /engineering/confidential.txt"- 6:
rw-(read and write) for the owner (engadmin). - 4:
r--(read-only) for the group (engineering). - 0: No permissions for others.
- 6:
sudo su salsadmin -c "chmod 640 /sales/confidential.txt"sudo su isadmin -c "chmod 640 /is/confidential.txt"
Deliverables: Verification Commands ✅
Verify User and Group Creation
To verify that the users and groups have been created, you can check the /etc/passwd and /etc/group files, respectively.
-
cat /etc/passwd | grep -E "engadmin|enguser1|enguser2|salsadmin|saluser1|saluser2|isadmin|isuser1|isuser2"- This command searches the
/etc/passwdfile for the usernames we created. The output confirms their existence and provides details like their UID, GID, home directory, and shell.
- This command searches the
-
cat /etc/group | grep -E "engineering|sales|is"- This command searches the
/etc/groupfile for the group names. The output confirms the groups exist and shows which users are members.
- This command searches the
-
getent passwdDisplays a list of all users. -
getent passwd isadmin isuser1 isuser2Displays users if found. -
-EEnables extended regular expressions.
Verify User’s Group Assignment
To check a specific user's group assignments, you can use the id command.
id engadmin- Sample Output:
uid=1001(engadmin) gid=1001(engineering) groups=1001(engineering) - This shows that
engadmin's primary group (gid) isengineering.
- Sample Output:
id saluser1id isuser2- You can run this command for each user to confirm their primary group.
Verify Directory Creation and Permissions
The ls -ld command is essential for checking directory permissions, ownership, and other details.
ls -ld /engineering /sales /is- Sample Output for
/engineering:drwxrwsr-T 2 engadmin engineering 4096 Aug 19 12:00 /engineering d: Confirms it's a directory.rwxrwsr-T:rwx: Owner (engadmin) has read, write, and execute permissions.rws: Thesconfirms the SGID bit is set, and the group has read, write, and execute permissions.r-T: TheTconfirms the sticky bit is set for others' permissions.
engadmin engineering: Confirms the correct owner and group ownership.
- Sample Output for
Verify File Creation and Permissions
To verify the creation and permissions of the confidential documents, use the ls -l command.
sudo su engadmin -c "ls -l /engineering/confidential.txt"- Sample Output:
-rw-r----- 1 engadmin engineering 62 Aug 19 12:05 /engineering/confidential_doc -rw-r-----: Confirms the permissions.rw-: Owner (engadmin) has read and write access.r--: Group (engineering) has read-only access.---: Others have no permissions.
engadmin engineering: Confirms the correct ownership and group.
- Sample Output:
sudo su salsadmin -c "ls -l /sales/confidential_doc"sudo su isadmin -c "ls -l /is/confidential_doc"
Cleanup
sudo userdel -r engadmin enguser1 enguser2 && \
sudo userdel -r salsadmin saluser1 saluser2 && \
sudo userdel -r isadmin isuser1 isuser2 && \
sudo groupdel engineering && \
sudo groupdel sales && \
sudo groupdel is && \
sudo rm -r /engineering && \
sudo rm -r /sales && \
sudo rm -r /is
Basic Syntax
- Heading
- Heading with custom id
- My Great Heading
- Bold
- Italic
- Bold and nested italic
- All bold and italic
- Strikethrough
- Emoji
- Highlight
- Subscript
- Superscript
- Blockquote
- Ordered List
- Unordered List
- Nested lists
- Code
- Fenced Code Block
- Horizontal Rule
- Link
- Image
- Table
- Footnote
- Task List
- Escaping characters
Heading
# H1
H1
## H2
H2
### H3
H3
Heading with custom id
## My Great Heading {#custom-id}
My Great Heading
Bold
**bold text**
bold text
Italic
*italicized text*
italicized text
Bold and nested italic
**This text is *extremely* important**
This text is extremely important
All bold and italic
***All this text is important***
All this text is important
Strikethrough
~~The world is flat.~~
The world is flat.
Emoji
That is so funny! :joy:
That is so funny! 😂
Might need som additional software to work. mdbook-emojicodes works for mdBook.
Here's a list of emojis.
Highlight
I need to highlight these ==very important words==.
[!NOTE]
mdBook doesn't support the highlight syntax. Use the html syntax instead.
I need to highlight these <mark>very important words</mark>
I need to highlight these very important words
Subscript
H~2~O
[!NOTE]
mdBook doesn't support the subscript syntax. Use the html syntax instead.
H<sub>2</sub>O
H2O
Superscript
X^2^
[!NOTE]
mdBook doesn't support the superscript syntax. Use the html syntax instead.
X<sup>2</sup>
X2
Blockquote
> blockquote
blockquote
> blockquote
>
> > nested blockquote
>
blockquote
nested blockquote
Ordered List
1. First item
1. Second item
1. Third item
- First item
- Second item
- Third item
Unordered List
- First item
- Second item
- Third item
- First item
- Second item
- Third item
Nested lists
1. First list item
   - First nested list item
     - Second nested list item
- First list item
- First nested list item
- Second nested list item
- First nested list item
Code
`code`
code
Fenced Code Block
Three backticks makes a fence. Using a tab or 4 blank spaces instead of backticks also works.
```
{
  "firstName": "John",
  "lastName": "Smith",
  "age": 25
}
```
{
  "firstName": "John",
  "lastName": "Smith",
  "age": 25
}
Language specification is optional.
```ruby
require 'redcarpet'
 = Redcarpet.new("Hello World!")
puts .to_
```
require 'redcarpet'
 = Redcarpet.new("Hello World!")
puts .to_
Horizontal Rule
---
Link
[Guide](https://www.guide.org)
[an example](http://example.com/ "Title")
Try [Ubuntu][] for your server.

[Ubuntu]: https://ubuntu.com/download/server "Ubuntu Server LTS"
Try Ubuntu for your server.
Image


![Logga][1]

[1]: https://commonmark.org/help/images/favicon.png "Creative Commons licensed"

Linked image
[](https://commonmark.org)
Table
| Item              | In Stock | Price |
| :---------------- | :------: | ----: |
| Python Hat        |   True | 3.99 |
| SQL Hat           |   Truer   | 23.99 |
| Codecademy Tee    |  False   | 19.99 |
| Codecademy Hoodie |  Falser   | 42.9999 |
| Item | In Stock | Price |
|---|---|---|
| Python Hat | True | 3.99 |
| SQL Hat | Truer | 23.99 |
| Codecademy Tee | False | 19.99 |
| Codecademy Hoodie | Falser | 42.9999 |
Footnote
Here's a sentence with a footnote. [^1]

[^1]: This is the footnote.
Here's a sentence with a footnote. 1
This is the footnote.
Task List
- [x] Write the press release
- [ ] Update the website
- [ ] Contact the media
- Write the press release
- Update the website
- Contact the media
Escaping characters
You can use a backslash \ to escape the following characters:
| Character | Name |
|---|---|
| \ | backslash |
| ` | backtick |
| * | asterisk |
| _ | underscore |
| { } | curly braces |
| [ ] | brackets |
| < > | angle brackets |
| ( ) | parentheses |
| # | pound sign |
| + | plus sign |
| - | minus sign (hyphen) |
| . | dot |
| ! | exclamation mark |
| | | pipe |
Escape backticks with two backticks.
``Use `code` in your Markdown file.``
Use four backticks to enclose code blocks.
````
```ruby
require 'rubygems'
require 'asciidoctor'
```
````
Inline HTML
Underline
<u> Text </u>
Text
Color
<span style="color: #FF69B4;">Why did the tomato turn red?</span>
<span style="color: #00FFFF;">Because it saw the salad dressing!</span>
<span style="color:red;">your text here in red</span>,
<span style="color:#520099;">or make it blue</span>
Why did the tomato turn red? Because it saw the salad dressing! your text here in red, or make it blue
Commentary
<!-- ingen kommentar -->
Collapsed section
<details>

<summary>Tips for collapsed sections</summary>

You can add text within a collapsed section.

You can add an image or a code block, too.

```ruby
   puts "Hello World"
```

</details>
Tips for collapsed sections
You can add text within a collapsed section.
You can add an image or a code block, too.
puts "Hello World"
Align
   Centrera
Centrera
     Centrera
Centrera
Centrera
Centrera
Center align
<p style="text-align: center;">Text i mitten
Text i mitten
Keyboard
<kbd>Ctrl</kbd> + <kbd>F</kbd>
Ctrl + F
Embed video
Local source
<video src="imgburn.mp4" width="100%" height="100%" controls></video>
Interwebz source
<iframe width="100%" height="100%"
src="https://www.youtube.com/embed/tgbNymZ7vqY">
</iframe>
[!NOTE]
height="100%" width="100%" doesn't work in mdBook, so I've changed to width="100%" height="420px" below.
mdBook Options
- Change browser tab title
- Include other files
- Rust Playground
- MathJax support
- Embedify
- Mermaid
- Tabs
- Admonish
For more details see mdBook docs
Change browser tab title
{{#title New & improved}}
Include other files
Include line 2-10 of the file rust.rs.
{{#include rust.rs:2:10}}
fn do_things<T>(a: T, b: T)
where
    T: IntoIterator,
    T::Item: Display,
{
    for (e, f) in a.into_iter().zip(b.into_iter()) {
        println!("{} {}", e, f);
    }
Rust Playground
Use Rust Playground to run code in the browser.
Produce editable code that runs in the browser.
```rust,editable
fn main() {
    let number = 5;
    print!("{}", number);
}
```
fn main() {
    let number = 5;
    print!("{}", number);
}
Non-editable code. Runs in the browser.
```rust
fn main() {
    let x = "Rust";
    print!("{}", x);
}
```
fn main() {
    let x = "Rust";
    print!("{}", x);
}
MathJax support
\\[ \mu = \frac{1}{N} \sum_{i=0} x_i \\]
\[ \mu = \frac{1}{N} \sum_{i=0} x_i \]
[!NOTE]
From mdBook docs: "The usual delimiters MathJax uses are not yet supported. You can’t currently use$$ ... $$as delimiters and the\[ ... \]delimiters need an extra backslash to work. Hopefully this limitation will be lifted soon."
Embedify
Get mdBook-embedify. Embed videos, gists & codepens. Option to include banners, scroll-to-top and footer options.
mdBook's Warning tag:
<div class="warning">

This is a bad thing that you should pay attention to.

Warning blocks should be used sparingly in documentation, to avoid "warning
fatigue," where people are trained to ignore them because they usually don't
matter for what they're doing.
</div>
This is a bad thing that you should pay attention to.
Warning blocks should be used sparingly in documentation, to avoid "warning fatigue," where people are trained to ignore them because they usually don't matter for what they're doing.
Mermaid
%%{
  init: {
    'theme': 'base',
    'themeVariables': {
      'primaryColor': '#abcadf',
      'primaryTextColor': '#000',
      'primaryBorderColor': '#abcadf',
      'lineColor': '#fae2b3',
      'secondaryColor': '#8FBCBB',
      'tertiaryColor': '#fff'
    }
  }
}%%
        graph TD
          A[Christmas] -->|Get money| B(Go shopping)
          B --> C{Let me think}
          B --> G[/Another/]
          C ==>|One| D[fa:fa-laptop Laptop]
          C -->|Two| E[fa:fa-mobile Phone]
          C -->|Three| F[fa:fa-car Car]

style D fill:#cdcdf3,color:#23272e,stroke-opacity:0.2

style E fill:#c8f1f3,color:#23272e,stroke-opacity:0.2

style G fill:#f9e5bc,color:#8c8c8c,stroke-opacity:0.2

style C fill:#839bac,color:#23272e,stroke-opacity:0.2

style B fill:#c7e9d3,color:#23272e,stroke-opacity:0.2

style F fill:#cbd5df,color:#23272e,stroke-opacity:0.2

style Test fill:#73737,color:#23272e,stroke-opacity:0.2


          subgraph section
            C
            D
            E
            F
            G
          end
Source code
```mermaid
%%{
  init: {
    'theme': 'base',
    'themeVariables': {
      'primaryColor': '#abcadf',
      'primaryTextColor': '#000',
      'primaryBorderColor': '#abcadf',
      'lineColor': '#fae2b3',
      'secondaryColor': '#89a389',
      'tertiaryColor': '#fff'
    }
  }
}%%
        graph TD
          A[Christmas] -->|Get money| B(Go shopping)
          B --> C{Let me think}
          B --> G[/Another/]
          C ==>|One| D[Laptop]
          C -->|Two| E[iPhone]
          C -->|Three| F[fa:fa-car Car]

style D fill:#cdcdf3,color:#23272e,stroke-opacity:0.2

style E fill:#c8f1f3,color:#23272e,stroke-opacity:0.2

style G fill:#f9e5bc,color:#8c8c8c,stroke-opacity:0.2

style C fill:#839bac,color:#23272e,stroke-opacity:0.2

style B fill:#c7e9d3,color:#23272e,stroke-opacity:0.2

style F fill:#cbd5df,color:#23272e,stroke-opacity:0.2

style Test fill:#dfdfdf,color:#23272e,stroke-opacity:0.2


          subgraph section
            C
            D
            E
            F
            G
          end


```
Tabs
Get mdbook-tabs
{{#tabs }}
{{#tab name="Tab 1" }}
**Tab content 1**
{{#endtab }}
{{#tab name="Tab 2" }}
_Tab content 2_
{{#endtab }}
{{#tab name="Tab 3" }}
~~Tab content 3~~
{{#endtab }}
{{#endtabs }}
Tab content 1
Global tabs
{{#tabs global="test" }}
{{#tab name="Rust" }}

```rust,noplayground
fn main() {
println!("Hello World!");
}
```

{{#endtab }}
{{#tab name="HTML" }}

```html
<p style="text-align:center;">Essential Shortcuts</p>
```

{{#endtab }}
{{#tab name="CSS" }}

```css
.mdbook-tab {
    background-color: var(--table-alternate-bg);
    padding: 0.5rem 1rem;
    cursor: pointer;
    border: none;
    font-size: 1.6rem;
    line-height: 1.45em;
}
```

{{#endtab }}
{{#endtabs }}
[!TIP] Paste the above code block twice into a document to create global tabs.
fn main() {
println!("Hello World!");
}
fn main() {
println!("Hello World!");
}
Admonish
Install admonish
Examples:
```admonish
Some text
```
```admonish example
example
```
```admonish quote collapsible=true, title='A title that really <span style="color: #e70073">pops</span>'
To really <b><span style="color: #e70073">grab</span></b> your reader's attention.
```
Golden Order
- INPUT chain (traffic to the router itself)
- Allow specific services you need (WireGuard, SSH, WinBox, HTTPS, ICMP from trusted LANs)
- FORWARD chain (traffic passing through the router)
- Allow your VPN rules (WireGuard, back-to-home, etc.)
- Allow LAN <-> VPN
- Allow specific port forwards (e.g. qBittorrent)
- Special drops (multicast, isolated WiFi subnets, inter-VLAN blocking)
INPUT chain (traffic to the router itself)
/ip firewall filter
add chain=input action=drop connection-state=invalid comment="Drop invalid"
add chain=input action=accept connection-state=established,related,untracked comment="Accept established/related/untracked"
Allow specific services you need (WireGuard, SSH, WinBox, HTTPS, ICMP from trusted LANs)
add chain=input action=accept in-interface-list=LAN_Trusted_Interfaces comment="Allow LAN management"
add chain=input action=accept dst-address=127.0.0.1 comment="Allow loopback"
add chain=input action=accept ipsec-policy=in,ipsec comment="Allow IPsec in"
add chain=input action=drop in-interface-list=!LAN comment="Drop all not from LAN"
FORWARD chain (traffic passing through the router)
/ip firewall filter
add chain=forward action=drop connection-state=invalid comment="Drop invalid"
add chain=forward action=fasttrack-connection hw-offload=yes connection-state=established,related comment="Fasttrack established/related"
add chain=forward action=accept connection-state=established,related,untracked comment="Accept established/related/untracked"
add chain=forward action=accept ipsec-policy=in,ipsec comment="Allow IPsec in"
add chain=forward action=accept ipsec-policy=out,ipsec comment="Allow IPsec out"
Allow your VPN rules (WireGuard, back-to-home, etc.)
Allow LAN <-> VPN
Allow specific port forwards (e.g. qBittorrent)
Special drops (multicast, isolated WiFi subnets, inter-VLAN blocking)
add chain=forward action=drop connection-state=new connection-nat-state=!dstnat in-interface-list=WAN comment="Drop all from WAN not dstnat"
IPv6
- Unicast
- Multicast
- Anycast
- ND, NS, and ULA: The Essentials
- Global Unicast Address, GUA
- EUI: Calculating IPv6 Interface ID Using EUI-64 from MAC Address 1C-6F-65-C2-BD-F8
- IPv4 Header Fields vs IPv6 Header Fields
Unicast
- One-to-one communication: Data is sent from a single source to a single, specific destination address.
- Typical use: Most internet traffic (web browsing, file downloads) is unicast.
- IPv6 example: Sending a packet from your computer to a specific server.
1. Global Unicast Address
- Publicly routable on the Internet
- Prefix:
2000::/3 - Used for global communication
2. Unique Local Address (ULA)
- Private, not routable on the Internet
- Prefix:
FD00::/8 - Used for local communications within a site
3. Link-Local Address
- Valid only within a single local network segment
- Prefix:
FE80::/10 - Automatically assigned to every IPv6 interface
4. Loopback Address
- Used by a device to send packets to itself
- Address:
::1/128
5. Unspecified Address
- Indicates the absence of an address
- Address:
::/128
6. IPv4-Embedded IPv6 Addresses
- Allow IPv4 and IPv6 interoperability
- Embed a 32-bit IPv4 address within an IPv6 address, often for transition mechanisms like NAT64, IPv4-mapped, and compatible addresses.
- Common formats:
- IPv4-mapped IPv6:
::ffff:192.0.2.33(80 bits zero, 16 bits ones, 32 bits IPv4)
Used for representing IPv4 addresses in IPv6-only environments, especially in software and NAT64 scenarios - IPv4-compatible IPv6:
::192.0.2.33[deprecated; 96 bits zero, 32 bits IPv4] - NAT64/XLAT464: Uses a configurable prefix (e.g.,
64:ff9b::/96), followed by the IPv4 address - Custom Embedded: Networks can embed IPv4 addresses using various prefix lengths, placing the IPv4 address at specific bits within the IPv6 address
- IPv4-mapped IPv6:
Example Table
| Type/Format | Example Address | Description |
|---|---|---|
| Global Unicast | 2001:db8::1 | Public, Internet-routable |
| Unique Local (ULA) | fd12:3456:789a::1 | Private, site-local only |
| Link-Local | fe80::1 | Local segment only |
| Loopback | ::1 | Local device (self) |
| Unspecified | :: | No specific address |
| IPv4-mapped IPv6 | ::ffff:192.0.2.33 | IPv4 in IPv6 for dual-stack/NAT64 |
| IPv4-compatible IPv6 | ::192.0.2.33 | Deprecated, for dual-stack |
| NAT64/XLAT464 Embedded | 64:ff9b::192.0.2.33 | NAT64 translation prefix + IPv4 |
| Custom Embedded (various) | 2001:db8::c000:221 | Prefix + embedded IPv4 (e.g., 192.0.2.33) |
Note: Embedding IPv4 in IPv6 addresses is essential for transition and interoperability between IPv4 and IPv6 networks
Multicast
- One-to-many communication: Data is sent from one source to multiple destinations, but only to devices that have joined a specific multicast group.
- Efficient for group communication: Saves bandwidth because the data is only sent once and delivered to all interested receivers.
- Typical use: Streaming media, online conferencing, or network discovery protocols.
- IPv6 example: Sending a video stream to all devices in a multicast group (e.g., all routers on a network).
General Structure
All IPv6 multicast addresses start with the prefix FF00::/8 (the first 8 bits are 11111111 in binary, or FF in hexadecimal).
Multicast Address Format
| Bits | Field | Description |
|---|---|---|
| 8 | Prefix | Always 11111111 (FF) to indicate multicast |
| 4 | Flags | Various control flags (see below) |
| 4 | Scope | Defines the reach of the multicast (e.g., link-local, global) |
| 112 | Group ID | Identifies the multicast group |
Example: FF02::1 (All nodes on the local link)
Flags Field
The 4-bit flags field provides additional information about the multicast address:
| Bit | Flag | Meaning when 0 | Meaning when 1 |
|---|---|---|---|
| 8 | Reserved | Reserved | Reserved |
| 9 | R (Rendezvous) | RP not embedded | RP embedded |
| 10 | P (Prefix) | Not based on prefix | Based on network prefix |
| 11 | T (Transient) | Well-known address | Dynamically assigned address |
Scope Field
The 4-bit scope field defines where the multicast is valid:
| Scope Value | IPv6 Address Example | Scope Name | Description |
|---|---|---|---|
| 1 | FF01::/16 | Interface-local | Stays within the originating node |
| 2 | FF02::/16 | Link-local | Stays within the local link |
| 3 | FF03::/16 | Realm-local | Local to a particular network technology |
| 4 | FF04::/16 | Admin-local | Administratively configured scope |
| 5 | FF05::/16 | Site-local | Restricted to the local site |
| 8 | FF08::/16 | Organization-local | Restricted to the organization |
| E | FFE0::/16 | Global | Globally routable multicast |
Special Multicast Address Types
- Solicited-Node Multicast Address: Used by Neighbor Discovery Protocol (NDP). Format:
FF02::1:FFXX:XXXXwhere the last 24 bits come from the unicast/anycast address. - Well-Known Multicast Groups: Assigned by IANA for specific protocols (e.g.,
FF02::1for all nodes,FF02::2for all routers).
Examples
| Address | Scope | Group Purpose |
|---|---|---|
| FF02::1 | Link-local | All nodes on the local link |
| FF02::2 | Link-local | All routers on the local link |
| FF05::101 | Site-local | NTP servers in a site |
| FF0E::1 | Global | All nodes (global scope) |
Summary
- All IPv6 multicast addresses begin with
FF. - The next 4 bits are flags, followed by 4 bits for scope.
- The remaining 112 bits specify the multicast group.
- Scope and flags determine the reach and type of multicast group.
- No broadcast in IPv6; multicast fulfills this role.
Anycast
- One-to-nearest communication: Data is sent from one source to the nearest (in routing terms) member of a group of receivers sharing the same address.
- Used for redundancy and load balancing: Improves availability and performance by routing requests to the closest server.
- Typical use: DNS root servers, content delivery networks (CDNs), and global services like Google DNS.
- IPv6 example: Multiple servers around the world share the same anycast address; a user’s request is automatically routed to the closest server.
What is an Anycast Address?
An IPv6 anycast address is an address assigned to multiple interfaces, typically on different nodes. When a packet is sent to an anycast address, it is routed to the "nearest" interface (according to the routing protocol's metric, such as hop count or cost) that has been assigned that address.
Key Characteristics
- Indistinguishable from Unicast: Anycast addresses are allocated from the unicast address space and look identical to unicast addresses. There is no special prefix or format to distinguish them; their "anycast" property comes from being assigned to multiple interfaces.
- Routing Behavior: Routers deliver packets sent to an anycast address to the closest (in terms of routing distance) node with that address.
- Use Cases: Anycast is commonly used for:
- Redundancy and load balancing (e.g., DNS root servers, CDN edge nodes)
- Service discovery and high availability
- Routing to the nearest gateway or service provider
IPv6 Anycast Address Examples
- Subnet Router Anycast: The lowest address in any IPv6 subnet (where the interface identifier is all zeros) is reserved as the subnet-router anycast address.
For example, in the subnet:
2001:db8:abcd:0012::/64
the anycast address is:
2001:db8:abcd:12::
- Reserved Ranges: The highest 128 interface identifiers in a subnet are also reserved for anycast purposes.
How Anycast Works
- Assignment: The same unicast address is configured on multiple devices/interfaces.
- Routing: Each device advertises its route to the shared address. Routers learn multiple paths to the same address.
- Packet Delivery: When a host sends a packet to the anycast address, the network delivers it to the nearest device (according to the routing protocol).
Summary Table
| Feature | Description |
|---|---|
| Address Format | Identical to unicast |
| Assignment | Assigned to multiple interfaces/nodes |
| Routing | Delivered to the nearest interface with the address |
| Common Uses | DNS root servers, CDN nodes, redundant gateways, service discovery |
| IPv6 Reserved | Subnet-router anycast (all-zero interface ID), highest 128 interface IDs |
Note: Anycast addresses provide a way to distribute services across multiple locations, improving redundancy, availability, and response times for clients.
| Type | Communication Model | Use Case Example | IPv6 Address Range/Assignment |
|---|---|---|---|
| Unicast | One-to-one | Web browsing, file download | Global: 2000::/3, Link-local: FE80::/10, ULA: FC00::/7 |
| Multicast | One-to-many | Video streaming, network discovery | FF00::/8 |
| Anycast | One-to-nearest | DNS root servers, CDNs | Allocated from unicast space |
Note: IPv6 does not use broadcast; multicast replaces broadcast functionality.
ND, NS, and ULA: The Essentials
IPv6 ND (Neighbor Discovery), NS (Neighbor Solicitation), and ULA (Unique Local Address) are foundational concepts in IPv6 networking. Here’s a concise breakdown:
IPv6 Neighbor Discovery (ND):
- ND is a protocol in IPv6 that allows devices (nodes) on the same network link to discover each other, learn about routers, resolve Layer 3 (IP) to Layer 2 (MAC) addresses, and maintain reachability information.
- It replaces IPv4’s ARP and ICMP Router Discovery, providing more secure and efficient communication.
- ND uses several ICMPv6 message types, including Neighbor Solicitation (NS) and Neighbor Advertisement (NA), to perform its functions.
Key ND Functions:
- Address resolution (finding a device’s MAC address from its IPv6 address)
- Neighbor reachability detection
- Router and prefix discovery
- Address autoconfiguration (stateless)
- Redirecting hosts to better routes
Neighbor Solicitation (NS):
- NS is a specific message type within ND, used to discover the link-layer (MAC) address of a neighbor or to verify its reachability.
- It is functionally similar to an ARP Request in IPv4 but uses multicast instead of broadcast, making it more efficient.
- NS messages are sent to a solicited-node multicast address derived from the target IPv6 address, ensuring only the relevant device responds.
How it works:
- A host sends an NS message to resolve a neighbor’s MAC address.
- The target device replies with a Neighbor Advertisement (NA), providing its MAC address.
- NS is also used for Duplicate Address Detection (DAD), ensuring no two devices use the same IPv6 address on the network.
Unique Local Address (ULA):
- ULAs are IPv6 addresses meant for local communications within a site or organization, similar to private IPv4 addresses (like 192.168.x.x).
- They are not routable on the global Internet but can be routed within private networks.
- ULA addresses start with the prefix FD00::/8. The rest of the address is generated randomly to ensure uniqueness within the local scope.
Key ULA Points:
- Used for internal-only communication
- Not registered or routed on the Internet
- Replace the deprecated “site-local” IPv6 addresses
Summary Table
| Term | Purpose | Key Features |
|---|---|---|
| ND (Neighbor Discovery) | Device discovery, address resolution, router/prefix discovery | Replaces ARP, uses ICMPv6, supports autoconfiguration and reachability detection |
| NS (Neighbor Solicitation) | Resolve MAC addresses, check reachability | Multicast-based, more efficient than ARP, used for DAD |
| ULA (Unique Local Address) | Private IPv6 addressing | FD00::/8 prefix, not Internet-routable, for internal use |
These mechanisms are essential for IPv6 networks to operate efficiently, securely, and with minimal manual configuration.
Global Unicast Address, GUA
An IPv6 Global Unicast Address (GUA) is a globally unique, Internet-routable address, equivalent to a public IPv4 address. GUAs are used for devices that need to communicate across the Internet and are assigned by Internet authorities to ensure uniqueness.
Structure of an IPv6 GUA
A typical IPv6 GUA consists of three main parts:
| Part | Length | Description |
|---|---|---|
| Global Routing Prefix | 48 bits | Uniquely identifies the network; assigned by IANA, RIR, or ISP |
| Subnet ID | 16 bits | Identifies subnets within the organization; set by local administrators |
| Interface ID | 64 bits | Uniquely identifies an interface on a subnet; usually auto-generated |
- Prefix: All GUAs start with binary
001(hex 2 or 3), corresponding to2000::/3.
Example Address:
2001:0db8:1234:5678:9abc:def0:1234:5678
Breakdown of Address Parts
1. Global Routing Prefix (48 bits)
- Assigned hierarchically (IANA → RIR → ISP → organization)
- Ensures global uniqueness
- Used by routers to forward packets across the Internet
2. Subnet ID (16 bits)
- Allows organizations to divide their address space into multiple subnets
- Functions similarly to subnetting in IPv4, but with more flexibility and scale
- Expressed in hexadecimal notation
3. Interface ID (64 bits)
- Uniquely identifies each interface within a subnet
- Often auto-generated from the device’s MAC address using EUI-64, but can be set manually
- Ensures each device on a subnet has a unique address
Allocation Example
- IANA assigns a large block (e.g.,
2001::/16) to a Regional Internet Registry (RIR) - RIR assigns a smaller block (e.g.,
2001:0db8::/32) to an ISP - ISP assigns a /48 prefix (e.g.,
2001:0db8:abcd::/48) to an organization - Organization subdivides the /48 into multiple /64 subnets using the Subnet ID
- Devices on each subnet get a unique Interface ID
Key Features
- Globally unique and routable: Ensures no address conflicts on the Internet
- Hierarchical allocation: Simplifies routing and address management
- Supports subnetting: Organizations can create many subnets internally
- Large address space: 64-bit Interface ID allows for vast numbers of devices per subnet
Summary Table
| Field | Length (bits) | Example Value | Purpose |
|---|---|---|---|
| Global Routing Prefix | 48 | 2001:0db8:abcd | Identifies organization/network globally |
| Subnet ID | 16 | 1234 | Identifies subnet within organization |
| Interface ID | 64 | 5678:9abc:def0:1234 | Identifies device/interface uniquely |
In summary:
IPv6 GUAs are globally unique, Internet-routable addresses with a hierarchical structure, enabling scalable, efficient, and conflict-free global networking.
EUI: Calculating IPv6 Interface ID Using EUI-64 from MAC Address 1C-6F-65-C2-BD-F8
Step-by-Step EUI-64 Calculation
-
Split the MAC address into two halves:
- MAC:
1C-6F-65-C2-BD-F8 - First half:
1C-6F-65 - Second half:
C2-BD-F8
- MAC:
-
Insert
FFFEin the middle:- Result:
1C-6F-65-FF-FE-C2-BD-F8
- Result:
-
Convert to IPv6 notation (grouped by two bytes):
1C6F:65FF:FEC2:BDF8
-
Invert the 7th bit (Universal/Local bit) of the first byte:
- First byte
1Cin binary:00011100 - 7th bit (counting from left, zero-based): currently
0 - Invert it to
1:00011110(hex:1E) - So, the new first byte is
1E
- First byte
-
Final EUI-64 Interface ID:
- Replace the first byte:
1E6F:65FF:FEC2:BDF8
- Replace the first byte:
Result
The interface ID, generated using EUI-64 from the MAC address 1C-6F-65-C2-BD-F8, is: 1E6F:65FF:FEC2:BDF8
IPv4 Header Fields vs IPv6 Header Fields
IPv6 simplifies and streamlines the IP header compared to IPv4, removing or replacing several fields to improve processing efficiency and support new features.
Comparison Table: IPv4 vs IPv6 Header Fields
| IPv4 Header Field | IPv6 Header Field | Present in IPv6? | Description / Notes |
|---|---|---|---|
| Version | Version | Yes | 4 bits; indicates IP version (4 or 6) |
| IHL (Header Length) | — | No | IPv6 header is fixed at 40 bytes; field not needed |
| Type of Service (ToS) | Traffic Class | Yes | 8 bits; used for QoS (DSCP marking) |
| Total Length | Payload Length | Yes | In IPv4, includes header + data; in IPv6, only payload + extension headers |
| Identification | — | No | Used for fragmentation in IPv4; handled via extension header in IPv6 |
| Flags | — | No | Used for fragmentation in IPv4; handled via extension header in IPv6 |
| Fragment Offset | — | No | Used for fragmentation in IPv4; handled via extension header in IPv6 |
| Time to Live (TTL) | Hop Limit | Yes | 8 bits; limits packet lifetime (prevents loops) |
| Protocol | Next Header | Yes | 8 bits; indicates next header or upper-layer protocol (TCP, UDP, etc.) |
| Header Checksum | — | No | Removed in IPv6; error checking handled elsewhere |
| Source Address | Source Address | Yes | 32 bits in IPv4, 128 bits in IPv6 |
| Destination Address | Destination Address | Yes | 32 bits in IPv4, 128 bits in IPv6 |
| Options | Extension Headers | Yes (different) | IPv4 options replaced by separate extension headers in IPv6 |
| Padding | — | No | Not present; IPv6 header is naturally aligned |
| Flow Label | Flow Label | Yes (new) | 20 bits; used for labeling packets belonging to the same flow (new in IPv6) |
Key Differences
- IPv6 header is fixed at 40 bytes (IPv4 header is variable: 20–60 bytes).
- Fragmentation fields (Identification, Flags, Fragment Offset) are removed from the main header and handled by an optional extension header in IPv6.
- Header checksum is eliminated in IPv6 to reduce processing overhead.
- Options are replaced by more flexible extension headers in IPv6.
- Flow Label is a new field in IPv6 for special packet handling.
- Address fields are expanded from 32 bits (IPv4) to 128 bits (IPv6).
Visual Summary
| Field | IPv4 | IPv6 |
|---|---|---|
| Version | 4 | 6 |
| Header Length | Variable (20–60 bytes) | Fixed (40 bytes) |
| Source Address | 32 bits | 128 bits |
| Destination Addr | 32 bits | 128 bits |
| Checksum | Yes | No |
| Extension Header | No (Options instead) | Yes |
| Flow Label | No | Yes (20 bits) |
OSI Layers
Description
- 1. Physical Layer (Layer 1): The Foundation of Transmission
- 2. Data Link Layer (Layer 2): Reliable Node-to-Node Delivery
- 3. Network Layer (Layer 3): Logical Addressing and Routing
- 4. Transport Layer (Layer 4): End-to-End Communication
- 5. Session Layer (Layer 5): Managing Application Sessions
- 6. Presentation Layer (Layer 6): Data Formatting and Security
- 7. Application Layer (Layer 7): User-Facing Network Services
- OSI Model vs TCP/IP Model
1. Physical Layer (Layer 1): The Foundation of Transmission
- Core Function: The Physical Layer is the most fundamental layer, responsible for the actual transmission of raw, unstructured bit streams over a physical medium. It's the tangible connection between devices.
- Detailed Focus:
- Physical Media: Defines the characteristics of the physical medium used for transmission, including copper cables (twisted-pair, coaxial), fiber optic cables (single-mode, multi-mode), and wireless radio frequencies (e.g., 2.4GHz, 5GHz, 60GHz).
- Electrical Specifications: Specifies voltage levels, signal timing, and encoding schemes used to represent bits as electrical signals. This includes concepts like baud rate, signal amplitude, and modulation techniques (e.g., amplitude modulation, frequency modulation, phase modulation, quadrature amplitude modulation).
- Mechanical Specifications: Defines the physical connectors, pin assignments, and cable specifications. This ensures compatibility between devices from different manufacturers. Examples: RJ45 pinouts, fiber optic connector types (LC, SC, ST, MTP/MPO).
- Procedural Specifications: Defines the procedures for establishing, maintaining, and terminating the physical connection. Includes specifications for signal timing, synchronization, and handshaking.
- Topology: Concerned with the physical layout of the network, such as point-to-point, bus, star, ring, or mesh topologies. Defines how devices are physically connected and the physical signal flow.
- Synchronization: Handles bit synchronization, ensuring that the receiver can accurately interpret the transmitted bits. This involves clocking and timing mechanisms, including clock recovery and bit-level alignment.
- Key Aspects:
- Deals with signal strength, attenuation (signal loss), and noise (interference).
- Specifies the bit rate (data transmission speed in bits per second).
- Includes technologies like Ethernet physical layer standards (10BASE-T, 100BASE-TX, 1000BASE-T, 10GBASE-T, 40GBASE-LR4), fiber optic standards (e.g., 1000BASE-LX, 10GBASE-LR, 40GBASE-ER4), and wireless standards (e.g., 802.11a/b/g/n/ac/ax/be).
- Deals with signal to noise ratio (SNR), and error rates.
- Examples:
- Cable types: Cat5e, Cat6, Cat6a, Cat7, Cat8, fiber optic cables (single-mode, multi-mode).
- Connectors: RJ45, LC, SC, ST, MTP/MPO, USB, HDMI.
- Network devices: Hubs, repeaters, media converters, transceivers (e.g., SFP, QSFP, CFP), optical amplifiers.
- NICs (Network Interface Cards), fiber optic modems, wireless transceivers, antennas.
- Power over ethernet (PoE) standards.
- Data Unit: Bits.
2. Data Link Layer (Layer 2): Reliable Node-to-Node Delivery
- Core Function: The Data Link Layer establishes a reliable link between two directly connected nodes, ensuring error-free data transfer within a local network.
- Detailed Focus:
- Physical Addressing (MAC Addresses): Uses MAC addresses (Media Access Control addresses) to uniquely identify devices on a local network. Includes 48-bit or 64-bit addresses, the organization of the address (OUI, vendor ID), and the use of multicast and broadcast addresses.
- Framing: Encapsulates data from the Network Layer into frames, adding header and trailer information for addressing, error detection, and control. Specific frame formats for Ethernet (802.3), Wi-Fi (802.11), and other Layer 2 protocols.
- Error Detection and Correction: Implements error detection mechanisms (e.g., CRC - Cyclic Redundancy Check, checksums) to detect errors during transmission and may also implement error correction techniques (e.g., forward error correction - FEC).
- Flow Control: Regulates the flow of data to prevent overwhelming the receiver. Includes techniques like stop-and-wait, sliding window, and backpressure, and the use of buffer management.
- Media Access Control (MAC): Controls how devices access the shared physical medium, especially in shared media networks (e.g., Ethernet, Wi-Fi). Includes protocols like CSMA/CD (Carrier Sense Multiple Access with Collision Detection), CSMA/CA (Carrier Sense Multiple Access with Collision Avoidance), and token passing.
- Logical Link Control (LLC): Provides flow control and error detection for the Data Link Layer. It defines the protocols used for data exchange over the link, including service access points (SAPs).
- VLANs (Virtual Local Area Networks): Allow for the logical segmentation of a physical network.
- Key Aspects:
- Handles collision detection and avoidance in shared media networks.
- Implements bridging and switching functions, including spanning tree protocol (STP) and link aggregation.
- Includes protocols like Ethernet (802.3), Wi-Fi (802.11), PPP (Point-to-Point Protocol), HDLC (High-Level Data Link Control), and L2TP (Layer 2 Tunneling Protocol).
- Handles quality of service (QoS) at layer 2.
- Examples:
- Ethernet switches, bridges, wireless access points, network adapters.
- MAC addresses.
- Protocols: Ethernet (802.3), Wi-Fi (802.11), PPP, HDLC, Frame Relay, ATM (Asynchronous Transfer Mode), MPLS (Multiprotocol Label Switching).
- Data Unit: Frames.
3. Network Layer (Layer 3): Logical Addressing and Routing
- Core Function: The Network Layer is responsible for logical addressing (IP addresses) and routing data packets across networks, enabling communication between devices on different networks.
- Detailed Focus:
- Logical Addressing (IP Addresses): Uses IP addresses (Internet Protocol addresses) to uniquely identify devices on a network. Includes IPv4 and IPv6 addressing schemes, subnetting, supernetting, and network address translation (NAT).
- Routing: Determines the best path for data packets to travel from source to destination, even across multiple networks. Includes routing tables, routing algorithms (e.g., Dijkstra's algorithm, Bellman-Ford algorithm), and routing protocols.
- Packet Forwarding: Forwards data packets based on their destination IP address. Includes techniques like longest prefix matching, packet switching, and label switching.
- Fragmentation and Reassembly: Handles fragmentation of large packets into smaller packets for transmission over networks with different MTU (Maximum Transmission Unit) sizes and reassembles them at the destination.
- Routing Protocols: Implements routing protocols (e.g., OSPF, RIP, BGP, EIGRP, IS-IS) to exchange routing information between routers. Includes distance-vector and link-state routing algorithms, and path vector routing.
- IP Multicast: Allows the sending of a single packet to multiple destinations.
- Key Aspects:
- Handles network congestion and quality of service (QoS) at the network layer.
- Includes protocols like IP (IPv4, IPv6), ICMP (Internet Control Message Protocol), ARP (Address Resolution Protocol), and IPsec (Internet Protocol Security).
- Handles network layer security.
- Examples:
- Routers, layer 3 switches, firewalls.
- IP addresses (IPv4 and IPv6).
- IP protocols: IP, ICMP, ARP, NAT, IPsec.
- Routing protocols: OSPF, RIP, BGP, EIGRP, IS-IS.
- VPNs (Virtual Private Networks).
- Data Unit: Packets.
4. Transport Layer (Layer 4): End-to-End Communication
- Core Function: The Transport Layer provides end-to-end communication between applications, ensuring reliable or unreliable data transfer.
- Detailed Focus:
- Segmentation and Reassembly: Divides data from the Application Layer into segments (TCP) or datagrams (UDP) for transmission and reassembles them at the destination. Includes sequence numbers, acknowledgment mechanisms, and windowing (sliding window protocol).
- Port Numbers: Uses port numbers to identify applications on a device. Includes well-known (0-1023), registered (1024-49151), and dynamic/private (49152-65535) port numbers, and the concept of sockets (IP address + port number).
- Reliable Data Transfer (TCP): Provides reliable, connection-oriented data transfer with error detection (checksum), flow control (windowing, congestion control), and retransmission (ARQ - Automatic Repeat Request). Includes three-way handshake (SYN, SYN-ACK, ACK) for connection establishment, four-way termination (FIN, ACK, FIN, ACK) for connection closure, and congestion control algorithms (e.g., TCP Reno, TCP Cubic, TCP BBR).
- Unreliable Data Transfer (UDP): Provides unreliable, connectionless data transfer with minimal overhead. Used for applications that prioritize speed over reliability, such as streaming media (voice, video), online gaming, DNS queries, and VoIP.
- Flow Control: Regulates the flow of data to prevent network congestion and buffer overflows. Includes windowing and buffering techniques, as well as congestion avoidance and congestion control mechanisms.
- Error Recovery: Implements mechanisms to recover from transmission errors, such as retransmission timeouts (RTO), selective acknowledgments (SACK), and fast retransmit/fast recovery.
- Multiplexing and Demultiplexing: Allows multiple applications to share a single network connection by using port numbers to differentiate between them.
- Connection-Oriented vs. Connectionless: Explains the difference between connection-oriented (TCP) and connectionless (UDP) communication, and their respective advantages and disadvantages.
- Key Aspects:
- Provides end-to-end reliability and flow control.
- Includes protocols like TCP (Transmission Control Protocol) and UDP (User Datagram Protocol), as well as SCTP (Stream Control Transmission Protocol) and DCCP (Datagram Congestion Control Protocol).
- Handles quality of service (QoS) by prioritizing certain types of traffic.
- Examples:
- TCP and UDP protocols.
- Port numbers (e.g., 80 for HTTP, 443 for HTTPS, 53 for DNS).
- Sockets.
- Connection establishment and termination procedures.
- Data Unit: Segments (TCP) or Datagrams (UDP).
5. Session Layer (Layer 5): Managing Application Sessions
- Core Function: The Session Layer establishes, manages, and terminates sessions between applications, controlling the dialog between them.
- Detailed Focus:
- Session Establishment and Termination: Establishes and terminates communication sessions between applications. Includes session negotiation, authentication, and authorization.
- Dialog Control: Manages the dialog between applications, determining which party can transmit at any given time (full-duplex, half-duplex, simplex).
- Synchronization: Provides synchronization points (checkpoints) for data streams, allowing for recovery in case of interruptions. Used for applications that require synchronized data exchange, such as database transactions and file transfers.
- Session Management: Manages the state of the session, including authentication, authorization, accounting, and session recovery.
- Token Management: Controls which party has the right to transmit data in a half-duplex communication.
- Activity Management: Defines the data structure and operations for transferring data.
- Exception Reporting: Handles exceptional conditions that arise during a session, such as session timeouts and errors.
- Session Recovery: Provides mechanisms for recovering from session interruptions, such as session resumption and checkpointing.
- Key Aspects:
- Handles session timeouts and recovery, including session resumption after interruptions.
- Includes protocols like NetBIOS, SAP (Session Announcement Protocol), RPC (Remote Procedure Call), SCP (Session Control Protocol), and TLS/SSL session management.
- Primarily used in older applications and protocols.
- Examples:
- NetBIOS session services.
- Database session management.
- Authentication protocols that establish sessions (e.g., Kerberos).
- Session resumption in TLS/SSL.
- Data Unit: Data.
6. Presentation Layer (Layer 6): Data Formatting and Security
- Core Function: The Presentation Layer handles data translation, encryption, and compression, ensuring that data is in a format that the Application Layer can understand.
- Detailed Focus:
- Data Translation: Translates data between different formats (e.g., ASCII to EBCDIC, Unicode to UTF-8), ensuring compatibility between systems with different data representations. Includes character encoding, data type conversion, and data structure transformations.
- Encryption and Decryption: Encrypts data for secure transmission (e.g., using SSL/TLS, AES, DES) and decrypts data at the destination, ensuring confidentiality. Includes symmetric and asymmetric encryption algorithms, key management, and digital signatures.
- Compression and Decompression: Compresses data to reduce its size for efficient transmission (e.g., using ZIP, JPEG compression, MPEG compression) and decompresses it at the destination, improving bandwidth utilization. Includes lossless and lossy compression algorithms.
- Data Formatting: Handles data formatting and syntax, ensuring that data is presented in a consistent and understandable way. Includes data structure definitions (e.g., XML, JSON), data type conversions, and data presentation standards.
- Data Representation: Defines the data format that applications will accept.
- Key Aspects:
- Handles character encoding, data representation, and data conversion.
- Includes protocols and standards like SSL/TLS (Secure Sockets Layer/Transport Layer Security), ASN.1 (Abstract Syntax Notation One), JPEG, MPEG, XML, JSON, and MIME (Multipurpose Internet Mail Extensions).
- Provides data security and data compression services.
- Examples:
- Encryption protocols used in HTTPS and VPNs.
- Image and video compression algorithms used in multimedia applications.
- Data formatting used in web services (XML, JSON).
- Character encoding used in text documents and web pages.
- Data Unit: Data.
7. Application Layer (Layer 7): User-Facing Network Services
-
Core Function: The Application Layer is the topmost layer, providing network services directly to end-user applications. It's the layer that users interact with directly.
-
Detailed Focus:
- Application-Specific Protocols: Provides a set of protocols that are specific to the applications that use them. These protocols define how applications interact with the network.
- User Interface: Acts as an interface between applications and the underlying network, allowing users to access network services.
- Data Interpretation: Interprets data received from lower layers and presents it to the user in a meaningful way.
- Network Services: Provides a wide range of network services, including file transfer, email, web browsing, remote access, and network management.
- Identifying communication partners: Determine the identity and availability of communication partners for an application with data to transmit.
- Synchronizing communication: Establish if enough resources exist for the intended communication.
- Supporting syntax agreement: Establish agreement on procedures for error recovery and control of data integrity.
- Application Logic: This layer can also contain some application-specific logic, such as data validation, business rules, and user authentication.
- End-User Interaction: Directly supports user interaction and provides the interface for applications to access network services.
-
Key Aspects:
- Is the only layer that directly interacts with end-user applications.
- Includes protocols like HTTP, HTTPS, FTP, SMTP, DNS, DHCP, Telnet, SSH, POP3, IMAP, SNMP, REST, SOAP, and SIP (Session Initiation Protocol).
- Provides services that are essential for everyday network use.
-
Examples:
- HTTP (Hypertext Transfer Protocol) and HTTPS (Hypertext Transfer Protocol Secure): Used for web browsing and secure web transactions.
- FTP (File Transfer Protocol): Used for transferring files between computers.
- SMTP (Simple Mail Transfer Protocol): Used for sending email.
- POP3 (Post Office Protocol version 3) and IMAP (Internet Message Access Protocol): Used for receiving email.
- DNS (Domain Name System): Used for translating domain names into IP addresses.
- DHCP (Dynamic Host Configuration Protocol): Used for automatically assigning IP addresses to devices.
- Telnet and SSH (Secure Shell): Used for remote access to computers and network devices.
- SNMP (Simple Network Management Protocol): Used for network management and monitoring.
- REST (Representational State Transfer) and SOAP (Simple Object Access Protocol): Used for web services and API communication.
- SIP (Session Initiation Protocol): Used for VoIP and multimedia communication.
-
Data Unit: Data.### 4. Transport Layer (Layer 4): End-to-End Communication
-
Core Function: The Transport Layer provides end-to-end communication between applications, ensuring reliable or unreliable data transfer.
-
Detailed Focus:
- Segmentation and Reassembly: Divides data from the Application Layer into segments (TCP) or datagrams (UDP) for transmission and reassembles them at the destination. Includes sequence numbers, acknowledgment mechanisms, and windowing (sliding window protocol).
- Port Numbers: Uses port numbers to identify applications on a device. Includes well-known (0-1023), registered (1024-49151), and dynamic/private (49152-65535) port numbers, and the concept of sockets (IP address + port number).
- Reliable Data Transfer (TCP): Provides reliable, connection-oriented data transfer with error detection (checksum), flow control (windowing, congestion control), and retransmission (ARQ - Automatic Repeat Request). Includes three-way handshake (SYN, SYN-ACK, ACK) for connection establishment, four-way termination (FIN, ACK, FIN, ACK) for connection closure, and congestion control algorithms (e.g., TCP Reno, TCP Cubic, TCP BBR).
- Unreliable Data Transfer (UDP): Provides unreliable, connectionless data transfer with minimal overhead. Used for applications that prioritize speed over reliability, such as streaming media (voice, video), online gaming, DNS queries, and VoIP.
- Flow Control: Regulates the flow of data to prevent network congestion and buffer overflows. Includes windowing and buffering techniques, as well as congestion avoidance and congestion control mechanisms.
- Error Recovery: Implements mechanisms to recover from transmission errors, such as retransmission timeouts (RTO), selective acknowledgments (SACK), and fast retransmit/fast recovery.
- Multiplexing and Demultiplexing: Allows multiple applications to share a single network connection by using port numbers to differentiate between them.
- Connection-Oriented vs. Connectionless: Explains the difference between connection-oriented (TCP) and connectionless (UDP) communication, and their respective advantages and disadvantages.
-
Key Aspects:
- Provides end-to-end reliability and flow control.
- Includes protocols like TCP (Transmission Control Protocol) and UDP (User Datagram Protocol), as well as SCTP (Stream Control Transmission Protocol) and DCCP (Datagram Congestion Control Protocol).
- Handles quality of service (QoS) by prioritizing certain types of traffic.
-
Examples:
- TCP and UDP protocols.
- Port numbers (e.g., 80 for HTTP, 443 for HTTPS, 53 for DNS).
- Sockets.
- Connection establishment and termination procedures.
-
Data Unit: Segments (TCP) or Datagrams (UDP).
OSI Model vs TCP/IP Model
Both the OSI and TCP/IP models are layered frameworks for understanding and designing network protocols, but they differ in structure, purpose, and real-world application.
Layer Structure Comparison
| OSI Model Layer | TCP/IP Model Layer | Function(s) Covered |
|---|---|---|
| 7. Application | Application | User interface, network services (HTTP, FTP, SMTP) |
| 6. Presentation | Application | Data translation, encryption, compression |
| 5. Session | Application | Session management, dialog control |
| 4. Transport | Transport | End-to-end communication, reliability (TCP, UDP) |
| 3. Network | Internet | Logical addressing, routing (IP, ICMP) |
| 2. Data Link | Network Access | Physical addressing, error detection (Ethernet, Wi-Fi) |
| 1. Physical | Network Access | Transmission of raw bits over physical medium |
Key Differences
- Number of Layers: OSI has 7 layers; TCP/IP has 4 layers (sometimes depicted as 5).
- Layer Functions: TCP/IP merges OSI’s Application, Presentation, and Session layers into a single Application layer. It also combines Data Link and Physical into Network Access.
- Purpose: OSI is a conceptual, protocol-agnostic reference model; TCP/IP is a practical protocol suite used in real-world networking.
- Usage: TCP/IP underpins the modern Internet; OSI is widely used for teaching, troubleshooting, and network planning.
- Protocol Dependency: OSI is protocol-independent; TCP/IP is built around standard protocols (TCP, IP, etc.).
Switch
Summary Table of Switch Methods
| Method | How It Works | Speed | Error Checking | Frame Processing Start | Notes / Use Cases |
|---|---|---|---|---|---|
| Store-and-Forward | Receives entire frame, checks for errors (CRC), then forwards if valid. | Slowest | Best (CRC check) | After full frame received | High accuracy, supports different port speeds |
| Cut-Through | Starts forwarding after reading destination MAC (first 6–8 bytes), before whole frame arrives. | Fastest | None | After 1st 6–8 bytes | Lowest latency, may forward corrupted frames |
| - Fragment-Free | Waits for first 64 bytes (to filter out runts), then forwards. | Moderate | Limited (runts) | After 64 bytes received | Balances speed and error avoidance (filters runts) |
| - Fast-Forward | Often used as another term for cut-through (vendor-specific); behaves like cut-through. | Fastest | None | After 1st 6–8 bytes | Sometimes used interchangeably with cut-through |
Method Details
Store-and-Forward
- Switch receives the entire Ethernet frame into memory.
- Performs a CRC (Cyclic Redundancy Check) to detect errors.
- Only forwards error-free frames.
- Introduces the most latency but ensures data integrity.
- Can connect ports of different speeds.
Cut-Through
- Switch reads only enough of the frame to learn the destination MAC (typically first 6–8 bytes).
- Starts forwarding immediately after determining the output port.
- Lowest latency, but may forward frames with errors.
- Cannot detect or filter out corrupted frames.
- Fragment-Free
- Switch waits for the first 64 bytes of the frame before forwarding.
- 64 bytes is the minimum legal Ethernet frame size; anything smaller is a "runt" (likely a collision fragment).
- Filters out runts but does not check for other errors.
- Provides a balance between speed and error avoidance.
- Fast-Forward
- Often a vendor-specific term for cut-through switching.
- Behavior is essentially the same as cut-through: forwards frames as soon as the destination MAC is read.
- Focuses on minimizing latency.
Visual Comparison
| Feature | Store-and-Forward | Cut-Through | Fragment-Free | Fast-Forward |
|---|---|---|---|---|
| Latency | High | Low | Medium | Low |
| Error Detection (CRC) | Yes | No | No (except runts) | No |
| Filters Runts | Yes | No | Yes | No |
| When Forwarding Starts | After full frame | After 6–8 bytes | After 64 bytes | After 6–8 bytes |
| Port Speed Conversion | Yes | No | No | No |
In summary:
- Store-and-forward maximizes reliability but adds delay.
- Cut-through (and fast-forward) minimizes delay but may propagate errors.
- Fragment-free offers a compromise, filtering out the most common collision fragments but not all errors.
Ethernet Frame Fields
An Ethernet frame is a structured packet used for data transmission at the data link layer. It encapsulates both addressing and error-checking information, along with the payload. Here are the main fields in a standard Ethernet II frame:
Ethernet Frame Structure
| Field | Size (Bytes) | Description |
|---|---|---|
| Preamble | 7 | Synchronizes the receiver's clock; pattern of alternating 1s and 0s |
| Start Frame Delimiter | 1 | Marks the end of preamble and start of the frame (10101011) |
| Destination MAC Address | 6 | MAC address of the receiving device |
| Source MAC Address | 6 | MAC address of the sending device |
| EtherType/Length | 2 | Indicates protocol type (e.g., IPv4, IPv6) or payload length |
| (Optional) VLAN Tag | 4 | Used for VLAN identification (802.1Q) |
| Payload (Data and Pad) | 46–1500 | Data being transmitted; padded if less than 46 bytes |
| Frame Check Sequence | 4 | CRC for error checking |
Field Descriptions
- Preamble: 7 bytes of alternating 1s and 0s for synchronization.
- Start Frame Delimiter (SFD): 1 byte (10101011) indicating the start of the actual frame.
- Destination MAC Address: 6 bytes specifying the intended recipient.
- Source MAC Address: 6 bytes specifying the sender.
- EtherType/Length: 2 bytes; EtherType (≥1536) specifies the upper-layer protocol, or Length (≤1500) for payload size.
- VLAN Tag (optional): 4 bytes inserted after the source MAC for VLAN tagging.
- Payload (Data and Pad): Actual data; minimum 46 bytes (padded if needed), maximum 1500 bytes.
- Frame Check Sequence (FCS): 4 bytes CRC for error detection.
Visual Representation
| Preamble | SFD | Dest MAC | Src MAC | EtherType/Length | [VLAN Tag] | Payload (Data+Pad) | FCS | | 7 B | 1 B | 6 B | 6 B | 2 B | 4 B | 46–1500 B | 4 B |
Note:
- VLAN Tag is optional and present only in VLAN-enabled networks.
- The minimum Ethernet frame size is 64 bytes (including all fields).
- The maximum payload is 1500 bytes, and the maximum frame size (without VLAN) is 1518 bytes.
Powershell 7
Basic handling of Powershell
Press F1 after typing a command to get help or type man before the command.
Press F2 to toggle prediction.
Press Tab to move to or list the next suggestion.
Press Shift + Tab to move to the previous suggestion.
Press → to accept the suggestion.
Press Ctrl + Space to list autocomplete suggestions.
Find the Powershell profile echo $profile or just $profile
Open the Powershell profile in notepad notepad $profile
Print the current PSReadLine key handlers Get-PSReadLineKeyHandler
or press Ctrl + Alt + ?
Misc
Find the file location of the Powershell history file. Edit and remove inaccurate predictions.
Get-PSReadLineOption | select-Object -Property HistorySavePath
# or
(Get-PSReadLineOption).HistorySavePath
Basic Commands
| Command | Description |
|---|---|
| pwd | Prints the current working directory. |
| ls | Lists the contents of the current directory. |
| cd | Changes the current directory. |
| md | Creates a new directory. |
| rm | Removes a file or directory. |
| cp | Copies a file or directory. |
| mv | Moves a file or directory. |
| cat | Displays the contents of a file. |
| tree | Lists the contents of a directory in a treelike format. |
| echo | Prints text to the console. |
| read | Reads input from the user. |
| cls | Clears the console. |
| exit | Exits the current shell. |
| help | Displays information about the builtin commands. |
| get-help | Displays information about a specific command. |
| file | Displays information about a file. |
| type | Displays the contents of a file. |
Powershell Scripts
Usage
Copy and Paste the scripts into your PowerShell profile. To open your PowerShell profile in VS Code type code $Profile. To open in Notepad type notepad $profile
Most scripts require additional software. Install the following software if you do not have it already:
winget install ajeetdsouza.zoxide
winget install junegunn.fzf
winget install sharkdp.fd
winget install sharkdp.bat
winget install BurntSushi.ripgrep.MSVC
winget install eza-community.eza
winget install jftuga.less
You will need to install the Visual C++ Redistributable package as well.
Add Invoke-Expression (& { (zoxide init powershell | Out-String) }) to your PowerShell profile
Detailed information can be found by clicking zoxide, fzf, fd, bat, ripgrep, eza and less.
PSFzf
PSFzf installs from PSGallery. More details here.
Install-Module -Name PSFzf
Paste the following into your PowerShell profile:
Set-PsFzfOption -PSReadlineChordProvider 'Ctrl+t' -PSReadlineChordReverseHistory 'Ctrl+r'
Set-PSReadLineKeyHandler -Key Tab -ScriptBlock { Invoke-FzfTabCompletion }
Type cd and press Ctrl + t and search for the directory you want to navigate to. Hit Enter twice to navigate to the directory.
Press Ctrl + r to list previous commands. Search and hit Enter twice to execute the command.
Press ↑ or ↓ to navigate the list.
Tab completion works out of the box.
Disks
Type disks and hit Enter to display disk information in human readable format.
Script
function disks {

    Get-WmiObject -Class Win32_LogicalDisk |
    Select-Object -Property DeviceID, VolumeName,
    @{Label = 'FreeGb'; expression = { ($_.FreeSpace / 1GB).ToString('F2') } },
    @{Label = 'UsedGb'; expression = { (($_.Size - $_.FreeSpace) / 1GB).ToString('F2') } }, # Calculated Used Space
    @{Label = 'TotalGb'; expression = { ($_.Size / 1GB).ToString('F2') } },
    @{label = 'Free %'; expression = { [Math]::Round(($_.freespace / $_.size) * 100, 2) } } |
    Format-Table
}
Find files and folders
A script with options to view, delete or edit files with external tools.
Script
$env:FZF_DEFAULT_OPTS = @"
--layout=reverse
--cycle
--scroll-off=5
--border
--preview-window=right,60%,border-left
--bind ctrl-u:preview-half-page-up
--bind ctrl-d:preview-half-page-down
--bind ctrl-f:preview-page-down
--bind ctrl-b:preview-page-up
--bind ctrl-g:preview-top
--bind ctrl-h:preview-bottom
--bind alt-w:toggle-preview-wrap
--bind ctrl-e:toggle-preview
"@

    function _fzf_open_path {
        param (
            [Parameter(Mandatory = $true)]
            [string]$input_path
        )
        if ($input_path -match "^.*:\d+:.*$") {
            $input_path = ($input_path -split ":")[0]
        }
        if (-not (Test-Path $input_path)) {
            return
        }
        $cmds = @{
            'bat'    = { bat $input_path }
            'cat'    = { Get-Content $input_path }
            'cd'     = {
                if (Test-Path $input_path -PathType Leaf) {
                    $input_path = Split-Path $input_path -Parent
                }
                Set-Location $input_path
            }
            'remove' = { Remove-Item -Recurse -Force $input_path }
            'echo'   = { Write-Output $input_path }
            'VS Code' = { code $input_path }
        }
        $cmd = $cmds.Keys | fzf --prompt 'Select command> '
        & $cmds[$cmd]
    }

    function _fzf_get_path_using_fd {
        $input_path = fd --type file --follow --exclude .git |
        fzf --prompt 'Files> ' `
            --header-first `
            --header 'CTRL-S: Switch between Files/Directories' `
            --bind 'ctrl-s:transform:if not "%FZF_PROMPT%"=="Files> " (echo ^change-prompt^(Files^> ^)^+^reload^(fd --type file^)) else (echo ^change-prompt^(Directory^> ^)^+^reload^(fd --type directory^))' `
            --preview 'if "%FZF_PROMPT%"=="Files> " (bat --color=always {} --style=plain) else (eza -T --colour=always --icons=always {})'
        return $input_path
    }

    function _fzf_get_path_using_rg {
        $INITIAL_QUERY = "${*:-}"
        $RG_PREFIX = "rg --column --line-number --no-heading --color=always --smart-case"
        $input_path = "" |
        fzf --ansi --disabled --query "$INITIAL_QUERY" `
            --bind "start:reload:$RG_PREFIX {q}" `
            --bind "change:reload:sleep 0.1 & $RG_PREFIX {q} || rem" `
            --bind 'ctrl-s:transform:if not "%FZF_PROMPT%" == "1. ripgrep> " (echo ^rebind^(change^)^+^change-prompt^(1. ripgrep^> ^)^+^disable-search^+^transform-query:echo ^{q^} ^> %TEMP%\rg-fzf-f ^& type %TEMP%\rg-fzf-r) else (echo ^unbind^(change^)^+^change-prompt^(2. fzf^> ^)^+^enable-search^+^transform-query:echo ^{q^} ^> %TEMP%\rg-fzf-r ^& type %TEMP%\rg-fzf-f)' `
            --color 'hl:-1:underline,hl+:-1:underline:reverse' `
            --delimiter ':' `
            --prompt '1. ripgrep> ' `
            --preview-label 'Preview' `
            --header 'CTRL-S: Switch between ripgrep/fzf' `
            --header-first `
            --preview 'bat --color=always {1} --highlight-line {2} --style=plain' `
            --preview-window 'up,60%,border-bottom,+{2}+3/3'
        return $input_path
    }

    function fdg {
        _fzf_open_path $(_fzf_get_path_using_fd)
    }

    function rgg {
        _fzf_open_path $(_fzf_get_path_using_rg)
    }


    # SET KEYBOARD SHORTCUTS TO CALL FUNCTION

    Set-PSReadLineKeyHandler -Key "Ctrl+q" -ScriptBlock {
        [Microsoft.PowerShell.PSConsoleReadLine]::RevertLine()
        [Microsoft.PowerShell.PSConsoleReadLine]::Insert("fdg")
        [Microsoft.PowerShell.PSConsoleReadLine]::AcceptLine()
    }

    Set-PSReadLineKeyHandler -Key "Ctrl+f" -ScriptBlock {
        [Microsoft.PowerShell.PSConsoleReadLine]::RevertLine()
        [Microsoft.PowerShell.PSConsoleReadLine]::Insert("rgg")
        [Microsoft.PowerShell.PSConsoleReadLine]::AcceptLine()
    }
There are two ways to get a file path.
Through ripgrep mode.
Through fd mode.
To open in Ripgrep mode, type rgg and hit Enter or press Ctrl + f.
To open in fd mode, type fdg and hit Enter or press Ctrl + q.
Press ↑ or ↓ to navigate the list. Press Shift + ↑ or ↓ to navigate the preview.
ctrl + s - switch between files and directories
ctrl + u - preview-half-page-up
ctrl + d - preview-half-page-down
ctrl + f - preview-page-down
ctrl + b - preview-page-up
ctrl + g - preview-top
ctrl + h - preview-bottom
ctrl + e - toggle-preview
alt + w - toggle-preview-wrap
Open files or folders with bat, cat, cd, echo or VS Code. Delete with 'remove'.
[!NOTE] The script sets two keybindings via PSReadLineKeyHandler.
Find fz
File search script utilizing fzf, ripgrep and bat.
Script
 function fz {

        $INITIAL_QUERY = "${*:-}"
        $RG_PREFIX = "rg --column --line-number --no-heading --color=always --smart-case"
        "" |
        fzf --ansi --disabled --query "$INITIAL_QUERY" `
        --bind "start:reload:$RG_PREFIX {q}" `
        --bind "change:reload:sleep 0.1 & $RG_PREFIX {q} || rem" `
        --bind 'ctrl-s:transform:if not "%FZF_PROMPT%" == "1. ripgrep> " (echo ^rebind^(change^)^+^change-prompt^(1. ripgrep^> ^)^+^disable-search^+^transform-query:echo ^{q^} ^> %TEMP%\rg-fzf-f ^& type %TEMP%\rg-fzf-r) else (echo ^unbind^(change^)^+^change-prompt^(2. fzf^> ^)^+^enable-search^+^transform-query:echo ^{q^} ^> %TEMP%\rg-fzf-r ^& type %TEMP%\rg-fzf-f)' `
        --color 'hl:-1:underline,hl+:-1:underline:reverse' `
        --delimiter ':' `
        --prompt '1. ripgrep> ' `
        --preview-label 'Preview' `
        --header 'CTRL-S: Switch between ripgrep/fzf' `
        --header-first `
        --preview 'bat --color=always {1} --highlight-line {2} --style=plain' `
        --preview-window 'up,60%,border-bottom,+{2}+3/3'
        }
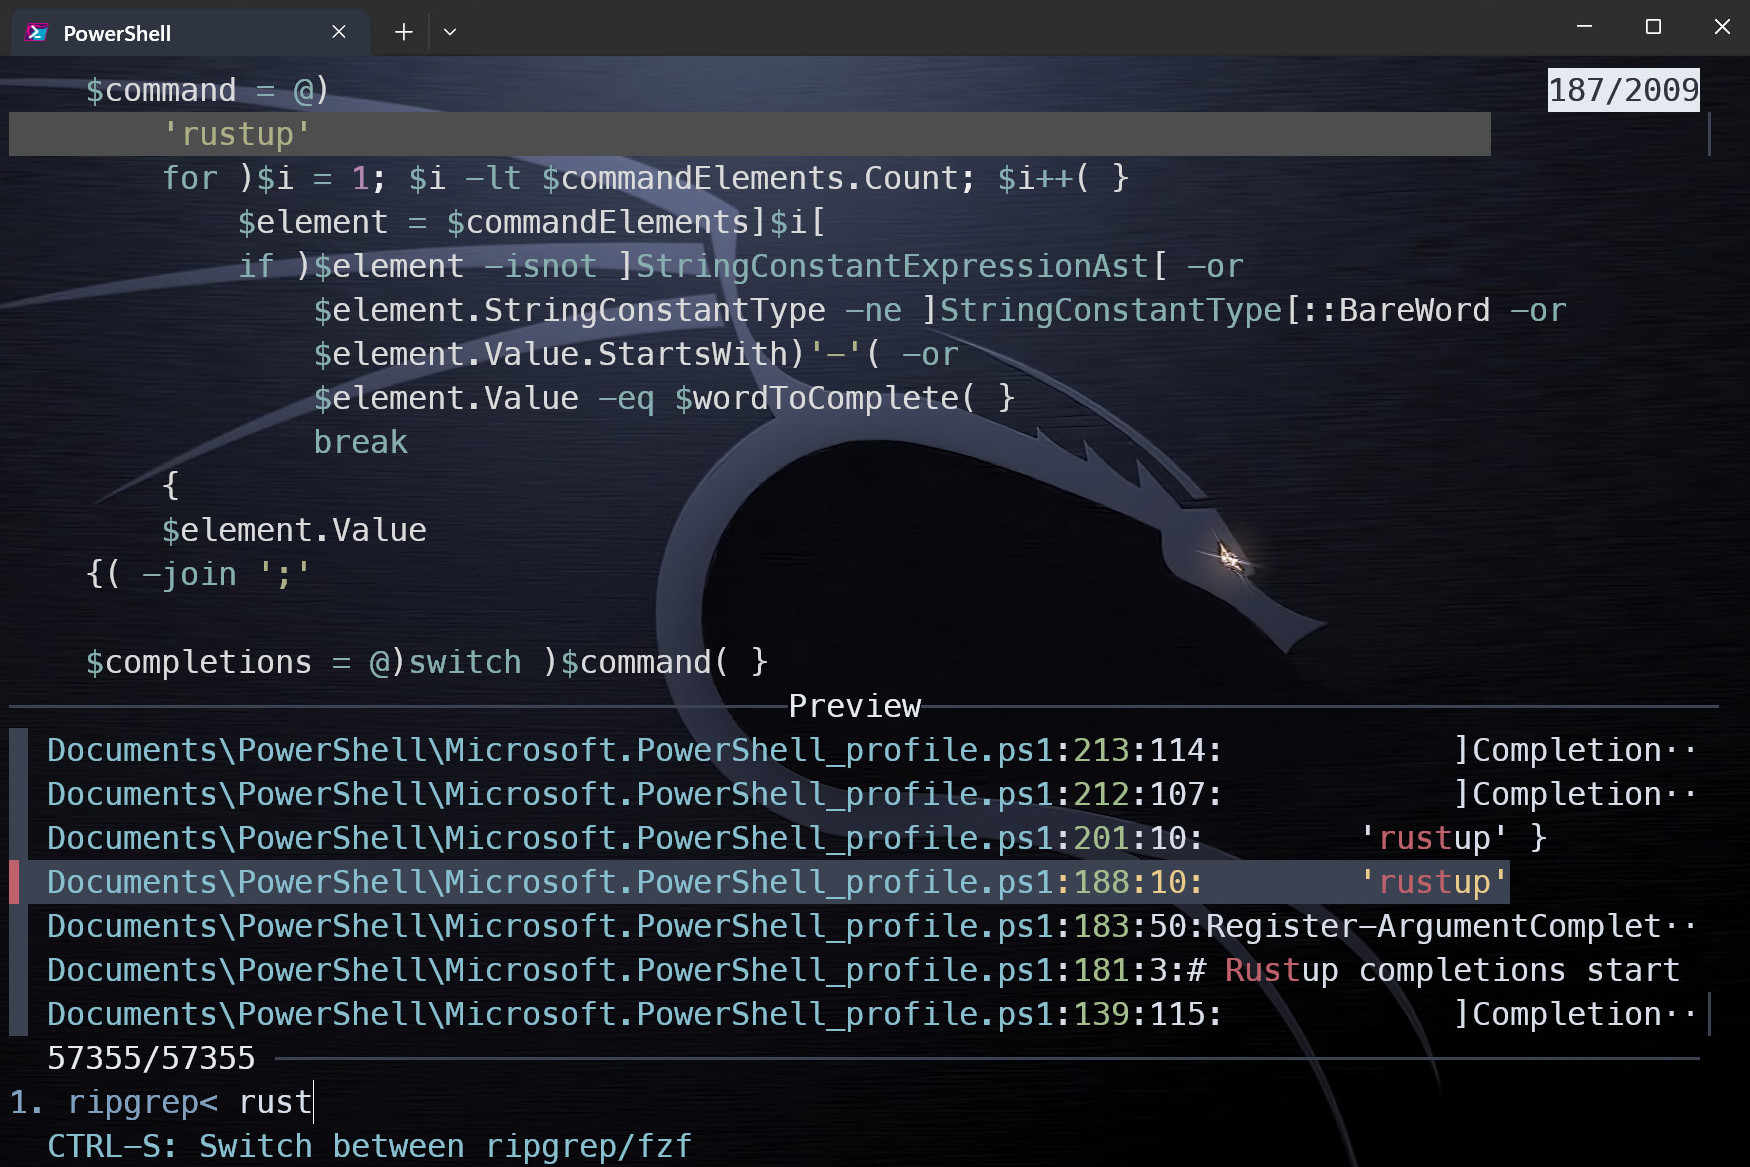
Type fz and hit Enter.
Press Ctrl + S to switch between ripgrep and fzf.
Press ↑ or ↓ to navigate the list. Press Enter to select.
Press Shift + ↑ or ↓ to navigate the preview.
Find fza
File searcher script utilizing fzf, fd and bat.
Script
function fza {
    fd --type file --follow --exclude .git |
    fzf --style=full `
        --bind 'focus:transform-header:file --brief {}' `
        --preview 'bat --color=always {} --style=numbers' `
        --preview-window '~3' --reverse `

}
Type fza and hit Enter.
Press ↑ or ↓ to navigate the list.
Press Shift + ↑ or ↓ to navigate the preview.
Google search
Search Google from the command line. Type gog and a search term and hit Enter.
Opens in your default browser.
Script
Function search-google {
    $query = 'https://www.google.com/search?q='
    $args | ForEach-Object { $query = $query + "$_+" }
    $url = $query.Substring(0, $query.Length - 1)
    Start-Process "$url"
}

Set-Alias gog search-google
eza
List files with details using the e alias. More information in the eza document.
Script
function e {
    eza `
        --long `
        --hyperlink `
        --icons=always `
        --git-repos `
        --git `
        --header `
        --flags `
        --created `
        --time-style long-iso `
        --group-directories-first `
        --context `
        --total-size `
        --all `

}
yt-dlp
Requires yt-dlp. More information here. A short user guide is available here.
winget install yt-dlp
Type ytm and a link and press Enter.
[!NOTE] This script recodes a video to mp4/mkv.
Script
Function ytm {
    yt-dlp `
        --progress `
        --console-title `
        --video-multistreams `
        --audio-multistreams `
        --format-sort "height:1080,fps" `
        --format "bestvideo+bestaudio/best" `
        --check-formats `
        --merge-output-format "mp4/mkv" `
        --recode-video "mp4/mkv" `
        --embed-thumbnail `
        --embed-metadata `
        --embed-chapters `
        --force-keyframes-at-cuts `
        --sponsorblock-mark "all" `
        --write-auto-subs --sub-lang "en.*" `
        $args
}
Get-MyIP
Fetch WAN ip.
function Get-MyIP {
    (Invoke-RestMethod -Uri "https://api.ipify.org")
}
Paste into your $Profile
Open path in Directory Opus
function Open {
    $opusPath = "C:\Program Files\GPSoftware\Directory Opus\dopus.exe"
    $folderPath = Get-Location

    $folderPath = $folderPath -replace '\{', '' -replace '\}', ''

    Start-Process $opusPath -ArgumentList "/path `"$folderPath`""
}
Open path in Explorer
function Open {
    $folderPath = Get-Location
    Invoke-Item $folderPath
}
List items
function ll { Get-ChildItem -Force | Format-Table -AutoSize }
function la { Get-ChildItem -Force -Attributes Hidden, ReadOnly, System | Format-Table -AutoSize }
function l { Get-ChildItem -Name }
Tools
.. that I find useful for Powershell
-
IntelliShell
Bookmarks commands and includes tldr pages. -
zoxide
Jump straight to directories. -
fzf
A command-line fuzzy finder. -
ripgrep
A fast file search tool. -
bat
Like cat but better. -
yazi
Tabbed file manager with preview supporting numerous file types. -
fd
A simple, fast and user-friendly alternative to find. -
eza
Like ls but better. -
glow
A terminal-based Markdown viewer.
IntelliShell
IntelliShell bookmarks commands and includes tldr pages.
Press Ctrl + Space to list bookmarked commands.
Type the beginning of the command, for example docker and intelli-shell will fetch
a list of commands starting with docker from your bookmarked commands and tldr.
Navigate with ↑ or ↓. Select with Enter.
Hotkeys
ctrl + b bookmark currently typed command
ctrl + space show suggestions for current line
ctrl + l replace labels of currently typed command (Linux)
esc clean current line, this binding can be skipped if INTELLI_SKIP_ESC_BIND=1
Note: When navigating items, selected suggestion can be deleted with ctrl + d or edited with any of: ctrl + e, ctrl + u or F2
You can customize key bindings using environment variables: INTELLI_BOOKMARK_HOTKEY, INTELLI_SEARCH_HOTKEY and INTELLI_LABEL_HOTKEY
Help
Usage: intelli-shell.exe [OPTIONS]
| Commands: | Description |
|---|---|
| new | Stores a new user command |
| search | Opens a new search interface |
| label | Opens a new label interface |
| export | Exports stored user commands |
| import | Imports user commands |
| fetch | Fetches new commands from tldr |
| help | Print this message or the help of the given subcommand(s) |
| Options: | Description |
|---|---|
| -i, --inline | Whether the UI should be rendered inline instead of taking full terminal |
| --inline-extra-line | Whether an extra line should be rendered when inline |
| -f, --file-output <FILE_OUTPUT> | Path of an existing file to write the output to (defaults to stdout) |
| -h, --help | Print help |
| -V, --version | Print version |
More details on IntelliShell and tldr.
zoxide
Installation
winget install ajeetdsouza.zoxide
Add this to the end of your $profile in PowerShell:
Invoke-Expression (& { (zoxide init powershell | Out-String) })
See the zoxide documentation for more information
Getting started
| Command | Description |
|---|---|
| z foo | cd into highest ranked directory matching foo |
| z foo bar | cd into highest ranked directory matching foo and bar |
| z foo / | cd into a subdirectory starting with foo |
| z ~/foo | z also works like a regular cd command |
| z foo/ | cd into relative path |
| z .. | cd one level up |
| z - | cd into previous directory |
| zi foo | cd with interactive selection (using fzf) |
| z foo | show interactive completions (zoxide v0.8.0+, bash 4.4+/fish/zsh only) |
Configuration
Configuration Flags
When calling zoxide init, the following flags are available:
--cmd
    Changes the prefix of the z and zi commands.
    --cmd j would change the commands to (j, ji).
    --cmd cd would replace the cd command.

--hook <HOOK>

    Changes how often zoxide increments a directory's score:
    Hook    Description
    none    Never
    prompt  At every shell prompt
    pwd (default)   Whenever the directory is changed

--no-cmd
    Prevents zoxide from defining the z and zi commands.
    These functions will still be available in your shell as __zoxide_z
    and __zoxide_zi, should you choose to redefine them.
Environment variables
Environment variables can be used for configuration. They must be set before zoxide init is called.
_ZO_DATA_DIR

    Specifies the directory in which the database is stored.

    The default value varies across OSes:
    OS               Path               Example
    Linux / BSD    $XDG_DATA_HOME or $HOME/.local/share     /home/alice/.local/share
    macOS   $HOME/Library/Application Support   /Users/Alice/Library/Application Support
    Windows    %LOCALAPPDATA%    C:\Users\Alice\AppData\Local

_ZO_ECHO
    When set to 1, z will print the matched directory before navigating to it.

_ZO_EXCLUDE_DIRS

    Excludes the specified directories from the database.

    This is provided as a list of globs, separated by OS-specific characters:
    OS      Separator     Example
    Linux / macOS / BSD   :    $HOME:$HOME/private/*
    Windows     ;    $HOME;$HOME/private/*

    By default, this is set to "$HOME".

_ZO_FZF_OPTS
    Custom options to pass to fzf during interactive selection.
    See man fzf for the list of options.

_ZO_MAXAGE
    Configures the aging algorithm, which limits the maximum number
    of entries in the database.
    By default, this is set to 10000.

_ZO_RESOLVE_SYMLINKS
    When set to 1, z will resolve symlinks before adding directories to the database.
Set environment variables
Assuming you want to set the _ZO_ECHO variable to 1:
Add this to your $profile in PowerShell:
env:_ZO_ECHO = '1'
Help
Usage:
zoxide.exe <COMMAND>
| Commands | Description |
|---|---|
| add | Add a new directory or increment its rank |
| edit | Edit the database |
| import | Import entries from another application |
| init | Generate shell configuration |
| query | Search for a directory in the database |
| remove | Remove a directory from the database |
| Options | Description |
|---|---|
| -h, --help | Print help |
| -V, --version | Print version |
| Environment variables | Description |
|---|---|
| _ZO_DATA_DIR | Path for zoxide data files |
| _ZO_ECHO | Print the matched directory before navigating to it when set to 1 |
| _ZO_EXCLUDE_DIRS | List of directory globs to be excluded |
| _ZO_FZF_OPTS | Custom flags to pass to fzf |
| _ZO_MAXAGE | Maximum total age after which entries start getting deleted |
| _ZO_RESOLVE_SYMLINKS | Resolve symlinks when storing paths |
fzf
Install:
winget install junegunn.fzf
Install Psfzf after fzf. Quick install instructions here.
Usage
Use arrow keys ↑ and ↓ to move cursor up and down.
Enter to select the item, Ctrl + C / Ctrl + G / Esc to exit
On multi-select mode (-m), TAB and Shift + TAB to mark multiple items
Mouse: scroll, click, double-click; shift-click and shift-scroll on multi-select mode
Press Ctrl + T to start PSFzf to select provider paths.
Press Ctrl + R to start PSFzf to select a command in the command history saved by PSReadline.
PSFzf will insert the command into the current line, but it will not execute the command.
Press Alt + C to start fzf in folder mode. Press Enter to cd into the selected directory.
A few scripts are here
More details here
Help File
fzf [options]
Search
-e, --exact- Enable exact-match+x, --no-extended- Disable extended-search mode-i, --ignore-case- Case-insensitive match+i, --no-ignore-case- Case-sensitive match--smart-case- Smart-case match (default)--scheme=SCHEME- Scoring scheme[default|path|history]-n, --nth=N[,..]- Limit search scope using field index expressions--with-nth=N[,..]- Transform line presentation using field index expressions-d, --delimiter=STR- Field delimiter regex (default: AWK-style)+s, --no-sort- Do not sort results--literal- Do not normalize Latin script letters--tail=NUM- Maximum number of items to keep in memory--disabled- Disable search--tiebreak=CRI[,..]- Sorting criteria when scores are tied[length|chunk|pathname|begin|end|index](default: length)
Input/Output
--read0- Read input delimited by ASCII NUL characters--print0- Print output delimited by ASCII NUL characters--ansi- Enable processing of ANSI color codes--sync- Synchronous search for multi-staged filtering
Global Style
--style=PRESET- Apply a style preset[default|minimal|full[:BORDER_STYLE]--color=COLSPEC- Set base color scheme[dark|light|16|bw]and custom colors--no-color- Disable colors--no-bold- Disable bold text
Display Mode
--height=[~]HEIGHT[%]- Set window height (fullscreen by default)--min-height=HEIGHT[+]- Minimum height when using percentages--tmux[=OPTS]- Startfzfin a tmux popup (requires tmux 3.3+)
Layout
--layout=LAYOUT- Choose layout[default|reverse|reverse-list]--margin=MARGIN- Set screen margin--padding=PADDING- Set padding inside the border--border[=STYLE]- Draw border[rounded|sharp|bold|block|thinblock|double|horizontal|vertical|top|bottom|left|right|none](default:rounded)--border-label=LABEL- Label for the border--border-label-pos=COL- Border label position
List Section
-m, --multi[=MAX]- Enable multi-select--highlight-line- Highlight the current line--cycle- Enable cyclic scroll--wrap- Enable line wrapping--gap[=N]- Render empty lines between items--scroll-off=LINES- Number of lines to keep above/below during scroll
Input Section
--no-input- Hide the input section--prompt=STR- Set input prompt (default: `> `)--info=STYLE- Set finder info style[default|right|hidden|inline[-right][:PREFIX]]
Preview Window
--preview=COMMAND- Command to preview highlighted line{}--preview-window=OPT- Preview window layout (default:right:50%)
Header
--header=STR- Print a header string--header-lines=N- Treat the firstNlines as a header--header-border[=STYLE]- Border around the header section
Scripting
-q, --query=STR- Start with the given query-1, --select-1- Auto-select the only match-0, --exit-0- Exit immediately if no match
Key/Event Binding
--bind=BINDINGS- Define custom key/event bindings
Advanced
--with-shell=STR- Specify shell command for child processes--listen[=[ADDR:]PORT]- Start HTTP server for actions
Directory Traversal
--walker=OPTS- Set traversal options[file][,dir][,follow][,hidden]--walker-root=DIR [...]- Set root directories (default:.)
History
--history=FILE- Specify history file--history-size=N- Max number of history entries (default:1000)
Shell Integration
--bash- Setup script for Bash integration--zsh- Setup script for Zsh integration--fish- Setup script for Fish integration
Help
--version- Display version information--help- Show help message--man- Show man page
Environment Variables
FZF_DEFAULT_COMMAND- Default command when input isttyFZF_DEFAULT_OPTS- Default options (e.g.'--layout=reverse --info=inline')FZF_DEFAULT_OPTS_FILE- File to read default options fromFZF_API_KEY- API key for HTTP server (--listen)
ripgrep
ripgrep is a line-oriented search tool that recursively searches the current directory for a regex pattern. More details can be found here
Reference
ripgrep 14.1.1 (rev 4649aa9700) Andrew Gallant jamslam@gmail.com
ripgrep (rg) recursively searches the current directory for lines matching a regex pattern. By default, ripgrep will respect gitignore rules and automatically skip hidden files/directories and binary files.
Use -h for short descriptions and --help for more details.
Project home page: https://github.com/BurntSushi/ripgrep
USAGE: rg [OPTIONS] PATTERN [PATH ...] rg [OPTIONS] -e PATTERN ... [PATH ...] rg [OPTIONS] -f PATTERNFILE ... [PATH ...] rg [OPTIONS] --files [PATH ...] rg [OPTIONS] --type-list command | rg [OPTIONS] PATTERN rg [OPTIONS] --help rg [OPTIONS] --version
POSITIONAL ARGUMENTS:
    For example, to search for the literal '-foo', you can use this flag:

        rg -e -foo

    You can also use the special '--' delimiter to indicate that no more
    flags will be provided. Namely, the following is equivalent to the
    above:

        rg -- -foo

<PATH>...
    A file or directory to search. Directories are searched recursively.
    File paths specified on the command line override glob and ignore
    rules.
INPUT OPTIONS: -e PATTERN, --regexp=PATTERN A pattern to search for. This option can be provided multiple times, where all patterns given are searched, in addition to any patterns provided by -f/--file. Lines matching at least one of the provided patterns are printed. This flag can also be used when searching for patterns that start with a dash.
    For example, to search for the literal -foo:

        rg -e -foo

    You can also use the special -- delimiter to indicate that no more
    flags will be provided. Namely, the following is equivalent to the
    above:

        rg -- -foo

    When -f/--file or -e/--regexp is used, then ripgrep treats all
    positional arguments as files or directories to search.

-f PATTERNFILE, --file=PATTERNFILE
    Search for patterns from the given file, with one pattern per line.
    When this flag is used multiple times or in combination with the
    -e/--regexp flag, then all patterns provided are searched. Empty
    pattern lines will match all input lines, and the newline is not
    counted as part of the pattern.

    A line is printed if and only if it matches at least one of the
    patterns.

    When PATTERNFILE is -, then stdin will be read for the patterns.

    When -f/--file or -e/--regexp is used, then ripgrep treats all
    positional arguments as files or directories to search.

--pre=COMMAND
    For each input PATH, this flag causes ripgrep to search the standard
    output of COMMAND PATH instead of the contents of PATH. This option
    expects the COMMAND program to either be a path or to be available in
    your PATH. Either an empty string COMMAND or the --no-pre flag will
    disable this behavior.

    WARNING: When this flag is set, ripgrep will unconditionally spawn a
    process for every file that is searched. Therefore, this can incur an
    unnecessarily large performance penalty if you don't otherwise need the
    flexibility offered by this flag. One possible mitigation to this is to
    use the --pre-glob flag to limit which files a preprocessor is run
    with.

    A preprocessor is not run when ripgrep is searching stdin.

    When searching over sets of files that may require one of several
    preprocessors, COMMAND should be a wrapper program which first
    classifies PATH based on magic numbers/content or based on the PATH
    name and then dispatches to an appropriate preprocessor. Each COMMAND
    also has its standard input connected to PATH for convenience.

    For example, a shell script for COMMAND might look like:

        case "$1" in
        *.pdf)
            exec pdftotext "$1" -
            ;;
        *)
            case $(file "$1") in
            *Zstandard*)
                exec pzstd -cdq
                ;;
            *)
                exec cat
                ;;
            esac
            ;;
        esac

    The above script uses pdftotext to convert a PDF file to plain text.
    For all other files, the script uses the file utility to sniff the type
    of the file based on its contents. If it is a compressed file in the
    Zstandard format, then pzstd is used to decompress the contents to
    stdout.

    This overrides the -z/--search-zip flag.

--pre-glob=GLOB
    This flag works in conjunction with the --pre flag. Namely, when one or
    more --pre-glob flags are given, then only files that match the given
    set of globs will be handed to the command specified by the --pre flag.
    Any non-matching files will be searched without using the preprocessor
    command.

    This flag is useful when searching many files with the --pre flag.
    Namely, it provides the ability to avoid process overhead for files
    that don't need preprocessing. For example, given the following shell
    script, pre-pdftotext:

        #!/bin/sh
        pdftotext "$1" -

    then it is possible to use --pre pre-pdftotext --pre-glob '*.pdf' to
    make it so ripgrep only executes the pre-pdftotext command on files
    with a .pdf extension.

    Multiple --pre-glob flags may be used. Globbing rules match gitignore
    globs. Precede a glob with a ! to exclude it.

    This flag has no effect if the --pre flag is not used.

-z, --search-zip
    This flag instructs ripgrep to search in compressed files. Currently
    gzip, bzip2, xz, LZ4, LZMA, Brotli and Zstd files are supported. This
    option expects the decompression binaries (such as gzip) to be
    available in your PATH. If the required binaries are not found, then
    ripgrep will not emit an error messages by default. Use the --debug
    flag to see more information.

    Note that this flag does not make ripgrep search archive formats as
    directory trees. It only makes ripgrep detect compressed files and then
    decompress them before searching their contents as it would any other
    file.

    This overrides the --pre flag.

    This flag can be disabled with --no-search-zip.
SEARCH OPTIONS: -s, --case-sensitive Execute the search case sensitively. This is the default mode.
    This is a global option that applies to all patterns given to ripgrep.
    Individual patterns can still be matched case insensitively by using
    inline regex flags. For example, (?i)abc will match abc case
    insensitively even when this flag is used.

    This flag overrides the -i/--ignore-case and -S/--smart-case flags.

--crlf
    When enabled, ripgrep will treat CRLF (\r\n) as a line terminator
    instead of just \n.

    Principally, this permits the line anchor assertions ^ and $ in regex
    patterns to treat CRLF, CR or LF as line terminators instead of just
    LF. Note that they will never match between a CR and a LF. CRLF is
    treated as one single line terminator.

    When using the default regex engine, CRLF support can also be enabled
    inside the pattern with the R flag. For example, (?R:$) will match just
    before either CR or LF, but never between CR and LF.

    This flag overrides --null-data.

    This flag can be disabled with --no-crlf.

--dfa-size-limit=NUM+SUFFIX?
    The upper size limit of the regex DFA. The default limit is something
    generous for any single pattern or for many smallish patterns. This
    should only be changed on very large regex inputs where the (slower)
    fallback regex engine may otherwise be used if the limit is reached.

    The input format accepts suffixes of K, M or G which correspond to
    kilobytes, megabytes and gigabytes, respectively. If no suffix is
    provided the input is treated as bytes.

-E ENCODING, --encoding=ENCODING
    Specify the text encoding that ripgrep will use on all files searched.
    The default value is auto, which will cause ripgrep to do a best effort
    automatic detection of encoding on a per-file basis. Automatic
    detection in this case only applies to files that begin with a UTF-8 or
    UTF-16 byte-order mark (BOM). No other automatic detection is
    performed. One can also specify none which will then completely disable
    BOM sniffing and always result in searching the raw bytes, including a
    BOM if it's present, regardless of its encoding.

    Other supported values can be found in the list of labels here:
    https://encoding.spec.whatwg.org/#concept-encoding-get.

    For more details on encoding and how ripgrep deals with it, see
    GUIDE.md.

    The encoding detection that ripgrep uses can be reverted to its
    automatic mode via the --no-encoding flag.

--engine=ENGINE
    Specify which regular expression engine to use. When you choose a regex
    engine, it applies that choice for every regex provided to ripgrep
    (e.g., via multiple -e/--regexp or -f/--file flags).

    Accepted values are default, pcre2, or auto.

    The default value is default, which is usually the fastest and should
    be good for most use cases. The pcre2 engine is generally useful when
    you want to use features such as look-around or backreferences. auto
    will dynamically choose between supported regex engines depending on
    the features used in a pattern on a best effort basis.

    Note that the pcre2 engine is an optional ripgrep feature. If PCRE2
    wasn't included in your build of ripgrep, then using this flag will
    result in ripgrep printing an error message and exiting.

    This overrides previous uses of the -P/--pcre2 and --auto-hybrid-regex
    flags.

-F, --fixed-strings
    Treat all patterns as literals instead of as regular expressions. When
    this flag is used, special regular expression meta characters such as
    .(){}*+ should not need be escaped.

    This flag can be disabled with --no-fixed-strings.

-i, --ignore-case
    When this flag is provided, all patterns will be searched case
    insensitively. The case insensitivity rules used by ripgrep's default
    regex engine conform to Unicode's "simple" case folding rules.

    This is a global option that applies to all patterns given to ripgrep.
    Individual patterns can still be matched case sensitively by using
    inline regex flags. For example, (?-i)abc will match abc case
    sensitively even when this flag is used.

    This flag overrides -s/--case-sensitive and -S/--smart-case.

-v, --invert-match
    This flag inverts matching. That is, instead of printing lines that
    match, ripgrep will print lines that don't match.

    Note that this only inverts line-by-line matching. For example,
    combining this flag with -l/--files-with-matches will emit files that
    contain any lines that do not match the patterns given. That's not the
    same as, for example, --files-without-match, which will emit files that
    do not contain any matching lines.

    This flag can be disabled with --no-invert-match.

-x, --line-regexp
    When enabled, ripgrep will only show matches surrounded by line
    boundaries. This is equivalent to surrounding every pattern with ^ and
    $. In other words, this only prints lines where the entire line
    participates in a match.

    This overrides the -w/--word-regexp flag.

-m NUM, --max-count=NUM
    Limit the number of matching lines per file searched to NUM.

    Note that 0 is a legal value but not likely to be useful. When used,
    ripgrep won't search anything.

--mmap
    When enabled, ripgrep will search using memory maps when possible. This
    is enabled by default when ripgrep thinks it will be faster.

    Memory map searching cannot be used in all circumstances. For example,
    when searching virtual files or streams likes stdin. In such cases,
    memory maps will not be used even when this flag is enabled.

    Note that ripgrep may abort unexpectedly when memory maps are used if
    it searches a file that is simultaneously truncated. Users can opt out
    of this possibility by disabling memory maps.

    This flag can be disabled with --no-mmap.

-U, --multiline
    This flag enable searching across multiple lines.

    When multiline mode is enabled, ripgrep will lift the restriction that
    a match cannot include a line terminator. For example, when multiline
    mode is not enabled (the default), then the regex \p{any} will match
    any Unicode codepoint other than \n. Similarly, the regex \n is
    explicitly forbidden, and if you try to use it, ripgrep will return an
    error. However, when multiline mode is enabled, \p{any} will match any
    Unicode codepoint, including \n, and regexes like \n are permitted.

    An important caveat is that multiline mode does not change the match
    semantics of .. Namely, in most regex matchers, a . will by default
    match any character other than \n, and this is true in ripgrep as well.
    In order to make . match \n, you must enable the "dot all" flag inside
    the regex. For example, both (?s). and (?s:.) have the same semantics,
    where . will match any character, including \n. Alternatively, the
    --multiline-dotall flag may be passed to make the "dot all" behavior
    the default. This flag only applies when multiline search is enabled.

    There is no limit on the number of the lines that a single match can
    span.

    WARNING: Because of how the underlying regex engine works, multiline
    searches may be slower than normal line-oriented searches, and they may
    also use more memory. In particular, when multiline mode is enabled,
    ripgrep requires that each file it searches is laid out contiguously in
    memory (either by reading it onto the heap or by memory-mapping it).
    Things that cannot be memory-mapped (such as stdin) will be consumed
    until EOF before searching can begin. In general, ripgrep will only do
    these things when necessary. Specifically, if the -U/--multiline flag
    is provided but the regex does not contain patterns that would match \n
    characters, then ripgrep will automatically avoid reading each file
    into memory before searching it. Nevertheless, if you only care about
    matches spanning at most one line, then it is always better to disable
    multiline mode.

    This overrides the --stop-on-nonmatch flag.

    This flag can be disabled with --no-multiline.

--multiline-dotall
    This flag enables "dot all" mode in all regex patterns. This causes .
    to match line terminators when multiline searching is enabled. This
    flag has no effect if multiline searching isn't enabled with the
    -U/--multiline flag.

    Normally, a . will match any character except line terminators. While
    this behavior typically isn't relevant for line-oriented matching
    (since matches can span at most one line), this can be useful when
    searching with the -U/--multiline flag. By default, multiline mode runs
    without "dot all" mode enabled.

    This flag is generally intended to be used in an alias or your ripgrep
    config file if you prefer "dot all" semantics by default. Note that
    regardless of whether this flag is used, "dot all" semantics can still
    be controlled via inline flags in the regex pattern itself, e.g.,
    (?s:.) always enables "dot all" whereas (?-s:.) always disables "dot
    all". Moreover, you can use character classes like \p{any} to match any
    Unicode codepoint regardless of whether "dot all" mode is enabled or
    not.

    This flag can be disabled with --no-multiline-dotall.

--no-unicode
    This flag disables Unicode mode for all patterns given to ripgrep.

    By default, ripgrep will enable "Unicode mode" in all of its regexes.
    This has a number of consequences:

    ΓÇó . will only match valid UTF-8 encoded Unicode scalar values.

    ΓÇó Classes like \w, \s, \d are all Unicode aware and much bigger than
    their ASCII only versions.

    ΓÇó Case insensitive matching will use Unicode case folding.

    ΓÇó A large array of classes like \p{Emoji} are available. (Although the
    specific set of classes available varies based on the regex engine. In
    general, the default regex engine has more classes available to it.)

    ΓÇó Word boundaries (\b and \B) use the Unicode definition of a word
    character.

    In some cases it can be desirable to turn these things off. This flag
    will do exactly that. For example, Unicode mode can sometimes have a
    negative impact on performance, especially when things like \w are used
    frequently (including via bounded repetitions like \w{100}) when only
    their ASCII interpretation is needed.

    This flag can be disabled with --unicode.

--null-data
    Enabling this flag causes ripgrep to use NUL as a line terminator
    instead of the default of \n.

    This is useful when searching large binary files that would otherwise
    have very long lines if \n were used as the line terminator. In
    particular, ripgrep requires that, at a minimum, each line must fit
    into memory. Using NUL instead can be a useful stopgap to keep memory
    requirements low and avoid OOM (out of memory) conditions.

    This is also useful for processing NUL delimited data, such as that
    emitted when using ripgrep's -0/--null flag or find's --print0 flag.

    Using this flag implies -a/--text. It also overrides --crlf.

-P, --pcre2
    When this flag is present, ripgrep will use the PCRE2 regex engine
    instead of its default regex engine.

    This is generally useful when you want to use features such as
    look-around or backreferences.

    Using this flag is the same as passing --engine=pcre2. Users may
    instead elect to use --engine=auto to ask ripgrep to automatically
    select the right regex engine based on the patterns given. This flag
    and the --engine flag override one another.

    Note that PCRE2 is an optional ripgrep feature. If PCRE2 wasn't
    included in your build of ripgrep, then using this flag will result in
    ripgrep printing an error message and exiting. PCRE2 may also have
    worse user experience in some cases, since it has fewer introspection
    APIs than ripgrep's default regex engine. For example, if you use a \n
    in a PCRE2 regex without the -U/--multiline flag, then ripgrep will
    silently fail to match anything instead of reporting an error
    immediately (like it does with the default regex engine).

    This flag can be disabled with --no-pcre2.

--regex-size-limit=NUM+SUFFIX?
    The size limit of the compiled regex, where the compiled regex
    generally corresponds to a single object in memory that can match all
    of the patterns provided to ripgrep. The default limit is generous
    enough that most reasonable patterns (or even a small number of them)
    should fit.

    This useful to change when you explicitly want to let ripgrep spend
    potentially much more time and/or memory building a regex matcher.

    The input format accepts suffixes of K, M or G which correspond to
    kilobytes, megabytes and gigabytes, respectively. If no suffix is
    provided the input is treated as bytes.

-S, --smart-case
    This flag instructs ripgrep to searches case insensitively if the
    pattern is all lowercase. Otherwise, ripgrep will search case
    sensitively.

    A pattern is considered all lowercase if both of the following rules
    hold:

    ΓÇó First, the pattern contains at least one literal character. For
    example, a\w contains a literal (a) but just \w does not.

    ΓÇó Second, of the literals in the pattern, none of them are considered
    to be uppercase according to Unicode. For example, foo\pL has no
    uppercase literals but Foo\pL does.

    This overrides the -s/--case-sensitive and -i/--ignore-case flags.

--stop-on-nonmatch
    Enabling this option will cause ripgrep to stop reading a file once it
    encounters a non-matching line after it has encountered a matching
    line. This is useful if it is expected that all matches in a given file
    will be on sequential lines, for example due to the lines being sorted.

    This overrides the -U/--multiline flag.

-a, --text
    This flag instructs ripgrep to search binary files as if they were
    text. When this flag is present, ripgrep's binary file detection is
    disabled. This means that when a binary file is searched, its contents
    may be printed if there is a match. This may cause escape codes to be
    printed that alter the behavior of your terminal.

    When binary file detection is enabled, it is imperfect. In general, it
    uses a simple heuristic. If a NUL byte is seen during search, then the
    file is considered binary and searching stops (unless this flag is
    present). Alternatively, if the --binary flag is used, then ripgrep
    will only quit when it sees a NUL byte after it sees a match (or
    searches the entire file).

    This flag overrides the --binary flag.

    This flag can be disabled with --no-text.

-j NUM, --threads=NUM
    This flag sets the approximate number of threads to use. A value of 0
    (which is the default) causes ripgrep to choose the thread count using
    heuristics.

-w, --word-regexp
    When enabled, ripgrep will only show matches surrounded by word
    boundaries. This is equivalent to surrounding every pattern with
    \b{start-half} and \b{end-half}.

    This overrides the -x/--line-regexp flag.

--auto-hybrid-regex
    DEPRECATED. Use --engine instead.

    When this flag is used, ripgrep will dynamically choose between
    supported regex engines depending on the features used in a pattern.
    When ripgrep chooses a regex engine, it applies that choice for every
    regex provided to ripgrep (e.g., via multiple -e/--regexp or -f/--file
    flags).

    As an example of how this flag might behave, ripgrep will attempt to
    use its default finite automata based regex engine whenever the pattern
    can be successfully compiled with that regex engine. If PCRE2 is
    enabled and if the pattern given could not be compiled with the default
    regex engine, then PCRE2 will be automatically used for searching. If
    PCRE2 isn't available, then this flag has no effect because there is
    only one regex engine to choose from.

    In the future, ripgrep may adjust its heuristics for how it decides
    which regex engine to use. In general, the heuristics will be limited
    to a static analysis of the patterns, and not to any specific runtime
    behavior observed while searching files.

    The primary downside of using this flag is that it may not always be
    obvious which regex engine ripgrep uses, and thus, the match semantics
    or performance profile of ripgrep may subtly and unexpectedly change.
    However, in many cases, all regex engines will agree on what
    constitutes a match and it can be nice to transparently support more
    advanced regex features like look-around and backreferences without
    explicitly needing to enable them.

    This flag can be disabled with --no-auto-hybrid-regex.

--no-pcre2-unicode
    DEPRECATED. Use --no-unicode instead.

    Note that Unicode mode is enabled by default.

    This flag can be disabled with --pcre2-unicode.
FILTER OPTIONS: --binary Enabling this flag will cause ripgrep to search binary files. By default, ripgrep attempts to automatically skip binary files in order to improve the relevance of results and make the search faster.
    Binary files are heuristically detected based on whether they contain a
    NUL byte or not. By default (without this flag set), once a NUL: byte
    is seen, ripgrep will stop searching the file. Usually, NUL bytes occur
    in the beginning of most binary files. If a NUL byte occurs after a
    match, then ripgrep will not print the match, stop searching that file,
    and emit a warning that some matches are being suppressed.

    In contrast, when this flag is provided, ripgrep will continue
    searching a file even if a NUL byte is found. In particular, if a NUL
    byte is found then ripgrep will continue searching until either a match
    is found or the end of the file is reached, whichever comes sooner. If
    a match is found, then ripgrep will stop and print a warning saying
    that the search stopped prematurely.

    If you want ripgrep to search a file without any special NUL byte
    handling at all (and potentially print binary data to stdout), then you
    should use the -a/--text flag.

    The --binary flag is a flag for controlling ripgrep's automatic
    filtering mechanism. As such, it does not need to be used when
    searching a file explicitly or when searching stdin. That is, it is
    only applicable when recursively searching a directory.

    When the -u/--unrestricted flag is provided for a third time, then this
    flag is automatically enabled.

    This flag overrides the -a/--text flag.

    This flag can be disabled with --no-binary.

-L, --follow
    This flag instructs ripgrep to follow symbolic links while traversing
    directories. This behavior is disabled by default. Note that ripgrep
    will check for symbolic link loops and report errors if it finds one.
    ripgrep will also report errors for broken links. To suppress error
    messages, use the --no-messages flag.

    This flag can be disabled with --no-follow.

-g GLOB, --glob=GLOB
    Include or exclude files and directories for searching that match the
    given glob. This always overrides any other ignore logic. Multiple glob
    flags may be used. Globbing rules match .gitignore globs. Precede a
    glob with a ! to exclude it. If multiple globs match a file or
    directory, the glob given later in the command line takes precedence.

    As an extension, globs support specifying alternatives: "-g'"ab{c,d}*'
    is equivalent to "-g""abc""-g"abd. Empty alternatives like "-g'"ab{,c}'
    are not currently supported. Note that this syntax extension is also
    currently enabled in gitignore files, even though this syntax isn't
    supported by git itself. ripgrep may disable this syntax extension in
    gitignore files, but it will always remain available via the -g/--glob
    flag.

    When this flag is set, every file and directory is applied to it to
    test for a match. For example, if you only want to search in a
    particular directory foo, then "-g"foo is incorrect because foo/bar
    does not match the glob foo. Instead, you should use "-g'"foo/**'.

--glob-case-insensitive
    Process all glob patterns given with the -g/--glob flag case
    insensitively. This effectively treats -g/--glob as --iglob.

    This flag can be disabled with --no-glob-case-insensitive.

-., --hidden
    Search hidden files and directories. By default, hidden files and
    directories are skipped. Note that if a hidden file or a directory is
    whitelisted in an ignore file, then it will be searched even if this
    flag isn't provided. Similarly if a hidden file or directory is given
    explicitly as an argument to ripgrep.

    A file or directory is considered hidden if its base name starts with a
    dot character (.). On operating systems which support a "hidden" file
    attribute, like Windows, files with this attribute are also considered
    hidden.

    This flag can be disabled with --no-hidden.

--iglob=GLOB
    Include or exclude files and directories for searching that match the
    given glob. This always overrides any other ignore logic. Multiple glob
    flags may be used. Globbing rules match .gitignore globs. Precede a
    glob with a ! to exclude it. If multiple globs match a file or
    directory, the glob given later in the command line takes precedence.
    Globs used via this flag are matched case insensitively.

--ignore-file=PATH
    Specifies a path to one or more gitignore formatted rules files. These
    patterns are applied after the patterns found in .gitignore, .rgignore
    and .ignore are applied and are matched relative to the current working
    directory. Multiple additional ignore files can be specified by using
    this flag repeatedly. When specifying multiple ignore files, earlier
    files have lower precedence than later files.

    If you are looking for a way to include or exclude files and
    directories directly on the command line, then use -g/--glob instead.

--ignore-file-case-insensitive
    Process ignore files (.gitignore, .ignore, etc.) case insensitively.
    Note that this comes with a performance penalty and is most useful on
    case insensitive file systems (such as Windows).

    This flag can be disabled with --no-ignore-file-case-insensitive.

-d NUM, --max-depth=NUM
    This flag limits the depth of directory traversal to NUM levels beyond
    the paths given. A value of 0 only searches the explicitly given paths
    themselves.

    For example, rg --max-depth 0 dir/ is a no-op because dir/ will not be
    descended into. rg --max-depth 1 dir/ will search only the direct
    children of dir.

    An alternative spelling for this flag is --maxdepth.

--max-filesize=NUM+SUFFIX?
    Ignore files larger than NUM in size. This does not apply to
    directories.

    The input format accepts suffixes of K, M or G which correspond to
    kilobytes, megabytes and gigabytes, respectively. If no suffix is
    provided the input is treated as bytes.

    Examples: --max-filesize 50K or --max-filesize 80M.

--no-ignore
    When set, ignore files such as .gitignore, .ignore and .rgignore will
    not be respected. This implies --no-ignore-dot, --no-ignore-exclude,
    --no-ignore-global, --no-ignore-parent and --no-ignore-vcs.

    This does not imply --no-ignore-files, since --ignore-file is specified
    explicitly as a command line argument.

    When given only once, the -u/--unrestricted flag is identical in
    behavior to this flag and can be considered an alias. However,
    subsequent -u/--unrestricted flags have additional effects.

    This flag can be disabled with --ignore.

--no-ignore-dot
    Don't respect filter rules from .ignore or .rgignore files.

    This does not impact whether ripgrep will ignore files and directories
    whose names begin with a dot. For that, see the -./--hidden flag. This
    flag also does not impact whether filter rules from .gitignore files
    are respected.

    This flag can be disabled with --ignore-dot.

--no-ignore-exclude
    Don't respect filter rules from files that are manually configured for
    the repository. For example, this includes git's .git/info/exclude.

    This flag can be disabled with --ignore-exclude.

--no-ignore-files
    When set, any --ignore-file flags, even ones that come after this flag,
    are ignored.

    This flag can be disabled with --ignore-files.

--no-ignore-global
    Don't respect filter rules from ignore files that come from "global"
    sources such as git's core.excludesFile configuration option (which
    defaults to $HOME/.config/git/ignore).

    This flag can be disabled with --ignore-global.

--no-ignore-parent
    When this flag is set, filter rules from ignore files found in parent
    directories are not respected. By default, ripgrep will ascend the
    parent directories of the current working directory to look for any
    applicable ignore files that should be applied. In some cases this may
    not be desirable.

    This flag can be disabled with --ignore-parent.

--no-ignore-vcs
    When given, filter rules from source control ignore files (e.g.,
    .gitignore) are not respected. By default, ripgrep respects git's
    ignore rules for automatic filtering. In some cases, it may not be
    desirable to respect the source control's ignore rules and instead only
    respect rules in .ignore or .rgignore.

    This flag implies --no-ignore-parent for source control ignore files as
    well.

    This flag can be disabled with --ignore-vcs.

--no-require-git
    When this flag is given, source control ignore files such as .gitignore
    are respected even if no git repository is present.

    By default, ripgrep will only respect filter rules from source control
    ignore files when ripgrep detects that the search is executed inside a
    source control repository. For example, when a .git directory is
    observed.

    This flag relaxes the default restriction. For example, it might be
    useful when the contents of a git repository are stored or copied
    somewhere, but where the repository state is absent.

    This flag can be disabled with --require-git.

--one-file-system
    When enabled, ripgrep will not cross file system boundaries relative to
    where the search started from.

    Note that this applies to each path argument given to ripgrep. For
    example, in the command

        rg --one-file-system /foo/bar /quux/baz

    ripgrep will search both /foo/bar and /quux/baz even if they are on
    different file systems, but will not cross a file system boundary when
    traversing each path's directory tree.

    This is similar to find's -xdev or -mount flag.

    This flag can be disabled with --no-one-file-system.

-t TYPE, --type=TYPE
    This flag limits ripgrep to searching files matching TYPE. Multiple
    -t/--type flags may be provided.

    This flag supports the special value all, which will behave as if
    -t/--type was provided for every file type supported by ripgrep
    (including any custom file types). The end result is that --type=all
    causes ripgrep to search in "whitelist" mode, where it will only search
    files it recognizes via its type definitions.

    Note that this flag has lower precedence than both the -g/--glob flag
    and any rules found in ignore files.

    To see the list of available file types, use the --type-list flag.

-T TYPE, --type-not=TYPE
    Do not search files matching TYPE. Multiple -T/--type-not flags may be
    provided. Use the --type-list flag to list all available types.

    This flag supports the special value all, which will behave as if
    -T/--type-not was provided for every file type supported by ripgrep
    (including any custom file types). The end result is that
    --type-not=all causes ripgrep to search in "blacklist" mode, where it
    will only search files that are unrecognized by its type definitions.

    To see the list of available file types, use the --type-list flag.

--type-add=TYPESPEC
    This flag adds a new glob for a particular file type. Only one glob can
    be added at a time. Multiple --type-add flags can be provided. Unless
    --type-clear is used, globs are added to any existing globs defined
    inside of ripgrep.

    Note that this must be passed to every invocation of ripgrep. Type
    settings are not persisted. See CONFIGURATION FILES for a workaround.

    Example:

        rg --type-add 'foo:*.foo' -tfoo PATTERN

    This flag can also be used to include rules from other types with the
    special include directive. The include directive permits specifying one
    or more other type names (separated by a comma) that have been defined
    and its rules will automatically be imported into the type specified.
    For example, to create a type called src that matches C++, Python and
    Markdown files, one can use:

        --type-add 'src:include:cpp,py,md'

    Additional glob rules can still be added to the src type by using this
    flag again:

        --type-add 'src:include:cpp,py,md' --type-add 'src:*.foo'

    Note that type names must consist only of Unicode letters or numbers.
    Punctuation characters are not allowed.

--type-clear=TYPE
    Clear the file type globs previously defined for TYPE. This clears any
    previously defined globs for the TYPE, but globs can be added after
    this flag.

    Note that this must be passed to every invocation of ripgrep. Type
    settings are not persisted. See CONFIGURATION FILES for a workaround.

-u, --unrestricted
    This flag reduces the level of "smart" filtering. Repeated uses (up to
    3) reduces the filtering even more. When repeated three times, ripgrep
    will search every file in a directory tree.

    A single -u/--unrestricted flag is equivalent to --no-ignore. Two
    -u/--unrestricted flags is equivalent to --no-ignore -./--hidden. Three
    -u/--unrestricted flags is equivalent to --no-ignore -./--hidden
    --binary.

    The only filtering ripgrep still does when -uuu is given is to skip
    symbolic links and to avoid printing matches from binary files.
    Symbolic links can be followed via the -L/--follow flag, and binary
    files can be treated as text files via the -a/--text flag.
OUTPUT OPTIONS: -A NUM, --after-context=NUM Show NUM lines after each match.
    This overrides the --passthru flag and partially overrides the
    -C/--context flag.

-B NUM, --before-context=NUM
    Show NUM lines before each match.

    This overrides the --passthru flag and partially overrides the
    -C/--context flag.

--block-buffered
    When enabled, ripgrep will use block buffering. That is, whenever a
    matching line is found, it will be written to an in-memory buffer and
    will not be written to stdout until the buffer reaches a certain size.
    This is the default when ripgrep's stdout is redirected to a pipeline
    or a file. When ripgrep's stdout is connected to a tty, line buffering
    will be used by default. Forcing block buffering can be useful when
    dumping a large amount of contents to a tty.

    This overrides the --line-buffered flag.

    This flag can be disabled with --no-block-buffered.

-b, --byte-offset
    Print the 0-based byte offset within the input file before each line of
    output. If -o/--only-matching is specified, print the offset of the
    matched text itself.

    If ripgrep does transcoding, then the byte offset is in terms of the
    result of transcoding and not the original data. This applies similarly
    to other transformations on the data, such as decompression or a --pre
    filter.

    This flag can be disabled with --no-byte-offset.

--color=WHEN
    This flag controls when to use colors. The default setting is auto,
    which means ripgrep will try to guess when to use colors. For example,
    if ripgrep is printing to a tty, then it will use colors, but if it is
    redirected to a file or a pipe, then it will suppress color output.

    ripgrep will suppress color output by default in some other
    circumstances as well. These include, but are not limited to:

    ΓÇó When the TERM environment variable is not set or set to dumb.

    ΓÇó When the NO_COLOR environment variable is set (regardless of value).

    ΓÇó When flags that imply no use for colors are given. For example,
    --vimgrep and --json.

    The possible values for this flag are:

    never: Colors will never be used.

    auto: The default. ripgrep tries to be smart.

    always: Colors will always be used regardless of where output is sent.

    ansi: Like 'always', but emits ANSI escapes (even in a Windows
    console).

    This flag also controls whether hyperlinks are emitted. For example,
    when a hyperlink format is specified, hyperlinks won't be used when
    color is suppressed. If one wants to emit hyperlinks but no colors,
    then one must use the --colors flag to manually set all color styles to
    none:

        --colors 'path:none' \
        --colors 'line:none' \
        --colors 'column:none' \
        --colors 'match:none'

--colors=COLOR_SPEC
    This flag specifies color settings for use in the output. This flag may
    be provided multiple times. Settings are applied iteratively.
    Pre-existing color labels are limited to one of eight choices: red,
    blue, green, cyan, magenta, yellow, white and black. Styles are limited
    to nobold, bold, nointense, intense, nounderline or underline.

    The format of the flag is {type}:{attribute}:{value}. type should be
    one of path, line, column or match. attribute can be fg, bg or style.
    value is either a color (for fg and bg) or a text style. A special
    format, {type}:none, will clear all color settings for type.

    For example, the following command will change the match color to
    magenta and the background color for line numbers to yellow:

        rg --colors 'match:fg:magenta' --colors 'line:bg:yellow'

    Extended colors can be used for value when the tty supports ANSI color
    sequences. These are specified as either x (256-color) or x,x,x (24-bit
    truecolor) where x is a number between 0 and 255 inclusive. x may be
    given as a normal decimal number or a hexadecimal number, which is
    prefixed by 0x.

    For example, the following command will change the match background
    color to that represented by the rgb value (0,128,255):

        rg --colors 'match:bg:0,128,255'

    or, equivalently,

        rg --colors 'match:bg:0x0,0x80,0xFF'

    Note that the intense and nointense styles will have no effect when
    used alongside these extended color codes.

--column
    Show column numbers (1-based). This only shows the column numbers for
    the first match on each line. This does not try to account for Unicode.
    One byte is equal to one column. This implies -n/--line-number.

    When -o/--only-matching is used, then the column numbers written
    correspond to the start of each match.

    This flag can be disabled with --no-column.

-C NUM, --context=NUM
    Show NUM lines before and after each match. This is equivalent to
    providing both the -B/--before-context and -A/--after-context flags
    with the same value.

    This overrides the --passthru flag. The -A/--after-context and
    -B/--before-context flags both partially override this flag, regardless
    of the order. For example, -A2 -C1 is equivalent to -A2 -B1.

--context-separator=SEPARATOR
    The string used to separate non-contiguous context lines in the output.
    This is only used when one of the context flags is used (that is,
    -A/--after-context, -B/--before-context or -C/--context). Escape
    sequences like \x7F or \t may be used. The default value is --.

    When the context separator is set to an empty string, then a line break
    is still inserted. To completely disable context separators, use the
    --no-context-separator flag.

--field-context-separator=SEPARATOR
    Set the field context separator. This separator is only used when
    printing contextual lines. It is used to delimit file paths, line
    numbers, columns and the contextual line itself. The separator may be
    any number of bytes, including zero. Escape sequences like \x7F or \t
    may be used.

    The - character is the default value.

--field-match-separator=SEPARATOR
    Set the field match separator. This separator is only used when
    printing matching lines. It is used to delimit file paths, line
    numbers, columns and the matching line itself. The separator may be any
    number of bytes, including zero. Escape sequences like \x7F or \t may
    be used.

    The : character is the default value.

--heading
    This flag prints the file path above clusters of matches from each file
    instead of printing the file path as a prefix for each matched line.

    This is the default mode when printing to a tty.

    When stdout is not a tty, then ripgrep will default to the standard
    grep-like format. One can force this format in Unix-like environments
    by piping the output of ripgrep to cat. For example, rg foo | cat.

    This flag can be disabled with --no-heading.

-h, --help
    This flag prints the help output for ripgrep.

    Unlike most other flags, the behavior of the short flag, -h, and the
    long flag, --help, is different. The short flag will show a condensed
    help output while the long flag will show a verbose help output. The
    verbose help output has complete documentation, where as the condensed
    help output will show only a single line for every flag.

--hostname-bin=COMMAND
    This flag controls how ripgrep determines this system's hostname. The
    flag's value should correspond to an executable (either a path or
    something that can be found via your system's PATH environment
    variable). When set, ripgrep will run this executable, with no
    arguments, and treat its output (with leading and trailing whitespace
    stripped) as your system's hostname.

    When not set (the default, or the empty string), ripgrep will try to
    automatically detect your system's hostname. On Unix, this corresponds
    to calling gethostname. On Windows, this corresponds to calling
    GetComputerNameExW to fetch the system's "physical DNS hostname."

    ripgrep uses your system's hostname for producing hyperlinks.

--hyperlink-format=FORMAT
    Set the format of hyperlinks to use when printing results. Hyperlinks
    make certain elements of ripgrep's output, such as file paths,
    clickable. This generally only works in terminal emulators that support
    OSC-8 hyperlinks. For example, the format file://{host}{path} will emit
    an RFC 8089 hyperlink. To see the format that ripgrep is using, pass
    the --debug flag.

    Alternatively, a format string may correspond to one of the following
    aliases: default, none, file, grep+, kitty, macvim, textmate, vscode,
    vscode-insiders, vscodium. The alias will be replaced with a format
    string that is intended to work for the corresponding application.

    The following variables are available in the format string:

    {path}: Required. This is replaced with a path to a matching file. The
    path is guaranteed to be absolute and percent encoded such that it is
    valid to put into a URI. Note that a path is guaranteed to start with a
    /.

    {host}: Optional. This is replaced with your system's hostname. On
    Unix, this corresponds to calling gethostname. On Windows, this
    corresponds to calling GetComputerNameExW to fetch the system's
    "physical DNS hostname." Alternatively, if --hostname-bin was provided,
    then the hostname returned from the output of that program will be
    returned. If no hostname could be found, then this variable is replaced
    with the empty string.

    {line}: Optional. If appropriate, this is replaced with the line number
    of a match. If no line number is available (for example, if
    --no-line-number was given), then it is automatically replaced with the
    value 1.

    {column}: Optional, but requires the presence of {line}. If
    appropriate, this is replaced with the column number of a match. If no
    column number is available (for example, if --no-column was given),
    then it is automatically replaced with the value 1.

    {wslprefix}: Optional. This is a special value that is set to
    wsl$/WSL_DISTRO_NAME, where WSL_DISTRO_NAME corresponds to the value of
    the equivalent environment variable. If the system is not Unix or if
    the WSL_DISTRO_NAME environment variable is not set, then this is
    replaced with the empty string.

    A format string may be empty. An empty format string is equivalent to
    the none alias. In this case, hyperlinks will be disabled.

    At present, ripgrep does not enable hyperlinks by default. Users must
    opt into them. If you aren't sure what format to use, try default.

    Like colors, when ripgrep detects that stdout is not connected to a
    tty, then hyperlinks are automatically disabled, regardless of the
    value of this flag. Users can pass --color=always to forcefully emit
    hyperlinks.

    Note that hyperlinks are only written when a path is also in the output
    and colors are enabled. To write hyperlinks without colors, you'll need
    to configure ripgrep to not colorize anything without actually
    disabling all ANSI escape codes completely:

        --colors 'path:none' \
        --colors 'line:none' \
        --colors 'column:none' \
        --colors 'match:none'

    ripgrep works this way because it treats the --color flag as a proxy
    for whether ANSI escape codes should be used at all. This means that
    environment variables like NO_COLOR=1 and TERM=dumb not only disable
    colors, but hyperlinks as well. Similarly, colors and hyperlinks are
    disabled when ripgrep is not writing to a tty. (Unless one forces the
    issue by setting --color=always.)

    If you're searching a file directly, for example:

        rg foo path/to/file

    then hyperlinks will not be emitted since the path given does not
    appear in the output. To make the path appear, and thus also a
    hyperlink, use the -H/--with-filename flag.

    For more information on hyperlinks in terminal emulators, see:
    https://gist.github.com/egmontkob/eb114294efbcd5adb1944c9f3cb5feda

--include-zero
    When used with -c/--count or --count-matches, this causes ripgrep to
    print the number of matches for each file even if there were zero
    matches. This is disabled by default but can be enabled to make ripgrep
    behave more like grep.

    This flag can be disabled with --no-include-zero.

--line-buffered
    When enabled, ripgrep will always use line buffering. That is, whenever
    a matching line is found, it will be flushed to stdout immediately.
    This is the default when ripgrep's stdout is connected to a tty, but
    otherwise, ripgrep will use block buffering, which is typically faster.
    This flag forces ripgrep to use line buffering even if it would
    otherwise use block buffering. This is typically useful in shell
    pipelines, for example:

        tail -f something.log | rg foo --line-buffered | rg bar

    This overrides the --block-buffered flag.

    This flag can be disabled with --no-line-buffered.

-n, --line-number
    Show line numbers (1-based).

    This is enabled by default when stdout is connected to a tty.

    This flag can be disabled by -N/--no-line-number.

-N, --no-line-number
    Suppress line numbers.

    Line numbers are off by default when stdout is not connected to a tty.

    Line numbers can be forcefully turned on by -n/--line-number.

-M NUM, --max-columns=NUM
    When given, ripgrep will omit lines longer than this limit in bytes.
    Instead of printing long lines, only the number of matches in that line
    is printed.

    When this flag is omitted or is set to 0, then it has no effect.

--max-columns-preview
    Prints a preview for lines exceeding the configured max column limit.

    When the -M/--max-columns flag is used, ripgrep will by default
    completely replace any line that is too long with a message indicating
    that a matching line was removed. When this flag is combined with
    -M/--max-columns, a preview of the line (corresponding to the limit
    size) is shown instead, where the part of the line exceeding the limit
    is not shown.

    If the -M/--max-columns flag is not set, then this has no effect.

    This flag can be disabled with --no-max-columns-preview.

-0, --null
    Whenever a file path is printed, follow it with a NUL byte. This
    includes printing file paths before matches, and when printing a list
    of matching files such as with -c/--count, -l/--files-with-matches and
    --files. This option is useful for use with xargs.

-o, --only-matching
    Print only the matched (non-empty) parts of a matching line, with each
    such part on a separate output line.

--path-separator=SEPARATOR
    Set the path separator to use when printing file paths. This defaults
    to your platform's path separator, which is / on Unix and \ on Windows.
    This flag is intended for overriding the default when the environment
    demands it (e.g., cygwin). A path separator is limited to a single
    byte.

    Setting this flag to an empty string reverts it to its default
    behavior. That is, the path separator is automatically chosen based on
    the environment.

--passthru
    Print both matching and non-matching lines.

    Another way to achieve a similar effect is by modifying your pattern to
    match the empty string. For example, if you are searching using rg foo,
    then using rg '^|foo' instead will emit every line in every file
    searched, but only occurrences of foo will be highlighted. This flag
    enables the same behavior without needing to modify the pattern.

    An alternative spelling for this flag is --passthrough.

    This overrides the -C/--context, -A/--after-context and
    -B/--before-context flags.

-p, --pretty
    This is a convenience alias for --color=always --heading --line-number.
    This flag is useful when you still want pretty output even if you're
    piping ripgrep to another program or file. For example: rg -p foo |
    less -R.

-q, --quiet
    Do not print anything to stdout. If a match is found in a file, then
    ripgrep will stop searching. This is useful when ripgrep is used only
    for its exit code (which will be an error code if no matches are
    found).

    When --files is used, ripgrep will stop finding files after finding the
    first file that does not match any ignore rules.

-r REPLACEMENT, --replace=REPLACEMENT
    Replaces every match with the text given when printing results. Neither
    this flag nor any other ripgrep flag will modify your files.

    Capture group indices (e.g., $5) and names (e.g., $foo) are supported
    in the replacement string. Capture group indices are numbered based on
    the position of the opening parenthesis of the group, where the
    leftmost such group is $1. The special $0 group corresponds to the
    entire match.

    The name of a group is formed by taking the longest string of letters,
    numbers and underscores (i.e. [_0-9A-Za-z]) after the $. For example,
    $1a will be replaced with the group named 1a, not the group at index 1.
    If the group's name contains characters that aren't letters, numbers or
    underscores, or you want to immediately follow the group with another
    string, the name should be put inside braces. For example, ${1}a will
    take the content of the group at index 1 and append a to the end of it.

    If an index or name does not refer to a valid capture group, it will be
    replaced with an empty string.

    In shells such as Bash and zsh, you should wrap the pattern in single
    quotes instead of double quotes. Otherwise, capture group indices will
    be replaced by expanded shell variables which will most likely be
    empty.

    To write a literal $, use $$.

    Note that the replacement by default replaces each match, and not the
    entire line. To replace the entire line, you should match the entire
    line.

    This flag can be used with the -o/--only-matching flag.

--sort=SORTBY
    This flag enables sorting of results in ascending order. The possible
    values for this flag are:

    none: (Default) Do not sort results. Fastest. Can be multi-threaded.

    path: Sort by file path. Always single-threaded. The order is
    determined by sorting files in each directory entry during traversal.
    This means that given the files a/b and a+, the latter will sort after
    the former even though + would normally sort before /.

    modified: Sort by the last modified time on a file. Always
    single-threaded.

    accessed: Sort by the last accessed time on a file. Always
    single-threaded.

    created: Sort by the creation time on a file. Always single-threaded.

    If the chosen (manually or by-default) sorting criteria isn't available
    on your system (for example, creation time is not available on ext4
    file systems), then ripgrep will attempt to detect this, print an error
    and exit without searching.

    To sort results in reverse or descending order, use the --sortr flag.
    Also, this flag overrides --sortr.

    Note that sorting results currently always forces ripgrep to abandon
    parallelism and run in a single thread.

--sortr=SORTBY
    This flag enables sorting of results in descending order. The possible
    values for this flag are:

    none: (Default) Do not sort results. Fastest. Can be multi-threaded.

    path: Sort by file path. Always single-threaded. The order is
    determined by sorting files in each directory entry during traversal.
    This means that given the files a/b and a+, the latter will sort before
    the former even though + would normally sort after / when doing a
    reverse lexicographic sort.

    modified: Sort by the last modified time on a file. Always
    single-threaded.

    accessed: Sort by the last accessed time on a file. Always
    single-threaded.

    created: Sort by the creation time on a file. Always single-threaded.

    If the chosen (manually or by-default) sorting criteria isn't available
    on your system (for example, creation time is not available on ext4
    file systems), then ripgrep will attempt to detect this, print an error
    and exit without searching.

    To sort results in ascending order, use the --sort flag. Also, this
    flag overrides --sort.

    Note that sorting results currently always forces ripgrep to abandon
    parallelism and run in a single thread.

--trim
    When set, all ASCII whitespace at the beginning of each line printed
    will be removed.

    This flag can be disabled with --no-trim.

--vimgrep
    This flag instructs ripgrep to print results with every match on its
    own line, including line numbers and column numbers.

    With this option, a line with more than one match will be printed in
    its entirety more than once. For that reason, the total amount of
    output as a result of this flag can be quadratic in the size of the
    input. For example, if the pattern matches every byte in an input file,
    then each line will be repeated for every byte matched. For this
    reason, users should only use this flag when there is no other choice.
    Editor integrations should prefer some other way of reading results
    from ripgrep, such as via the --json flag. One alternative to avoiding
    exorbitant memory usage is to force ripgrep into single threaded mode
    with the -j/--threads flag. Note though that this will not impact the
    total size of the output, just the heap memory that ripgrep will use.

-H, --with-filename
    This flag instructs ripgrep to print the file path for each matching
    line. This is the default when more than one file is searched. If
    --heading is enabled (the default when printing to a tty), the file
    path will be shown above clusters of matches from each file; otherwise,
    the file name will be shown as a prefix for each matched line.

    This flag overrides -I/--no-filename.

-I, --no-filename
    This flag instructs ripgrep to never print the file path with each
    matching line. This is the default when ripgrep is explicitly
    instructed to search one file or stdin.

    This flag overrides -H/--with-filename.

--sort-files
    DEPRECATED. Use --sort=path instead.

    This flag instructs ripgrep to sort search results by file path
    lexicographically in ascending order. Note that this currently disables
    all parallelism and runs search in a single thread.

    This flag overrides --sort and --sortr.

    This flag can be disabled with --no-sort-files.
OUTPUT MODES: -c, --count This flag suppresses normal output and shows the number of lines that match the given patterns for each file searched. Each file containing a match has its path and count printed on each line. Note that unless -U/--multiline is enabled, this reports the number of lines that match and not the total number of matches. In multiline mode, -c/--count is equivalent to --count-matches.
    If only one file is given to ripgrep, then only the count is printed if
    there is a match. The -H/--with-filename flag can be used to force
    printing the file path in this case. If you need a count to be printed
    regardless of whether there is a match, then use --include-zero.

    This overrides the --count-matches flag. Note that when -c/--count is
    combined with -o/--only-matching, then ripgrep behaves as if
    --count-matches was given.

--count-matches
    This flag suppresses normal output and shows the number of individual
    matches of the given patterns for each file searched. Each file
    containing matches has its path and match count printed on each line.
    Note that this reports the total number of individual matches and not
    the number of lines that match.

    If only one file is given to ripgrep, then only the count is printed if
    there is a match. The -H/--with-filename flag can be used to force
    printing the file path in this case.

    This overrides the -c/--count flag. Note that when -c/--count is
    combined with -o/--only-matching, then ripgrep behaves as if
    --count-matches was given.

-l, --files-with-matches
    Print only the paths with at least one match and suppress match
    contents.

    This overrides --files-without-match.

--files-without-match
    Print the paths that contain zero matches and suppress match contents.

    This overrides -l/--files-with-matches.

--json
    Enable printing results in a JSON Lines format.

    When this flag is provided, ripgrep will emit a sequence of messages,
    each encoded as a JSON object, where there are five different message
    types:

    begin: A message that indicates a file is being searched and contains
    at least one match.

    end: A message the indicates a file is done being searched. This
    message also include summary statistics about the search for a
    particular file.

    match: A message that indicates a match was found. This includes the
    text and offsets of the match.

    context: A message that indicates a contextual line was found. This
    includes the text of the line, along with any match information if the
    search was inverted.

    summary: The final message emitted by ripgrep that contains summary
    statistics about the search across all files.

    Since file paths or the contents of files are not guaranteed to be
    valid UTF-8 and JSON itself must be representable by a Unicode
    encoding, ripgrep will emit all data elements as objects with one of
    two keys: text or bytes. text is a normal JSON string when the data is
    valid UTF-8 while bytes is the base64 encoded contents of the data.

    The JSON Lines format is only supported for showing search results. It
    cannot be used with other flags that emit other types of output, such
    as --files, -l/--files-with-matches, --files-without-match, -c/--count
    or --count-matches. ripgrep will report an error if any of the
    aforementioned flags are used in concert with --json.

    Other flags that control aspects of the standard output such as
    -o/--only-matching, --heading, -r/--replace, -M/--max-columns, etc.,
    have no effect when --json is set. However, enabling JSON output will
    always implicitly and unconditionally enable --stats.

    A more complete description of the JSON format used can be found here:
    https://docs.rs/grep-printer/*/grep_printer/struct.JSON.html.

    This flag can be disabled with --no-json.
LOGGING OPTIONS: --debug Show debug messages. Please use this when filing a bug report.
    The --debug flag is generally useful for figuring out why ripgrep
    skipped searching a particular file. The debug messages should mention
    all files skipped and why they were skipped.

    To get even more debug output, use the --trace flag, which implies
    --debug along with additional trace data.

--no-ignore-messages
    When this flag is enabled, all error messages related to parsing ignore
    files are suppressed. By default, error messages are printed to stderr.
    In cases where these errors are expected, this flag can be used to
    avoid seeing the noise produced by the messages.

    This flag can be disabled with --ignore-messages.

--no-messages
    This flag suppresses some error messages. Specifically, messages
    related to the failed opening and reading of files. Error messages
    related to the syntax of the pattern are still shown.

    This flag can be disabled with --messages.

--stats
    When enabled, ripgrep will print aggregate statistics about the search.
    When this flag is present, ripgrep will print at least the following
    stats to stdout at the end of the search: number of matched lines,
    number of files with matches, number of files searched, and the time
    taken for the entire search to complete.

    This set of aggregate statistics may expand over time.

    This flag is always and implicitly enabled when --json is used.

    Note that this flag has no effect if --files, -l/--files-with-matches
    or --files-without-match is passed.

    This flag can be disabled with --no-stats.

--trace
    Show trace messages. This shows even more detail than the --debug flag.
    Generally, one should only use this if --debug doesn't emit the
    information you're looking for.
OTHER BEHAVIORS: --files Print each file that would be searched without actually performing the search. This is useful to determine whether a particular file is being searched or not.
    This overrides --type-list.

--generate=KIND
    This flag instructs ripgrep to generate some special kind of output
    identified by KIND and then quit without searching. KIND can be one of
    the following values:

    man: Generates a manual page for ripgrep in the roff format.

    complete-bash: Generates a completion script for the bash shell.

    complete-zsh: Generates a completion script for the zsh shell.

    complete-fish: Generates a completion script for the fish shell.

    complete-powershell: Generates a completion script for PowerShell.

    The output is written to stdout. The list above may expand over time.

--no-config
    When set, ripgrep will never read configuration files. When this flag
    is present, ripgrep will not respect the RIPGREP_CONFIG_PATH
    environment variable.

    If ripgrep ever grows a feature to automatically read configuration
    files in pre-defined locations, then this flag will also disable that
    behavior as well.

--pcre2-version
    When this flag is present, ripgrep will print the version of PCRE2 in
    use, along with other information, and then exit. If PCRE2 is not
    available, then ripgrep will print an error message and exit with an
    error code.

--type-list
    Show all supported file types and their corresponding globs. This takes
    any --type-add and --type-clear flags given into account. Each type is
    printed on its own line, followed by a : and then a comma-delimited
    list of globs for that type on the same line.

-V, --version
    This flag prints ripgrep's version. This also may print other relevant
    information, such as the presence of target specific optimizations and
    the git revision that this build of ripgrep was compiled from.
Search
-
Basic Search
rg "search_term" /path/to/directory
Searches for "search_term" in all files under the specified directory (recursive by default). -
Case-Insensitive Search
rg -i "search_term"
Ignores case distinctions (e.g., matches "Search_Term" or "SEARCH_TERM"). -
Case-Sensitive Search
rg -s "Search_Term"
Forces a case-sensitive match (default behavior if the query contains uppercase letters). -
Whole-Word Match
rg -w "word"
Matches "word" only when it appears as a full word (e.g., matches "word" but not "sword"). -
Search in Specific File Types
rg -t markdown "TODO"
Searches for "TODO" only in Markdown files (.md/.markdown). Use-t pyfor Python files, etc. -
Exclude Files/Directories
rg "term" --glob "!node_modules"
Excludes files innode_modulesfrom the search. Use--glob '*.log'to exclude.logfiles. -
Search Hidden Files
rg -u "hidden_term"
Includes hidden files and directories (e.g.,.config,.gitignore). -
Show Context Around Matches
rg -C 3 "error"
Displays 3 lines of context before and after each match. Use-A 2for 2 lines after or-B 1for 1 line before. -
List Matching Files Only
rg -l "pattern"
Prints only filenames containing the pattern (no actual match text). -
Invert Match (Exclude Lines)
rg -v "debug"
Shows lines that do not contain "debug". -
Multiline Search
rg -U "start.*\n.*end"
Enables multiline mode to match patterns across line breaks (e.g.,startandendon separate lines). -
Regular Expression Search
rg "^\d{3}-\d{4}"
Uses regex to find patterns like a phone number (e.g.,123-4567). -
Search and Replace (with Sed)
rg "old_text" -l | xargs sed -i 's/old_text/new_text/g'
Lists files containing "old_text" and replaces it with "new_text" usingsed. -
JSON Output
rg --json "error"
Outputs results in JSON format for programmatic processing. -
Ignore .gitignore Rules
rg --no-ignore "password"
Searches files ignored by.gitignore/.rgignore(e.g.,node_modules,.env). -
Search for Predefined Patterns
rg --type-add 'foo:*.{foo,bar}' --type foo 'pattern'
Defines a custom file typefooand searches for "pattern" in.foo/.barfiles. -
Limit Search Depth
rg --max-depth 2 "term"
Restricts recursion to 2 subdirectories deep. -
Follow Symbolic Links
rg -L "term"
Follows symlinks during the search. -
Count Matches
rg -c "warning"
Shows the count of matches per file. -
Line endings
rg "\.jpg$"
\. → Matches a literal dot (.).
jpg → Matches the string "jpg".
$ → Anchors the match to the end of the line. -
Containing numbers
rg "\d+"
\d → Matches any digit (0-9).
+ → Matches one or more occurrences of the preceding character (\d). -
Find email
rg "[a-zA-Z0-9._%+-]+@[a-zA-Z0-9.-]+.[a-zA-Z]{2,}"[a-zA-Z0-9._%+-]+ → Matches the username part (letters, numbers, and special characters). @ → Matches the "@" symbol. [a-zA-Z0-9.-]+ → Matches the domain name. \. → Matches a literal dot (.). [a-zA-Z]{2,} → Matches the top-level domain (at least two letters, like .com, . org). -
String followed by any character
rg "test.*"
test → Matches the string "test".
.* → Matches zero or more occurrences of any character. -
Exact character number match
rg "\b\w{5}\b"
\b → Matches a word boundary (ensures full-word match).
\w{5} → Matches exactly 5 word characters (letters, digits, underscore).
\b → Ensures the match ends at a word boundary. -
Characters other than a
rg "[^a]+"
[^a] → Matches any character except a.
+ → Matches one or more occurrences. -
Lines containing a number followed by a letter
rg "\d+[a-zA-Z]"
\d+ → Matches one or more digits.
[a-zA-Z] → Matches a letter (uppercase or lowercase). -
either or
rg -i -w "error|warning"
-i → Case-insensitive search (matches "ERROR", "Error", "error", etc.).
-w → Word match (ensures the search term is a whole word, not a part of another word like "terror" or "warnings").
"error|warning" → A regular expression (regex) that matches either "error" or "warning"
Common options for ripgrep
-
-i --ignore-case: When searching for a pattern, ignore case differences. That isrg -i fastmatchesfast,fASt,FAST, etc. -
-S --smart-case: This is similar to--ignore-case, but disables itself if the pattern contains any uppercase letters. Usually this flag is put into alias or a config file. -
-F --fixed-strings: Disable regular expression matching and treat the pattern as a literal string. -
-w --word-regexp: Require that all matches of the pattern be surrounded by word boundaries. That is, givenpattern, the--word-regexpflag will cause ripgrep to behave as ifpatternwere actually\b(?:pattern)\b. -
-c --count: Report a count of total matched lines. -
-l --files-with-matches: Only print the names of files that contain matches. -
--files-without-match: Only print the names of files that do not contain matches. -
--files: Print the files that ripgrep would search, but don't actually search them. -
-a --text: Search binary files as if they were plain text. -
-U --multiline: Permit matches to span multiple lines. -
-z --search-zip: Search compressed files (gzip, bzip2, lzma, xz, lz4, brotli, zstd). This is disabled by default. -
-C --context: Show the lines surrounding a match. -
--sort path: Force ripgrep to sort its output by file name. (This disables parallelism, so it might be slower.) -
-L --follow: Follow symbolic links while recursively searching. -
-M --max-columns: Limit the length of lines printed by ripgrep. -
--debug: Shows ripgrep's debug output. This is useful for understanding why a particular file might be ignored from search, or what kinds of configuration ripgrep is loading from the environment.
bat
A file previewer with syntax highlighting and git integration.
bat homepage
Install
winget install sharkdp.bat
winget install jftuga.less
less is a pager for text files that supports syntax highlighting.
You will need to install the Visual C++ Redistributable package.
Get shell completions by running bat --completion ps1
Usage
Display a single file on the terminal
bat README.md
Display multiple files at once
bat *.rs
Read from stdin, determine the syntax automatically (note, highlighting will only work if the syntax can be determined from the first line of the file, usually through a shebang such as #!/bin/sh)
curl -s https://sh.rustup.rs | bat
Read from stdin, specify the language explicitly
yaml2json .travis.yml | json_pp | bat -l json
Show and highlight non-printable characters:
bat -A 'c:\windows\system32\drivers\etc\hosts'
Use it as a cat replacement:
bat > note.md # quickly create a new file. Exit with Ctrl+C
bat header.md content.md footer.md > document.md # Concatenate (cat) files into one
bat -n main.rs # show line numbers (only)
Integration with other tools
fzf
You can use bat as a previewer for fzf. To do this, use bat --color=always option to force colorized output. You can also use --line-range option to restrict the load times for long files:
fzf --preview "bat --color=always --style=numbers --line-range=:500 {}"
For more information, see fzf's README.
find or fd
You can use the -exec option of find to preview all search results with bat:
find … -exec bat {} +
If you happen to use fd, you can use the -X/--exec-batch option to do the same:
fd … -X bat
bat can be combined with tail -f to continuously monitor a given file with syntax highlighting.
tail -f .\var\log\pacman.log | bat --paging=never -l log
Note that we have to switch off paging in order for this to work. We have also specified the syntax explicitly (-l log), as it can not be auto-detected in this case.
Git
You can combine bat with git show to view an older version of a given file with proper syntax highlighting:
git show v0.6.0:main.rs | bat -l rs
git diff
You can combine bat with git diff to view lines around code changes with proper syntax highlighting:
function batdiff() {
    git diff --name-only --relative --diff-filter=d | xargs bat --diff
}
clip
The line numbers and Git modification markers in the output of bat can make it hard to copy the contents of a file. To prevent this, you can call bat with the -p/--plain option or simply pipe the output into clip:
bat main.rs | clip
bat will detect that the output is being redirected and print the plain file contents.
Yazi
- Navigation
- Selection
- File operations
- Copy paths
- Filter files
- Find files
- Search files
- Sorting
- Multi-tab
Tabbed file manager with preview supporting numerous file types.
The install instructions are here. Don't forget to add the shell wrapper. Plugins are also available.
Add a shortcut ! to drop to the shell in current directory. Type exit to return to yazi. Add this keybinding to your keymap.toml file:
[[manager.prepend_keymap]]
on   = "!"
run  = 'shell "pwsh.exe" --block'
desc = "Open PowerShell here"
mpv for video playback is recommended. Edit yazi.toml accordingly.
[!TIP]
For all keybindings, see the default keymap.toml file.
Navigation
To navigate between files and directories you can use the arrow keys ←, ↓, ↑ and → or Vim-like keys such as h, j, k, l:
| Key binding | Alternate key | Action |
|---|---|---|
| k | ↑ | Move the cursor up |
| j | ↓ | Move the cursor down |
| l | → | Enter hovered directory |
| h | ← | Leave the current directory and into its parent |
Further navigation commands can be found in the table below.
| Key binding | Action |
|---|---|
| K | Seek up 5 units in the preview |
| J | Seek down 5 units in the preview |
| g ⇒ g | Move cursor to the top |
| G | Move cursor to the bottom |
| z | Jump to a directory using zoxide |
| Z | Jump to a directory or reveal a file using fzf |
Selection
To select files and directories, the following commands are available.
| Key binding | Action |
|---|---|
| Space | Toggle selection of hovered file/directory |
| v | Enter visual mode (selection mode) |
| V | Enter visual mode (unset mode) |
| Ctrl + a | Select all files |
| Ctrl + r | Inverse selection of all files |
| Esc | Cancel selection |
File operations
To interact with selected files/directories use any of the commands below.
| Key binding | Action |
|---|---|
| o | Open selected files |
| O | Open selected files interactively |
| Enter | Open selected files |
| Shift + Enter | Open selected files interactively (some terminals don't support it yet) |
| Tab | Show the file information |
| y | Yank selected files (copy) |
| x | Yank selected files (cut) |
| p | Paste yanked files |
| P | Paste yanked files (overwrite if the destination exists) |
| Y or X | Cancel the yank status |
| d | Trash selected files |
| D | Permanently delete selected files |
| a | Create a file (ends with / for directories) |
| r | Rename selected file(s) |
| . | Toggle the visibility of hidden files |
Further file operation commands can be found in the table below.
| Key binding | Action |
|---|---|
| ; | Run a shell command |
| : | Run a shell command (block until finishes) |
| - | Symlink the absolute path of yanked files |
| _ | Symlink the relative path of yanked files |
| Ctrl + - | Hardlink yanked files |
Copy paths
To copy paths, use any of the following commands below.
Observation: c ⇒ d indicates pressing the c key followed by pressing the d key.
| Key binding | Action |
|---|---|
| c ⇒ c | Copy the file path |
| c ⇒ d | Copy the directory path |
| c ⇒ f | Copy the filename |
| c ⇒ n | Copy the filename without extension |
Filter files
| Key binding | Action |
|---|---|
| f | Filter files |
Find files
| Key binding | Action |
|---|---|
| / | Find next file |
| ? | Find previous file |
| n | Go to the next found |
| N | Go to the previous found |
Search files
| Key binding | Action |
|---|---|
| s | Search files by name using fd |
| S | Search files by content using ripgrep |
| Ctrl + s | Cancel the ongoing search |
Sorting
To sort files/directories use the following commands.
Observation: , ⇒ a indicates pressing the , key followed by pressing the a key.
| Key binding | Action |
|---|---|
| , ⇒ m | Sort by modified time |
| , ⇒ M | Sort by modified time (reverse) |
| , ⇒ b | Sort by birth time |
| , ⇒ B | Sort by birth time (reverse) |
| , ⇒ e | Sort by file extension |
| , ⇒ E | Sort by file extension (reverse) |
| , ⇒ a | Sort alphabetically |
| , ⇒ A | Sort alphabetically (reverse) |
| , ⇒ n | Sort naturally |
| , ⇒ N | Sort naturally (reverse) |
| , ⇒ s | Sort by size |
| , ⇒ S | Sort by size (reverse) |
| , ⇒ r | Sort randomly |
Multi-tab
| Key binding | Action |
|---|---|
| t | Create a new tab with CWD |
| 1, 2, ..., 9 | Switch to the N-th tab |
| [ | Switch to the previous tab |
| ] | Switch to the next tab |
| { | Swap current tab with previous tab |
| } | Swap current tab with next tab |
| Ctrl + c | Close the current tab |
fd
Install
winget install sharkdp.fd
Usage
How to use
First, to get an overview of all available command line options, you can either run fd -h for a concise help message or fd --help for a more detailed version. Simple search
fd is designed to find entries in your filesystem. The most basic search you can perform is to run fd with a single argument: the search pattern. For example, assume that you want to find an old script of yours (the name included netflix):
fd netfl
Software/python/imdb-ratings/netflix-details.py
If called with just a single argument like this, fd searches the current directory recursively for any entries that contain the pattern netfl. Regular expression search
The search pattern is treated as a regular expression. Here, we search for entries that start with x and end with rc:
cd \etc
fd '^x.*rc$'
X11/xinit/xinitrc
X11/xinit/xserverrc
The regular expression syntax used by fd is documented here. Specifying the root directory
If we want to search a specific directory, it can be given as a second argument to fd:
fd passwd \etc
etc\default\passwd
etc\pam.d\passwd
etc\passwd
List all files, recursively
fd can be called with no arguments. This is very useful to get a quick overview of all entries in the current directory, recursively (similar to ls -R):
cd fd\tests
fd
testenv
testenv/mod.rs
tests.rs
If you want to use this functionality to list all files in a given directory, you have to use a catch-all pattern such as . or ^:
cd fd\tests
fd .
testenv
testenv/mod.rs
tests.rs
Searching for a particular file extension
Often, we are interested in all files of a particular type. This can be done with the -e (or --extension) option. Here, we search for all Markdown files in the fd repository:
cd fd
fd -e md
CONTRIBUTING.md
README.md
The -e option can be used in combination with a search pattern:
fd -e rs mod
src/fshelper/mod.rs
src/lscolors/mod.rs
tests/testenv/mod.rs
Searching for a particular file name
To find files with exactly the provided search pattern, use the -g (or --glob) option:
fd -g libc.so /usr
/usr/lib32/libc.so
/usr/lib/libc.so
Hidden and ignored files
By default, fd does not search hidden directories and does not show hidden files in the search results. To disable this behavior, we can use the -H (or --hidden) option:
fd pre-commit
fd -H pre-commit
.git/hooks/pre-commit.sample
If we work in a directory that is a Git repository (or includes Git repositories), fd does not search folders (and does not show files) that match one of the .gitignore patterns. To disable this behavior, we can use the -I (or --no-ignore) option:
fd num_cpu
fd -I num_cpu
target/debug/deps/libnum_cpus-f5ce7ef99006aa05.rlib
To really search all files and directories, simply combine the hidden and ignore features to show everything (-HI) or use -u/--unrestricted. Matching the full path
By default, fd only matches the filename of each file. However, using the --full-path or -p option, you can match against the full path.
fd -p -g '**/.git/config'
fd -p '.*/lesson-\d+/[a-z]+.(jpg|png)'
Command execution
Instead of just showing the search results, you often want to do something with them. fd provides two ways to execute external commands for each of your search results:
The -x/--exec option runs an external command for each of the search results (in parallel).
The -X/--exec-batch option launches the external command once, with all search results as arguments.
Examples
Recursively find all zip archives and unpack them:
fd -e zip -x unzip
If there are two such files, file1.zip and backup/file2.zip, this would execute unzip file1.zip and unzip backup/file2.zip. The two unzip processes run in parallel (if the files are found fast enough).
Find all *.h and *.cpp files and auto-format them inplace with clang-format -i:
fd -e h -e cpp -x clang-format -i
Note how the -i option to clang-format can be passed as a separate argument. This is why we put the -x option last.
Find all test_*.py files and open them in your favorite editor:
fd -g 'test_*.py' -X vim
Note that we use capital -X here to open a single vim instance. If there are two such files, test_basic.py and lib/test_advanced.py, this will run vim test_basic.py lib/test_advanced.py.
To see details like file permissions, owners, file sizes etc., you can tell fd to show them by running ls for each result:
fd … -X ls -lhd --color=always
This pattern is so useful that fd provides a shortcut. You can use the -l/--list-details option to execute ls in this way: fd … -l
The -X option is also useful when combining fd with ripgrep (rg) in order to search within a certain class of files, like all C++ source files:
fd -e cpp -e cxx -e h -e hpp -X rg 'std::cout <<'
Convert all *.jpg files to *.png files:
fd -e jpg -x convert {} {.}.png
Here, {} is a placeholder for the search result. {.} is the same, without the file extension. See below for more details on the placeholder syntax.
The terminal output of commands run from parallel threads using -x will not be interlaced or garbled, so fd -x can be used to rudimentarily parallelize a task run over many files. An example of this is calculating the checksum of each individual file within a directory.
fd -tf -x md5sum > file_checksums.txt
Placeholder syntax
The -x and -X options take a command template as a series of arguments (instead of a single string). If you want to add additional options to fd after the command template, you can terminate it with a ;.
The syntax for generating commands is similar to that of GNU Parallel:
{}: A placeholder token that will be replaced with the path of the search result (documents/images/party.jpg).
{.}: Like {}, but without the file extension (documents/images/party).
{/}: A placeholder that will be replaced by the basename of the search result (party.jpg).
{//}: The parent of the discovered path (documents/images).
{/.}: The basename, with the extension removed (party).
If you do not include a placeholder, fd automatically adds a {} at the end. Parallel vs. serial execution
For -x/--exec, you can control the number of parallel jobs by using the -j/--threads option. Use --threads=1 for serial execution. Excluding specific files or directories
Sometimes we want to ignore search results from a specific subdirectory. For example, we might want to search all hidden files and directories (-H) but exclude all matches from .git directories. We can use the -E (or --exclude) option for this. It takes an arbitrary glob pattern as an argument:
fd -H -E .git …
We can also use this to skip mounted directories:
fd -E /mnt/external-drive …
.. or to skip certain file types:
fd -E '*.bak' …
To make exclude-patterns like these permanent, you can create a .fdignore file. They work like .gitignore files, but are specific to fd. For example:
cat ~/.fdignore
/mnt/external-drive
*.bak
Note
fd also supports .ignore files that are used by other programs such as rg or ag.
If you want fd to ignore these patterns globally, you can put them in fd's global ignore file. This is usually located in ~/.config/fd/ignore in macOS or Linux, and %APPDATA%\fd\ignore in Windows.
You may wish to include .git/ in your fd/ignore file so that .git directories, and their contents are not included in output if you use the --hidden option. Deleting files
You can use fd to remove all files and directories that are matched by your search pattern. If you only want to remove files, you can use the --exec-batch/-X option to call rm. For example, to recursively remove all .DS_Store files, run:
fd -H '^\.DS_Store$' -tf -X rm
If you are unsure, always call fd without -X rm first. Alternatively, use rms "interactive" option:
fd -H '^\.DS_Store$' -tf -X rm -i
If you also want to remove a certain class of directories, you can use the same technique. You will have to use rms --recursive/-r flag to remove directories.
Note
There are scenarios where using fd … -X rm -r can cause race conditions: if you have a path like …/foo/bar/foo/… and want to remove all directories named foo, you can end up in a situation where the outer foo directory is removed first, leading to (harmless) "'foo/bar/foo': No such file or directory" errors in the rm call. Command-line options
This is the output of fd -h. To see the full set of command-line options, use fd --help which also includes a much more detailed help text.
Usage: fd [OPTIONS] [pattern] [path]...
Arguments: [pattern] the search pattern (a regular expression, unless '--glob' is used; optional) [path]... the root directories for the filesystem search (optional)
| Options | Description |
|---|---|
| -H, --hidden | Search hidden files and directories |
| -I, --no-ignore | Do not respect .(git|fd) ignore files |
| -s, --case-sensitive | Case-sensitive search (default: smart case) |
| -i, --ignore-case | Case-insensitive search (default: smart case) |
| -g, --glob | Glob-based search (default: regular expression) |
| -a, --absolute-path | Show absolute instead of relative paths |
| -l, --list-details | Use a long listing format with file metadata |
| -L, --follow | Follow symbolic links |
| -p, --full-path | Search full abs. path (default: filename only) |
| -d, --max-depth <depth> | Set maximum search depth (default: none) |
| -E, --exclude <pattern> | Exclude entries that match the given glob pattern |
| -t, --type <filetype> | Filter by type: file (f), directory (d/dir), symlink (l),executable (x), empty (e), socket (s), pipe (p), char-device (c), block-device (b) |
| -e, --extension <ext> | Filter by file extension |
| -S, --size <size> | Limit results based on the size of files |
| --changed-within <date|dur> | Filter by file modification time (newer than) |
| --changed-before <date|dur> | Filter by file modification time (older than) |
| -o, --owner user:group | Filter by owning user and/or group |
| --format <fmt> | Print results according to template |
| -x, --exec <cmd>... | Execute a command for each search result |
| -X, --exec-batch <cmd>... | Execute a command with all search results at once |
| -c, --color <when> | When to use colors [default: auto] [possible values: auto, always, never] |
| --hyperlink[=<when>] | Add hyperlinks to output paths [default: never] [possible values: auto, always, never] |
| -h, --help | Print help (see more with '--help') |
| -V, --version | Print version |
Full output from --help
Usage: fd.exe [OPTIONS] [pattern] [path]...
Arguments: [pattern] the search pattern which is either a regular expression (default) or a glob pattern (if --glob is used). If no pattern has been specified, every entry is considered a match. If your pattern starts with a dash (-), make sure to pass '--' first, or it will be considered as a flag (fd -- '-foo').
[path]... The directory where the filesystem search is rooted (optional). If omitted, search the current working directory.
Options:
-H, --hidden
Include hidden directories and files in the search results (default: hidden files and
directories are skipped). Files and directories are considered to be hidden if their
name starts with a . sign (dot). Any files or directories that are ignored due to the
rules described by --no-ignore are still ignored unless otherwise specified. The flag
can be overridden with --no-hidden.
-I, --no-ignore Show search results from files and directories that would otherwise be ignored by '.gitignore', '.ignore', '.fdignore', or the global ignore file, The flag can be overridden with --ignore.
  --no-ignore-vcs
      Show search results from files and directories that would otherwise be ignored by
      '.gitignore' files. The flag can be overridden with --ignore-vcs.

  --no-require-git
      Do not require a git repository to respect gitignores. By default, fd will only respect
      global gitignore rules, .gitignore rules, and local exclude rules if fd detects that you
      are searching inside a git repository. This flag allows you to relax this restriction
      such that fd will respect all git related ignore rules regardless of whether you're
      searching in a git repository or not.

      This flag can be disabled with --require-git.

  --no-ignore-parent
      Show search results from files and directories that would otherwise be ignored by
      '.gitignore', '.ignore', or '.fdignore' files in parent directories.
-u, --unrestricted... Perform an unrestricted search, including ignored and hidden files. This is an alias for '--no-ignore --hidden'.
-s, --case-sensitive Perform a case-sensitive search. By default, fd uses case-insensitive searches, unless the pattern contains an uppercase character (smart case).
-i, --ignore-case Perform a case-insensitive search. By default, fd uses case-insensitive searches, unless the pattern contains an uppercase character (smart case).
-g, --glob Perform a glob-based search instead of a regular expression search.
  --regex
      Perform a regular-expression based search (default). This can be used to override
      --glob.
-F, --fixed-strings Treat the pattern as a literal string instead of a regular expression. Note that this also performs substring comparison. If you want to match on an exact filename, consider using '--glob'.
  --and <pattern>
      Add additional required search patterns, all of which must be matched. Multiple
      additional patterns can be specified. The patterns are regular expressions, unless
      '--glob' or '--fixed-strings' is used.
-a, --absolute-path Shows the full path starting from the root as opposed to relative paths. The flag can be overridden with --relative-path.
-l, --list-details Use a detailed listing format like 'ls -l'. This is basically an alias for '--exec-batch ls -l' with some additional 'ls' options. This can be used to see more metadata, to show symlink targets and to achieve a deterministic sort order.
-L, --follow By default, fd does not descend into symlinked directories. Using this flag, symbolic links are also traversed. Flag can be overridden with --no-follow.
-p, --full-path By default, the search pattern is only matched against the filename (or directory name). Using this flag, the pattern is matched against the full (absolute) path. Example: fd --glob -p '**/.git/config'
-0, --print0 Separate search results by the null character (instead of newlines). Useful for piping results to 'xargs'.
-d, --max-depth
  --min-depth <depth>
      Only show search results starting at the given depth. See also: '--max-depth' and
      '--exact-depth'

  --exact-depth <depth>
      Only show search results at the exact given depth. This is an alias for '--min-depth
      <depth> --max-depth <depth>'.
-E, --exclude
      Examples:
        --exclude '*.pyc'
        --exclude node_modules

  --prune
      Do not traverse into directories that match the search criteria. If you want to exclude
      specific directories, use the '--exclude=…' option.
-t, --type
        'x' or 'executable':   executables
        'e' or 'empty':        empty files or directories

      This option can be specified more than once to include multiple file types. Searching
      for '--type file --type symlink' will show both regular files as well as symlinks. Note
      that the 'executable' and 'empty' filters work differently: '--type executable' implies
      '--type file' by default. And '--type empty' searches for empty files and directories,
      unless either '--type file' or '--type directory' is specified in addition.

      Examples:
        - Only search for files:
            fd --type file …
            fd -tf …
        - Find both files and symlinks
            fd --type file --type symlink …
            fd -tf -tl …
        - Find executable files:
            fd --type executable
            fd -tx
        - Find empty files:
            fd --type empty --type file
            fd -te -tf
        - Find empty directories:
            fd --type empty --type directory
            fd -te -td
-e, --extension
      If you want to search for files without extension, you can use the regex '^[^.]+$' as a
      normal search pattern.
-S, --size
      If neither '+' nor '-' is specified, file size must be exactly equal to this.
         'NUM':  The numeric size (e.g. 500)
         'UNIT': The units for NUM. They are not case-sensitive.
      Allowed unit values:
          'b':  bytes
          'k':  kilobytes (base ten, 10^3 = 1000 bytes)
          'm':  megabytes
          'g':  gigabytes
          't':  terabytes
          'ki': kibibytes (base two, 2^10 = 1024 bytes)
          'mi': mebibytes
          'gi': gibibytes
          'ti': tebibytes

  --changed-within <date|dur>
      Filter results based on the file modification time. Files with modification times
      greater than the argument are returned. The argument can be provided as a specific point
      in time (YYYY-MM-DD HH:MM:SS or @timestamp) or as a duration (10h, 1d, 35min). If the
      time is not specified, it defaults to 00:00:00. '--change-newer-than', '--newer', or
      '--changed-after' can be used as aliases.

      Examples:
          --changed-within 2weeks
          --change-newer-than '2018-10-27 10:00:00'
          --newer 2018-10-27
          --changed-after 1day

  --changed-before <date|dur>
      Filter results based on the file modification time. Files with modification times less
      than the argument are returned. The argument can be provided as a specific point in time
      (YYYY-MM-DD HH:MM:SS or @timestamp) or as a duration (10h, 1d, 35min).
      '--change-older-than' or '--older' can be used as aliases.

      Examples:
          --changed-before '2018-10-27 10:00:00'
          --change-older-than 2weeks
          --older 2018-10-27

  --format <fmt>
      Print results according to template
-x, --exec
      If no placeholder is present, an implicit "{}" at the end is assumed.

      Examples:

        - find all *.zip files and unzip them:

            fd -e zip -x unzip

        - find *.h and *.cpp files and run "clang-format -i .." for each of them:

            fd -e h -e cpp -x clang-format -i

        - Convert all *.jpg files to *.png files:

            fd -e jpg -x convert {} {.}.png
-X, --exec-batch
      If no placeholder is present, an implicit "{}" at the end is assumed.

      Examples:

        - Find all test_*.py files and open them in your favorite editor:

            fd -g 'test_*.py' -X vim

        - Find all *.rs files and count the lines with "wc -l ...":

            fd -e rs -X wc -l

  --batch-size <size>
      Maximum number of arguments to pass to the command given with -X. If the number of
      results is greater than the given size, the command given with -X is run again with
      remaining arguments. A batch size of zero means there is no limit (default), but note
      that batching might still happen due to OS restrictions on the maximum length of command
      lines.

      [default: 0]

  --ignore-file <path>
      Add a custom ignore-file in '.gitignore' format. These files have a low precedence.
-c, --color
      [default: auto]

      Possible values:
      - auto:   show colors if the output goes to an interactive console (default)
      - always: always use colorized output
      - never:  do not use colorized output

  --hyperlink[=<when>]
      Add a terminal hyperlink to a file:// url for each path in the output.

      Auto mode  is used if no argument is given to this option.

      This doesn't do anything for --exec and --exec-batch.

      [default: never]

      Possible values:
      - auto:   Use hyperlinks only if color is enabled
      - always: Always use hyperlinks when printing file paths
      - never:  Never use hyperlinks
-j, --threads
  --max-results <count>
      Limit the number of search results to 'count' and quit immediately.
-1 Limit the search to a single result and quit immediately. This is an alias for '--max-results=1'.
-q, --quiet When the flag is present, the program does not print anything and will return with an exit code of 0 if there is at least one match. Otherwise, the exit code will be 1. '--has-results' can be used as an alias.
  --show-errors
      Enable the display of filesystem errors for situations such as insufficient permissions
      or dead symlinks.

  --base-directory <path>
      Change the current working directory of fd to the provided path. This means that search
      results will be shown with respect to the given base path. Note that relative paths
      which are passed to fd via the positional <path> argument or the '--search-path' option
      will also be resolved relative to this directory.

  --path-separator <separator>
      Set the path separator to use when printing file paths. The default is the OS-specific
      separator ('/' on Unix, '\' on Windows).

  --search-path <search-path>
      Provide paths to search as an alternative to the positional <path> argument. Changes the
      usage to `fd [OPTIONS] --search-path <path> --search-path <path2> [<pattern>]`

  --strip-cwd-prefix[=<when>]
      By default, relative paths are prefixed with './' when -x/--exec, -X/--exec-batch, or
      -0/--print0 are given, to reduce the risk of a path starting with '-' being treated as a
      command line option. Use this flag to change this behavior. If this flag is used without
      a value, it is equivalent to passing "always".

      Possible values:
      - auto:   Use the default behavior
      - always: Always strip the ./ at the beginning of paths
      - never:  Never strip the ./

  --one-file-system
      By default, fd will traverse the file system tree as far as other options dictate. With
      this flag, fd ensures that it does not descend into a different file system than the one
      it started in. Comparable to the -mount or -xdev filters of find(1).
-h, --help Print help (see a summary with '-h')
-V, --version Print version
Bugs can be reported on GitHub: https://github.com/sharkdp/fd/issues
eza
- Examples
- Meta Options
- Display Options
- Filtering And Sorting Options
- Long View Options
- Environment Variables
- Exit Statuses
- All switches
eza is a modern replacement for ls, with a focus on speed and ease of use.
https://github.com/eza-community/eza/tree/main/man
A script for Powershell can be found here.
eza [options] [files...]
eza is a modern replacement for ls. It uses colours for information by default, helping you distinguish between many types of files, such as whether you are the owner, or in the owning group.
It also has extra features not present in the original ls, such as viewing the Git status for a directory, or recursing into directories with a tree view.
Examples
eza : Lists the contents of the current directory in a grid.
eza --oneline --reverse --sort=size : Displays a list of files with the largest at the top.
eza --long --header --inode --git : Displays a table of files with a header, showing each file’s metadata, inode, and Git status.
eza --long --tree --level=3 : Displays a tree of files, three levels deep, as well as each file’s metadata.
Meta Options
--help : Show list of command-line options.
-v, --version : Show version of eza.
Display Options
-1, --oneline : Display one entry per line.
-F, --classify=WHEN : Display file kind indicators next to file names.
Valid settings are ‘always’, ‘automatic’ (or ‘auto’ for short), and ‘never’. The default value is ‘automatic’.
The default behavior (automatic or auto) will display file kind indicators only when the standard output is connected to a real terminal. If eza is ran while in a tty, or the output of eza is either redirected to a file or piped into another program, file kind indicators will not be used. Setting this option to ‘always’ causes eza to always display file kind indicators, while ‘never’ disables the use of file kind indicators.
-G, --grid : Display entries as a grid (default).
-l, --long : Display extended file metadata as a table.
-R, --recurse : Recurse into directories.
-T, --tree : Recurse into directories as a tree.
--follow-symlinks : Drill down into symbolic links that point to directories.
-X, --dereference : Dereference symbolic links when displaying information.
-x, --across : Sort the grid across, rather than downwards.
--color=WHEN, --colour=WHEN : When to use terminal colours (using ANSI escape code to colorize the output).
Valid settings are ‘always’, ‘automatic’ (or ‘auto’ for short), and ‘never’. The default value is ‘automatic’.
The default behavior (‘automatic’ or ‘auto’) is to colorize the output only when the standard output is connected to a real terminal. If the output of eza is redirected to a file or piped into another program, terminal colors will not be used. Setting this option to ‘always’ causes eza to always output terminal color, while ‘never’ disables the use of terminal color.
Manually setting this option overrides NO_COLOR environment.
--color-scale, --colour-scale : highlight levels of field distinctly. Use comma(,) separated list of all, age, size
--color-scale-mode, --colour-scale-mode : Use gradient or fixed colors in --color-scale.
Valid options are fixed or gradient. The default value is gradient.
--icons=WHEN : Display icons next to file names.
Valid settings are ‘always’, ‘automatic’ (‘auto’ for short), and ‘never’. The default value is ‘automatic’.
automatic or auto will display icons only when the standard output is connected to a real terminal. If eza is ran while in a tty, or the output of eza is either redirected to a file or piped into another program, icons will not be used. Setting this option to ‘always’ causes eza to always display icons, while ‘never’ disables the use of icons.
--no-quotes : Don't quote file names with spaces.
--hyperlink : Display entries as hyperlinks
-w, --width=COLS : Set screen width in columns.
Filtering And Sorting Options
-a, --all : Show hidden and “dot” files. Use this twice to also show the ‘.’ and ‘..’ directories.
-A, --almost-all : Equivalent to --all; included for compatibility with ls -A.
-d, --list-dirs : List directories as regular files, rather than recursing and listing their contents.
-L, --level=DEPTH : Limit the depth of recursion.
-r, --reverse : Reverse the sort order.
-s, --sort=SORT_FIELD : Which field to sort by.
Valid sort fields are ‘name’, ‘Name’, ‘extension’, ‘Extension’, ‘size’, ‘modified’, ‘changed’, ‘accessed’, ‘created’, ‘inode’, ‘type’, and ‘none’.
The modified sort field has the aliases ‘date’, ‘time’, and ‘newest’, and its reverse order has the aliases ‘age’ and ‘oldest’.
Sort fields starting with a capital letter will sort uppercase before lowercase: ‘A’ then ‘B’ then ‘a’ then ‘b’. Fields starting with a lowercase letter will mix them: ‘A’ then ‘a’ then ‘B’ then ‘b’.
-I, --ignore-glob=GLOBS : Glob patterns, pipe-separated, of files to ignore.
--git-ignore [if eza was built with git support] : Do not list files that are ignored by Git.
--group-directories-first : List directories before other files.
--group-directories-last : List directories after other files.
-D, --only-dirs : List only directories, not files.
-f, --only-files : List only files, not directories.
--show-symlinks : Explicitly show symbolic links (when used with --only-files | --only-dirs)
--no-symlinks : Do not show symbolic links
Long View Options
These options are available when running with --long (-l):
-b, --binary : List file sizes with binary prefixes.
-B, --bytes : List file sizes in bytes, without any prefixes.
--changed : Use the changed timestamp field.
-g, --group : List each file’s group.
--smart-group : Only show group if it has a different name from owner
-h, --header : Add a header row to each column.
-H, --links : List each file’s number of hard links.
-i, --inode : List each file’s inode number.
-m, --modified : Use the modified timestamp field.
-M, --mounts : Show mount details (Linux and Mac only)
-n, --numeric : List numeric user and group IDs.
-O, --flags : List file flags on Mac and BSD systems and file attributes on Windows systems. By default, Windows attributes are displayed in a long form. To display in attributes as single character set the environment variable EZA_WINDOWS_ATTRIBUTES=short. On BSD systems see chflags(1) for a list of file flags and their meanings.
-S, --blocksize : List each file’s size of allocated file system blocks.
-t, --time=WORD : Which timestamp field to list.
: Valid timestamp fields are ‘modified’, ‘changed’, ‘accessed’, and ‘created’.
--time-style=STYLE : How to format timestamps.
: Valid timestamp styles are ‘default’, ‘iso’, ‘long-iso’, ‘full-iso’, ‘relative’, or a custom style ‘+<FORMAT>’ (e.g., ‘+%Y-%m-%d %H:%M’ => ‘2023-09-30 13:00’).
<FORMAT> should be a chrono format string. For details on the chrono format syntax, please read: https://docs.rs/chrono/latest/chrono/format/strftime/index.html .
Alternatively, <FORMAT> can be a two line string, the first line will be used for non-recent files and the second for recent files. E.g., if <FORMAT> is "%Y-%m-%d %H<newline>--%m-%d %H:%M", non-recent files => "2022-12-30 13", recent files => "--09-30 13:34".
--total-size : Show recursive directory size (unix only).
-u, --accessed : Use the accessed timestamp field.
-U, --created : Use the created timestamp field.
--no-permissions : Suppress the permissions field.
-o, --octal-permissions : List each file's permissions in octal format.
--no-filesize : Suppress the file size field.
--no-user : Suppress the user field.
--no-time : Suppress the time field.
--stdin : When you wish to pipe directories to eza/read from stdin. Separate one per line or define custom separation char in EZA_STDIN_SEPARATOR env variable.
-@, --extended : List each file’s extended attributes and sizes.
-Z, --context : List each file's security context.
--git [if eza was built with git support] : List each file’s Git status, if tracked. This adds a two-character column indicating the staged and unstaged statuses respectively. The status character can be ‘-’ for not modified, ‘M’ for a modified file, ‘N’ for a new file, ‘D’ for deleted, ‘R’ for renamed, ‘T’ for type-change, ‘I’ for ignored, and ‘U’ for conflicted. Directories will be shown to have the status of their contents, which is how ‘deleted’ is possible if a directory contains a file that has a certain status, it will be shown to have that status.
--git-repos [if eza was built with git support] : List each directory’s Git status, if tracked. Symbols shown are |= clean, += dirty, and ~= for unknown.
--git-repos-no-status [if eza was built with git support] : List if a directory is a Git repository, but not its status. All Git repository directories will be shown as (themed) - without status indicated.
--no-git : Don't show Git status (always overrides --git, --git-repos, --git-repos-no-status)
Environment Variables
If an environment variable prefixed with EZA_ is not set, for backward compatibility, it will default to its counterpart starting with EXA_.
eza responds to the following environment variables:
COLUMNS
Overrides the width of the terminal, in characters, however, -w takes precedence.
For example, ‘COLUMNS=80 eza’ will show a grid view with a maximum width of 80 characters.
This option won’t do anything when eza’s output doesn’t wrap, such as when using the --long view.
EZA_STRICT
Enables strict mode, which will make eza error when two command-line options are incompatible.
Usually, options can override each other going right-to-left on the command line, so that eza can be given aliases: creating an alias ‘eza=eza --sort=ext’ then running ‘eza --sort=size’ with that alias will run ‘eza --sort=ext --sort=size’, and the sorting specified by the user will override the sorting specified by the alias.
In strict mode, the two options will not co-operate, and eza will error.
This option is intended for use with automated scripts and other situations where you want to be certain you’re typing in the right command.
EZA_GRID_ROWS
Limits the grid-details view (‘eza --grid --long’) so it’s only activated when at least the given number of rows of output would be generated.
With widescreen displays, it’s possible for the grid to look very wide and sparse, on just one or two lines with none of the columns lining up. By specifying a minimum number of rows, you can only use the view if it’s going to be worth using.
EZA_ICON_SPACING
Specifies the number of spaces to print between an icon (see the ‘--icons’ option) and its file name.
Different terminals display icons differently, as they usually take up more than one character width on screen, so there’s no “standard” number of spaces that eza can use to separate an icon from text. One space may place the icon too close to the text, and two spaces may place it too far away. So the choice is left up to the user to configure depending on their terminal emulator.
NO_COLOR
Disables colours in the output (regardless of its value). Can be overridden by --color option.
See https://no-color.org/ for details.
LS_COLORS, EZA_COLORS
Specifies the colour scheme used to highlight files based on their name and kind, as well as highlighting metadata and parts of the UI.
For more information on the format of these environment variables, see the eza_colors.5.md manual page.
EZA_OVERRIDE_GIT
Overrides any --git or --git-repos argument
EZA_MIN_LUMINANCE
Specifies the minimum luminance to use when color-scale is active. It's value can be between -100 to 100.
EZA_ICONS_AUTO
If set, automates the same behavior as using --icons or --icons=auto. Useful for if you always want to have icons enabled.
Any explicit use of the --icons=WHEN flag overrides this behavior.
EZA_STDIN_SEPARATOR
Specifies the separator to use when file names are piped from stdin. Defaults to newline.
EZA_CONFIG_DIR
Specifies the directory where eza will look for its configuration and theme files. Defaults to $XDG_CONFIG_HOME/eza or $HOME/.config/eza if XDG_CONFIG_HOME is not set.
Exit Statuses
0 : If everything goes OK.
1 : If there was an I/O error during operation.
3 : If there was a problem with the command-line arguments.
13 : If permission is denied to access a path.
All switches
Click to expand
    --version(-v)              # Show version of eza
    --help                     # Show list of command-line options
    --oneline(-1)              # Display one entry per line
    --long(-l)                 # Display extended file metadata as a table
    --grid(-G)                 # Display entries in a grid
    --across(-x)               # Sort the grid across, rather than downwards
    --recurse(-R)              # Recurse into directories
    --tree(-T)                 # Recurse into directories as a tree
    --dereference(-X)          # Dereference symbolic links when displaying file information
    --classify(-F)             # Display type indicator by file names
    --color                    # When to use terminal colours
    --colour                   # When to use terminal colours
    --color-scale              # Highlight levels of file sizes distinctly
    --colour-scale             # Highlight levels of file sizes distinctly
    --color-scale-mode         # Use gradient or fixed colors in --color-scale
    --colour-scale-mode        # Use gradient or fixed colors in --colour-scale
    --icons                    # When to display icons
    --no-quotes                # Don't quote file names with spaces
    --hyperlink                # Display entries as hyperlinks
    --absolute                 # Display entries with their absolute path
    --follow-symlinks          # Drill down into symbolic links that point to directories
    --group-directories-first  # Sort directories before other files
    --group-directories-last   # Sort directories after other files
    --git-ignore               # Ignore files mentioned in '.gitignore'
    --all(-a)                  # Show hidden and 'dot' files. Use this twice to also show the '.' and '..' directories
    --almost-all(-A)           # Equivalent to --all; included for compatibility with `ls -A`
    --list-dirs(-d)            # List directories like regular files
    --level(-L): string        # Limit the depth of recursion
    --width(-w)                # Limits column output of grid, 0 implies auto-width
    --reverse(-r)              # Reverse the sort order
    --sort(-s)                 # Which field to sort by
    --only-dirs(-D)            # List only directories
    --only-files(-f)           # List only files
    --show-symlinks            # Explicitly show symbolic links (for use with --only-dirs | --only-files)
    --no-symlinks              # Do not show symbolic links
    --binary(-b)               # List file sizes with binary prefixes
    --bytes(-B)                # List file sizes in bytes, without any prefixes
    --group(-g)                # List each file's group
    --header(-h)               # Add a header row to each column
    --links(-H)                # List each file's number of hard links
    --inode(-i)                # List each file's inode number
    --blocksize(-S)            # List each file's size of allocated file system blocks
    --time(-t) -d              # Which timestamp field to list
    --modified(-m)             # Use the modified timestamp field
    --numeric(-n)              # List numeric user and group IDs.
    --changed                  # Use the changed timestamp field
    --accessed(-u)             # Use the accessed timestamp field
    --created(-U)              # Use the created timestamp field
    --time-style               # How to format timestamps
    --total-size               # Show recursive directory size (unix only)
    --no-permissions           # Suppress the permissions field
    --octal-permissions(-o)    # List each file's permission in octal format
    --no-filesize              # Suppress the filesize field
    --no-user                  # Suppress the user field
    --no-time                  # Suppress the time field
    --mounts(-M)               # Show mount details
    --git                      # List each file's Git status, if tracked
    --no-git                   # Suppress Git status
    --git-repos                # List each git-repos status and branch name
    --git-repos-no-status      # List each git-repos branch name (much faster)
    --extended(-@)             # List each file's extended attributes and sizes
    --context(-Z)              # List each file's security context
    --smart-group              # Only show group if it has a different name from owner
    --stdin                    # When piping to eza. Read file paths from stdin
glow
Markdown viewer
Use it to discover markdown files, read documentation directly on the command line. Glow will find local markdown files in subdirectories or a local Git repository.
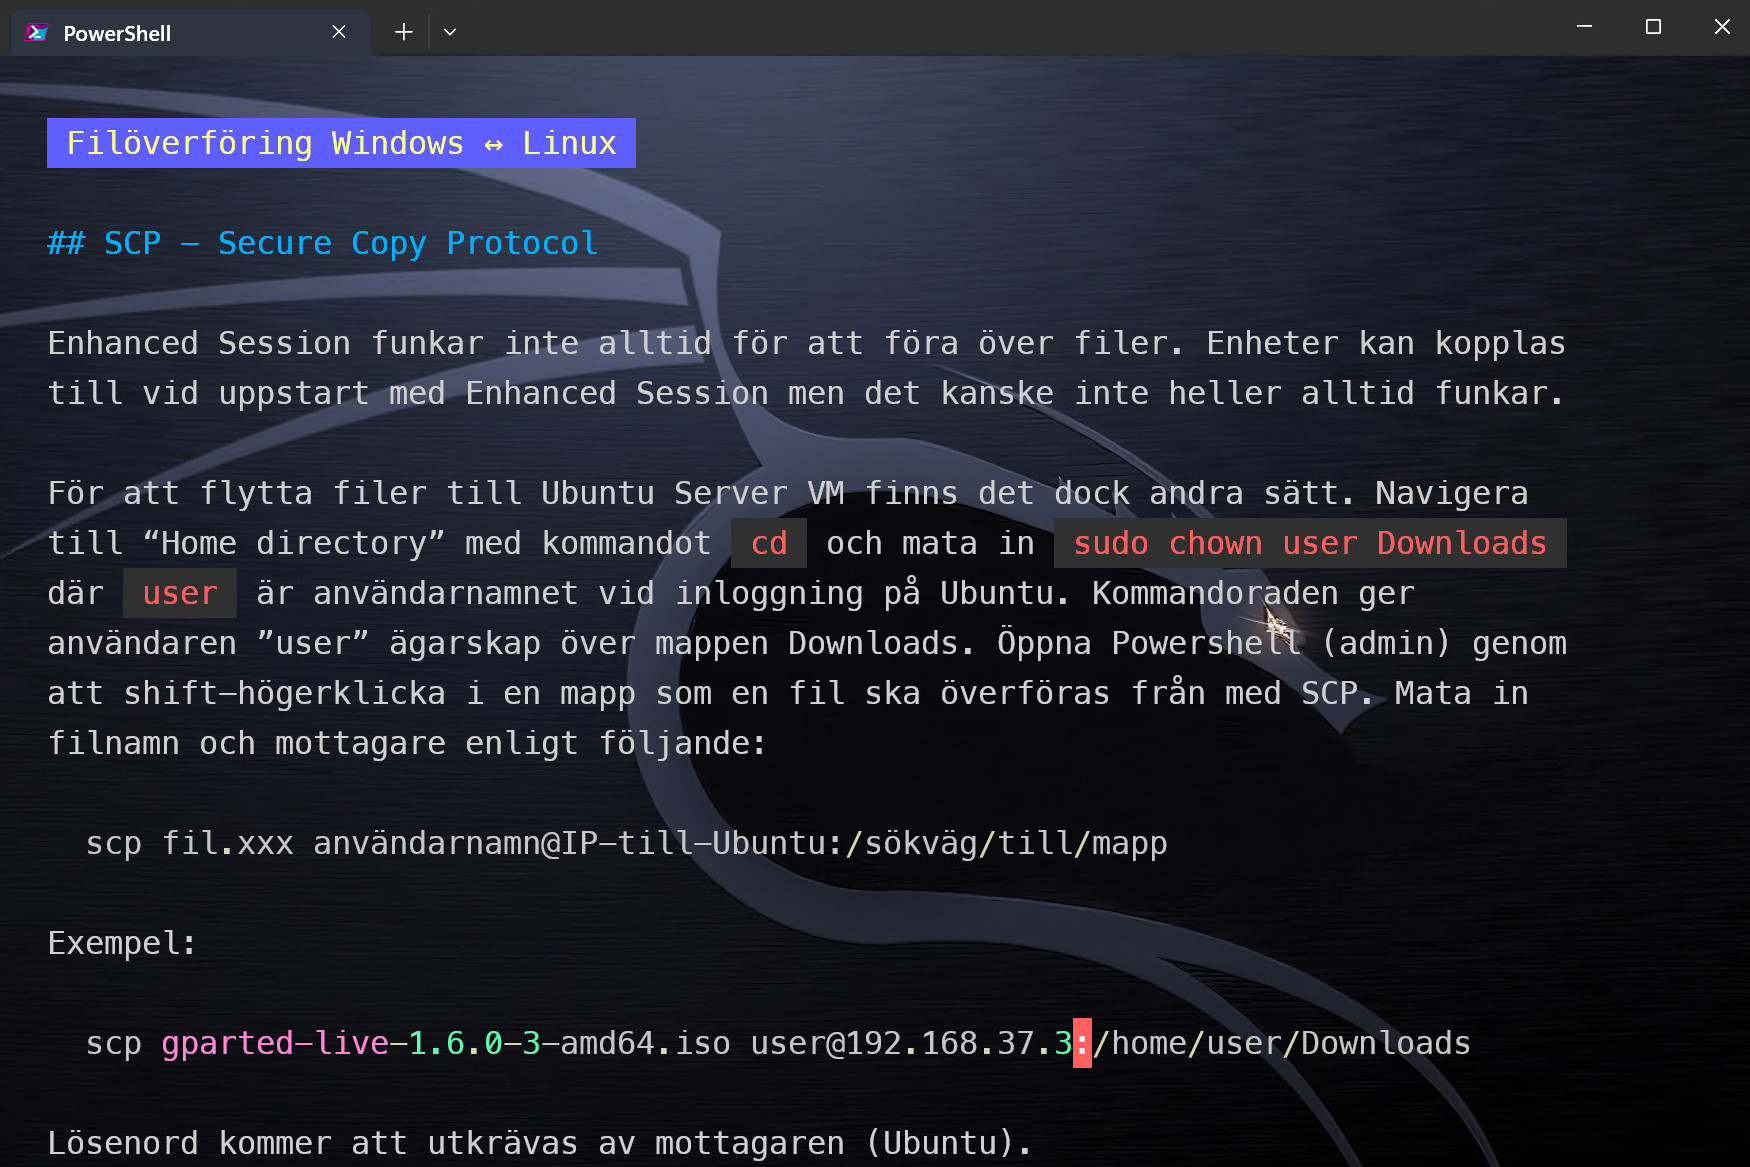
More info at glow
Install:
winget install charmbracelet.glow
Just type glow in the terminal and ? to get help.
A plugin for yazi can be found here
Install it with
ya pack -a Reledia/glow
and add this to yazi.toml:
[plugin]
prepend_previewers = [
  { name = "*.md", run = "glow" },
]
Hard Links, Soft Links (Symbolic Links), and Junctions in PowerShell
- Understanding the Concepts
- Hard Link
- Soft Link (Symbolic Link)
- Junction
- PowerShell Cmdlets
- 1. Creating Hard Links
- Important Considerations for Hard Links
- 2. Creating Soft Links (Symbolic Links)
- Key Points for Soft Links:
- 3. Creating Junctions
- Important Details for Junctions
- Checking Link Type
- Removing Links
- Important Notes on Removal
- Error Handling
Understanding the Concepts
Hard Link
A hard link is essentially another name for the same file. Both the original file and the hard link point to the same data on the disk. If you modify one, the other reflects the changes immediately because they are the same data. You can't create hard links across different volumes/partitions. Deleting the original file doesn't delete the data as long as at least one hard link remains
Soft Link (Symbolic Link)
A soft link is a pointer to another file or directory. It acts as a shortcut. If you modify the original file, the changes are reflected when you access the soft link. However, if you delete the original file, the soft link becomes broken (it points to a non-existent location). Soft links can cross volume boundaries
Junction
A junction (also called a directory symbolic link) is similar to a soft link, but it works specifically for directories. It points to another directory on the same volume. Like hard links, junctions continue to work even if the original directory is moved within the same volume. They are transparent to applications; an application accessing the junction thinks it's accessing a real directory. Junctions cannot cross volume boundaries
PowerShell Cmdlets
The primary cmdlet for creating links in PowerShell is New-Item
1. Creating Hard Links
Syntax
New-Item -ItemType HardLink -Path "<link_path>" -Target "<target_file>"
Example
# Create a hard link named 'MyHardLink.txt' to the file 'OriginalFile.txt'

New-Item -ItemType HardLink -Path ".\MyHardLink.txt" -Target ".\OriginalFile.txt"
Important Considerations for Hard Links
-
The
-Pathspecifies the name and location of the new hard link -
The
-Targetspecifies the path to the existing file you want to create a hard link to -
Hard links can only be created to files, not directories
-
Hard links must be on the same volume
2. Creating Soft Links (Symbolic Links)
Syntax
New-Item -ItemType SymbolicLink -Path "<link_path>" -Target "<target_path>"
Example
# Create a symbolic link named 'MySoftLink.txt' to the file 'OriginalFile.txt'

New-Item -ItemType SymbolicLink -Path ".\MySoftLink.txt" -Target ".\OriginalFile.txt"

# Create a symbolic link named 'MyDirectoryLink' to the directory 'OriginalDirectory'

New-Item -ItemType SymbolicLink -Path ".\MyDirectoryLink" -Target ".\OriginalDirectory"
Key Points for Soft Links:
-
-Path: The path and name of the symbolic link -
-Target: The path to the file or directory the link will point to -
Soft links can point to files or directories
-
Soft links can cross volume boundaries
3. Creating Junctions
Syntax
New-Item -ItemType Junction -Path "<junction_path>" -Target "<target_directory>"
Example
# Create a junction named 'MyJunction' that points to the directory 'OriginalDirectory'

New-Item -ItemType Junction -Path ".\MyJunction" -Target ".\OriginalDirectory"
Important Details for Junctions
-
-Path: The path and name of the junction (which will be a directory) -
-Target: The path to the existing directory the junction will point to -
Junctions can only point to directories
-
Junctions must be on the same volume
Checking Link Type
You can use Get-Item to inspect the link and determine its type
$item = Get-Item ".\MySoftLink.txt" # Replace with your link path

$item.LinkType
The $item.LinkType property will return
-
HardLink -
SymbolicLink -
Junction -
NotALink(if it's a regular file or directory)
Removing Links
Use Remove-Item to remove any of these links
Remove-Item ".\MyHardLink.txt"

Remove-Item ".\MySoftLink.txt"

Remove-Item ".\MyJunction"
Important Notes on Removal
-
Removing a hard link does not delete the original file's data, unless it's the last hard link to that data
-
Removing a soft link does not delete the original file or directory. It only removes the link itself
-
Removing a junction does not delete the target directory or its contents. It only removes the junction point
Error Handling
It's a good practice to include error handling when creating links
try {

New-Item -ItemType SymbolicLink -Path ".\MySoftLink.txt" -Target ".\NonExistentFile.txt" -ErrorAction Stop

Write-Host "Symbolic link created successfully."

}

catch {

Write-Host "Error creating symbolic link: $($_.Exception.Message)"

}
The -ErrorAction Stop parameter will cause the script to stop immediately if an error occurs, and the catch block will handle the error
Settings
What is PSReadLine?
PSReadLine is a module that replaces the default PowerShell console line editor with a more feature-rich and user-friendly one. It significantly improves the command-line experience by providing:
- Command History: Persistent and easily accessible command history.
- Syntax Highlighting: Makes code easier to read and identify errors.
- Tab Completion: Intelligent tab completion for commands, parameters, file paths, and more.
- Vi Mode: An optional editing mode that emulates the Vi/Vim text editor.
- Emacs Mode: An optional editing mode that emulates the Emacs text editor.
- Windows Mode: The default editing mode.
- Predictive IntelliSense: Suggests commands based on your history and other factors.
- Key Bindings: Customizable key bindings for common actions.
PSReadline
Windows Terminal has a "mark mode" that allows you to select text using the keyboard.
Here's how to use it:
- Enable Mark Mode: Press
Ctrl + Shift + M. This puts the terminal into mark mode. - Select Text: Use the arrow keys (with
Shiftheld down) to move the cursor and select the desired text. You can also useCtrl + Ato select all text in the terminal buffer. - Copy Text: Once the text is selected, press
Ctrl + Shift + Cto copy it to the clipboard.
Some additional information about text selection in Windows Terminal:
- Hyperlink Navigation: In mark mode, you can use
TaborShift + Tabto navigate between hyperlinks in the buffer if hyperlink detection is enabled (experimental.detectUrls). - Block Selection: Use the
toggleBlockSelectionaction to switch to block selection mode. - Copy on Select: You can enable the
copyOnSelectsetting so that text is automatically copied to the clipboard when you select it. If this setting is enabled, right-clicking the terminal will paste the selected text.
PSReadLine History Features
The history features in PSReadLine are a major benefit. Here's a breakdown:
- Persistent History:
PSReadLinesaves your command history to a file (by default,~\AppData\Roaming\Microsoft\Windows\PowerShell\PSReadLine\ConsoleHost_history.txt). This means your commands are remembered across PowerShell sessions. You can delete unwanted entries from this file. - History Navigation:
- Up/Down Arrow Keys: Navigate through your command history.
- Ctrl+R (Reverse Search): Start typing a command, and
PSReadLinewill search backward through your history for matching commands. PressCtrl+Rrepeatedly to cycle through matches. - Ctrl+S (Forward Search): Similar to
Ctrl+R, but searches forward. (Less commonly used). Get-HistoryCmdlet: Retrieves the command history from the current session. This is useful for scripting or further analysis.Invoke-HistoryCmdlet: Executes a command from the history by its ID (as shown byGet-History).
- History Duplicates: By default,
PSReadLineprevents consecutive duplicate commands from being added to the history. - History Size: You can control the maximum number of commands saved in the history file and the maximum number of commands stored in the current session's history.
- History Location: You can change the location of the history file.
Key Cmdlets for Managing History
Get-History: Gets the history of the current session.Get-History -Id <ID>: Gets a specific history entry by its ID.Get-History -Count <N>: Gets the last N history entries.Invoke-History: Executes a command from the history.Invoke-History <ID>: Executes the history entry with the specified ID. You can get the ID fromGet-History.Add-History: Adds a command to the history. (Less commonly used directly).Clear-History: Clears the history of the current session.Clear-History -Newest <N>: Deletes the newest N entries.Clear-History -Oldest <N>: Deletes the oldest N entries.
Configuration and Customization
You can customize PSReadLine's behavior using the Set-PSReadLineOption cmdlet. Here are some common settings related to history:
HistorySavePath: Specifies the path to the history file.
Set-PSReadLineOption -HistorySavePath "C:\MyPowerShellHistory.txt"
MaximumHistoryCount: Specifies the maximum number of commands to store in the session history.
Set-PSReadLineOption -MaximumHistoryCount 4096
MaximumKillRingCount: Specifies the maximum number of commands to store in the "kill ring" (used for cutting and pasting). This is less directly related to history but can affect your command editing experience.
Set-PSReadLineOption -MaximumKillRingCount 10
HistoryNoDuplicates: Specifies whether to prevent consecutive duplicate commands from being added to the history. (Defaults to$true).HistorySearchCaseSensitive: Specifies whether history searches (Ctrl+R,Ctrl+S) are case-sensitive. (Defaults to$false).HistorySaveStyle: Specifies how the history is saved. The default isSaveIncrementally, which saves each command to the history file as it's executed.
Example: Configuring PSReadLine History
To configure PSReadLine history, you typically add the Set-PSReadLineOption commands to your PowerShell profile. The profile is a script that runs automatically when PowerShell starts.
1. Find Your Profile:
$PROFILE
This will show you the path to your current PowerShell profile. If the file doesn't exist, you can create it.
2. Edit Your Profile:
Open the profile file in a text editor (like VS Code or Notepad).
3. Add Configuration:
Add the Set-PSReadLineOption commands to the profile. For example:
Set-PSReadLineOption -HistorySavePath "$env:USERPROFILE\.powershell\MyHistory.txt"
Set-PSReadLineOption -MaximumHistoryCount 10000
Set-PSReadLineOption -HistoryNoDuplicates $true
4. Save and Restart:
Save the profile file and restart PowerShell. Save the profile file and restart PowerShell.
Troubleshooting
- History Not Saving:
- Make sure
PSReadLineis installed (Get-Module PSReadLine -ListAvailable). If not, install it:Install-Module PSReadLine -Force. - Check that the
HistorySavePathis valid and that PowerShell has permissions to write to that location. - Ensure that
HistorySaveStyleis set toSaveIncrementally(the default) orSaveAtExit.
- Make sure
- History Not Showing Up:
- Verify that
MaximumHistoryCountis set to a reasonable value. - Make sure you're using the correct key bindings for history navigation (Up/Down arrows, Ctrl+R, Ctrl+S).
- If you've recently cleared the history, it will be empty.
- Verify that
Basic editing functions
- Cursor movement functions
- History functions
- Completion functions
- Prediction functions
- Miscellaneous functions
- Selection functions
- Search functions
- User defined functions
- To learn
| Key | Function | Description |
|---|---|---|
| Unbound | Abort | Abort the current operation, e.g. incremental history search |
| Unbound | AcceptAndGetNext | Accept the current line and recall the next line from history after the current line finishes executing |
| Enter | AcceptLine | Accept the input or move to the next line if input is missing a closing token. |
| Shift+Enter | AddLine | Move the cursor to the next line without attempting to execute the input |
| Backspace | BackwardDeleteChar | Delete the character before the cursor |
| Ctrl+h | BackwardDeleteChar | Delete the character before the cursor |
| Ctrl+Home | BackwardDeleteInput | Delete text from the cursor to the start of the input |
| Unbound | BackwardDeleteLine | Delete text from the cursor to the start of the current logical line |
| Unbound | BackwardDeleteWord | Delete the previous word in the line. |
| Unbound | BackwardKillInput | Move the text from the cursor to the beginning of the input to the kill ring |
| Unbound | BackwardKillLine | Move the text from the start of the current logical line to the cursor to the kill ring |
| Ctrl+Backspace | BackwardKillWord | Move the text from the start of the current or previous word to the cursor to the kill ring |
| Ctrl+w | BackwardKillWord | Move the text from the start of the current or previous word to the cursor to the kill ring |
| Unbound | CancelLine | Abort editing the current line and re-evaluate the prompt |
| Unbound | CapitalizeWord | Find the next word starting from the current position and then upcase the first character and downcase the remaining characters. |
| Ctrl+C | Copy | Copy selected region to the system clipboard. If no region is selected, copy the whole line |
| Ctrl+c | CopyOrCancelLine | Either copy selected text to the clipboard, or if no text is selected, cancel editing the line with CancelLine. |
| Ctrl+x | Cut | Delete selected region placing deleted text in the system clipboard |
| Delete | DeleteChar | Delete the character under the cursor |
| Unbound | DeleteCharOrExit | Delete the character under the cursor, or if the line is empty, exit the process. |
| Unbound | DeleteEndOfBuffer | Delete the current logical line and up to the end of the multiline buffer |
| Unbound | DeleteEndOfWord | Delete to the end of the current word, as delimited by white space and common delimiters. |
| Unbound | DeleteLine | Deletes the current line. |
| Unbound | DeleteLineToFirstChar | Deletes from the first non blank character of the current logical line in a multiline buffer. |
| Unbound | DeletePreviousLines | Deletes from the previous n logical lines in a multiline buffer to the current logical line included. |
| Unbound | DeleteToEnd | Deletes from the cursor to the end of the line. |
| Unbound | DeleteWord | Deletes the current word. |
| Unbound | DowncaseWord | Find the next word starting from the current position and then make it lower case. |
| Ctrl+End | ForwardDeleteInput | Delete text from the cursor to the end of the input |
| Unbound | ForwardDeleteLine | Delete text from the cursor to the end of the current logical line |
| Ctrl+Enter | InsertLineAbove | Inserts a new empty line above the current line without attempting to execute the input |
| Shift+Ctrl+Enter | InsertLineBelow | Inserts a new empty line below the current line without attempting to execute the input |
| Unbound | InvertCase | Inverts the case of the current character and advances the cursor. |
| Unbound | KillLine | Move the text from the cursor to the end of the input to the kill ring |
| Unbound | KillRegion | Kill the text between the cursor and the mark |
| Alt+d | KillWord | Move the text from the cursor to the end of the current or next word to the kill ring |
| Ctrl+Delete | KillWord | Move the text from the cursor to the end of the current or next word to the kill ring |
| Ctrl+v | Paste | Paste text from the system clipboard |
| Shift+Insert | Paste | Paste text from the system clipboard |
| Unbound | PasteAfter | Write the contents of the local clipboard after the cursor. |
| Unbound | PasteBefore | Write the contents of the local clipboard before the cursor. |
| Unbound | PrependAndAccept | Inserts the entered character at the beginning and accepts the line. |
| Ctrl+y | Redo | Redo an undo |
| Unbound | RepeatLastCommand | Repeats the last modification command. |
| Escape | RevertLine | Equivalent to undo all edits (clears the line except lines imported from history) |
| Unbound | ShellBackwardKillWord | Move the text from the cursor to the start of the current or previous token to the kill ring |
| Unbound | ShellKillWord | Move the text from the cursor to the end of the current or next token to the kill ring |
| Unbound | SwapCharacters | Swap the current character with the character before it. |
| Ctrl+z | Undo | Undo a previous edit |
| Unbound | UndoAll | Undoes all commands for this line. |
| Unbound | UnixWordRubout | Move the text from the cursor to the start of the current or previous whitespace delimited word to the kill ring |
| Unbound | UpcaseWord | Find the next word starting from the current position and then make it upper case. |
| Unbound | ValidateAndAcceptLine | Accept the input or move to the next line if input is missing a closing token. If there are other parse errors, unresolved commands, or incorrect parameters, show the error and continue editing. |
| Unbound | ViAcceptLine | Accept the line and switch to Vi's insert mode. |
| Unbound | ViAcceptLineOrExit | If the line is empty, exit, otherwise accept the line as input. |
| Unbound | ViAppendLine | Appends a new multi-line edit mode line to the current line. |
| Unbound | ViBackwardDeleteGlob | Delete backward to the beginning of the previous word, as delimited by white space. |
| Unbound | ViBackwardGlob | Move the cursor to the beginning of the previous word, as delimited by white space. |
| Unbound | ViDeleteBrace | Deletes all characters between the cursor and the matching brace. |
| Unbound | ViDeleteEndOfGlob | Delete to the end of this word, as delimited by white space. |
| Unbound | ViDeleteGlob | Delete the current word, as delimited by white space. |
| Unbound | ViDeleteToBeforeChar | Deletes until given character. |
| Unbound | ViDeleteToBeforeCharBackward | Deletes until given character. |
| Unbound | ViDeleteToChar | Deletes until given character. |
| Unbound | ViDeleteToCharBackward | Deletes backwards until given character. |
| Unbound | ViInsertAtBegining | Moves the cursor to the beginning of the line and switches to insert mode. |
| Unbound | ViInsertAtEnd | Moves the cursor to the end of the line and switches to insert mode. |
| Unbound | ViInsertLine | Inserts a new multi-line edit mode line in front of the current line. |
| Unbound | ViInsertWithAppend | Switch to insert mode, appending at the current line position. |
| Unbound | ViInsertWithDelete | Deletes the current character and switches to insert mode. |
| Unbound | ViJoinLines | Joins the current multi-line edit mode line with the next. |
| Unbound | ViReplaceLine | Repace the current line with the next set of characters typed. |
| Unbound | ViReplaceToBeforeChar | Replaces until given character. |
| Unbound | ViReplaceToBeforeCharBackward | Replaces until given character. |
| Unbound | ViReplaceToChar | Deletes until given character. |
| Unbound | ViReplaceToCharBackward | Replaces until given character. |
| Unbound | ViYankBeginningOfLine | Place the characters before the cursor into the local clipboard. |
| Unbound | ViYankEndOfGlob | Place the characters from the cursor to the end of the next white space delimited word into the local clipboard. |
| Unbound | ViYankEndOfWord | Place the characters from the cursor to the end of the next word, as delimited by white space and common delimiters, into the local clipboard. |
| Unbound | ViYankLeft | Place the character to the left of the cursor into the local clipboard. |
| Unbound | ViYankLine | Place all characters in the current line into the local clipboard. |
| Unbound | ViYankNextGlob | Place all characters from the cursor to the end of the word, as delimited by white space, into the local clipboard. |
| Unbound | ViYankNextWord | Place all characters from the cursor to the end of the word, as delimited by white space and common delimiters, into the local clipboard. |
| Unbound | ViYankPercent | Place all characters between the matching brace and the cursor into the local clipboard. |
| Unbound | ViYankPreviousGlob | Place all characters from before the cursor to the beginning of the previous word, as delimited by white space, into the local clipboard. |
| Unbound | ViYankPreviousWord | Place all characters from before the cursor to the beginning of the previous word, as delimited by white space and common delimiters, into the local clipboard. |
| Unbound | ViYankRight | Place the character at the cursor into the local clipboard. |
| Unbound | ViYankToEndOfLine | Place all characters at and after the cursor into the local clipboard. |
| Unbound | ViYankToFirstChar | Place all characters before the cursor and to the 1st non-white space character into the local clipboard. |
| Unbound | Yank | Copy the text from the current kill ring position to the input |
| Alt+. | YankLastArg | Copy the text of the last argument to the input |
| Unbound | YankNthArg | Copy the text of the first argument to the input |
| Unbound | YankPop | Replace the previously yanked text with the text from the next kill ring position |
Cursor movement functions
| Key | Function | Description |
|---|---|---|
| LeftArrow | BackwardChar | Move the cursor back one character |
| Ctrl+LeftArrow | BackwardWord | Move the cursor to the beginning of the current or previous word |
| Home | BeginningOfLine | Move the cursor to the beginning of the line |
| End | EndOfLine | Move the cursor to the end of the line |
| RightArrow | ForwardChar | Move the cursor forward one character |
| Unbound | ForwardWord | Move the cursor forward to the end of the current word, or if between words, to the end of the next word. |
| Ctrl+] | GotoBrace | Go to matching brace |
| Unbound | GotoColumn | Moves the cursor to the prescribed column. |
| Unbound | GotoFirstNonBlankOfLine | Positions the cursor at the first non-blank character. |
| Unbound | MoveToEndOfLine | Move to the end of the line. |
| Unbound | NextLine | Move the cursor to the next line if the input has multiple lines. |
| Ctrl+RightArrow | NextWord | Move the cursor forward to the start of the next word |
| Unbound | NextWordEnd | Moves the cursor forward to the end of the next word. |
| Unbound | PreviousLine | Move the cursor to the previous line if the input has multiple lines. |
| Unbound | ShellBackwardWord | Move the cursor to the beginning of the current or previous token or start of the line |
| Unbound | ShellForwardWord | Move the cursor to the beginning of the next token or end of line |
| Unbound | ShellNextWord | Move the cursor to the end of the current token |
| Unbound | ViBackwardChar | Move the cursor back one character in the Vi edit mode. |
| Unbound | ViBackwardWord | Delete backward to the beginning of the previous word, as delimited by white space and common delimiters, and enter insert mode. |
| Unbound | ViEndOfGlob | Move the cursor to the end this word, as delimited by white space. |
| Unbound | ViEndOfPreviousGlob | Moves to the end of the previous word, using only white space as a word delimiter. |
| Unbound | ViForwardChar | Move the cursor forward one character in the Vi edit mode. |
| Unbound | ViGotoBrace | Move the cursor to the matching brace. |
| Unbound | ViNextGlob | Move the cursor to the beginning of the next word, as delimited by white space. |
| Unbound | ViNextWord | Move the cursor to the beginning of the next word, as delimited by white space and common delimiters. |
History functions
| Key | Function | Description |
|---|---|---|
| Unbound | BeginningOfHistory | Move to the first item in the history |
| Alt+F7 | ClearHistory | Remove all items from the command line history (not PowerShell history) |
| Unbound | EndOfHistory | Move to the last item (the current input) in the history |
| Ctrl+s | ForwardSearchHistory | Search history forward interactively |
| F8 | HistorySearchBackward | Search for the previous item in the history that starts with the current input - like PreviousHistory if the input is empty |
| Shift+F8 | HistorySearchForward | Search for the next item in the history that starts with the current input - like NextHistory if the input is empty |
| DownArrow | NextHistory | Replace the input with the next item in the history |
| UpArrow | PreviousHistory | Replace the input with the previous item in the history |
| Unbound | ReverseSearchHistory | Search history backwards interactively |
| Unbound | ViSearchHistoryBackward | Starts a new search backward in the history. |
Completion functions
| Key | Function | Description |
|---|---|---|
| Unbound | Complete | Complete the input if there is a single completion, otherwise complete the input with common prefix for all completions. Show possible completions if pressed a second time. |
| Ctrl+@ | MenuComplete | Complete the input if there is a single completion, otherwise complete the input by selecting from a menu of possible completions. |
| Unbound | PossibleCompletions | Display the possible completions without changing the input |
| Unbound | TabCompleteNext | Complete the input using the next completion |
| Shift+Tab | TabCompletePrevious | Complete the input using the previous completion |
| Unbound | ViTabCompleteNext | Invokes TabCompleteNext after doing some vi-specific clean up. |
| Unbound | ViTabCompletePrevious | Invokes TabCompletePrevious after doing some vi-specific clean up. |
Prediction functions
| Key | Function | Description |
|---|---|---|
| Ctrl+g | AcceptNextSuggestionWord | Accept the next word of the inline or selected suggestion |
| Unbound | AcceptSuggestion | Accept the current inline or selected suggestion |
| Unbound | NextSuggestion | Select the next suggestion item shown in the list view. |
| Unbound | PreviousSuggestion | Select the previous suggestion item shown in the list view. |
| F4 | ShowFullPredictionTooltip | Show the full tooltip of the selected list-view item in the terminal's alternate screen buffer. |
| F2 | SwitchPredictionView | Switch between the inline and list prediction views. |
Miscellaneous functions
| Key | Function | Description |
|---|---|---|
| Unbound | CaptureScreen | Allows you to select multiple lines from the console using Shift+UpArrow/DownArrow and copy the selected lines to clipboard by pressing Enter. |
| Ctrl+l | ClearScreen | Clear the screen and redraw the current line at the top of the screen |
| Alt+0 | DigitArgument | Start or accumulate a numeric argument to other functions |
| Alt+1 | DigitArgument | Start or accumulate a numeric argument to other functions |
| Alt+2 | DigitArgument | Start or accumulate a numeric argument to other functions |
| Alt+3 | DigitArgument | Start or accumulate a numeric argument to other functions |
| Alt+4 | DigitArgument | Start or accumulate a numeric argument to other functions |
| Alt+5 | DigitArgument | Start or accumulate a numeric argument to other functions |
| Alt+6 | DigitArgument | Start or accumulate a numeric argument to other functions |
| Alt+7 | DigitArgument | Start or accumulate a numeric argument to other functions |
| Alt+8 | DigitArgument | Start or accumulate a numeric argument to other functions |
| Alt+9 | DigitArgument | Start or accumulate a numeric argument to other functions |
| Alt+- | DigitArgument | Start or accumulate a numeric argument to other functions |
| Unbound | InvokePrompt | Erases the current prompt and calls the prompt function to redisplay the prompt |
| PageDown | ScrollDisplayDown | Scroll the display down one screen |
| Ctrl+PageDown | ScrollDisplayDownLine | Scroll the display down one line |
| Unbound | ScrollDisplayToCursor | Scroll the display to the cursor |
| Unbound | ScrollDisplayTop | Scroll the display to the top |
| PageUp | ScrollDisplayUp | Scroll the display up one screen |
| Ctrl+PageUp | ScrollDisplayUpLine | Scroll the display up one line |
| F1 | ShowCommandHelp | Shows help for the command at the cursor in an alternate screen buffer. |
| Ctrl+Alt+? | ShowKeyBindings | Show all key bindings |
| Alt+h | ShowParameterHelp | Shows help for the parameter at the cursor. |
| Unbound | ViCommandMode | Switch to VI's command mode. |
| Unbound | ViDigitArgumentInChord | Handles the processing of a number argument after the first key of a chord. |
| Unbound | ViEditVisually | Invokes the console compatible editor specified by $env:VISUAL or $env:EDITOR on the current command line. |
| Unbound | ViExit | Exit the shell. |
| Unbound | ViInsertMode | Switches to insert mode. |
| Alt+? | WhatIsKey | Show the key binding for the next chord entered |
Selection functions
| Key | Function | Description |
|---|---|---|
| Unbound | ExchangePointAndMark | Mark the location of the cursor and move the cursor to the position of the previous m |
| ark | ||
| Ctrl+a | SelectAll | Select the entire line. Moves the cursor to the end of the line |
| Shift+LeftArrow | SelectBackwardChar | Adjust the current selection to include the previous character |
| Shift+Home | SelectBackwardsLine | Adjust the current selection to include from the cursor to the start of the line |
| Shift+Ctrl+LeftArrow | SelectBackwardWord | Adjust the current selection to include the previous word |
| Alt+a | SelectCommandArgument | Make visual selection of the command arguments. |
| Shift+RightArrow | SelectForwardChar | Adjust the current selection to include the next character |
| Unbound | SelectForwardWord | Adjust the current selection to include the next word using ForwardWord |
| Shift+End | SelectLine | Adjust the current selection to include from the cursor to the end of the line |
| Shift+Ctrl+RightArrow | SelectNextWord | Adjust the current selection to include the next word |
| Unbound | SelectShellBackwardWord | Adjust the current selection to include the previous word using ShellBackwardWord |
| Unbound | SelectShellForwardWord | Adjust the current selection to include the next word using ShellForwardWord |
| Unbound | SelectShellNextWord | Adjust the current selection to include the next word using ShellNextWord |
| Unbound | SetMark | Mark the location of the cursor |
Search functions
| Key | Function | Description |
|---|---|---|
| F3 | CharacterSearch | Read a character and move the cursor to the next occurrence of that character |
| Shift+F3 | CharacterSearchBackward | Read a character and move the cursor to the previous occurrence of that character |
| Unbound | RepeatLastCharSearch | Repeat the last recorded character search. |
| Unbound | RepeatLastCharSearchBackwards | Repeat the last recorded character search in the opposite direction. |
| Unbound | RepeatSearch | Repeat the last search. |
| Unbound | RepeatSearchBackward | Repeat the last search, but in the opposite direction. |
| Unbound | SearchChar | Move to the next occurrence of the specified character. |
| Unbound | SearchCharBackward | Move to the previous occurrence of the specified character. |
| Unbound | SearchCharBackwardWithBackoff | Move to the previous occurrence of the specified character and then forward one character. |
| Unbound | SearchCharWithBackoff | Move to he next occurrence of the specified character and then back one character. |
| Unbound | SearchForward | Prompts for a search string and initiates a search upon AcceptLine. |
User defined functions
| Key | Function | Description |
|---|---|---|
| Tab | CustomAction | User defined action |
| Ctrl+q | CustomAction | fzf gets path using fd |
| Ctrl+f | CustomAction | fzf gets path using rg |
| Ctrl+t | Fzf Provider Select | Run fzf for current provider based on current token |
| Ctrl+r | Fzf Reverse History Select | Run fzf to search through PSReadline history |
| Alt+c | Fzf Set Location | Run fzf to select directory to set current location |
| Ctrl+b | IntelliShell Bookmark | Bookmark current command |
| Ctrl+Spacebar | IntelliShell Search | Search for a bookmarked command |
| Ctrl+h | IntelliShell Label | Trigger label replace for current command |
To learn
| Key | Function | Description |
|---|---|---|
| Alt+a | SelectCommandArgument | Make visual selection of the command arguments. |
| Alt+? | WhatIsKey | Show the key binding for the next chord entered |
| Ctrl+Alt+? | ShowKeyBindings | Show all key bindings |
| Alt+h | ShowParameterHelp | Shows help for the parameter at the cursor. |
| Alt+0..9 | DigitArgument | Start or accumulate a numeric argument to other functions |
| Alt+- | DigitArgument | Start or accumulate a numeric argument to other functions |
| Ctrl+l | ClearScreen | Clear the screen and redraw the current line at the top of the screen |
| Shift+Tab | TabCompletePrevious | Complete the input using the previous completion |
| Alt+F7 | ClearHistory | Remove all items from the command line history (not PowerShell history) |
| Ctrl+] | GotoBrace | Go to matching brace |
| Ctrl+w | BackwardKillWord | Move the text from the start of the current or previous word to the cursor to the kill ring |
Rust RegEx syntax
Matching one character
.             any character except new line (includes new line with s flag)
[0-9]         any ASCII digit
\d            digit (\p{Nd})
\D            not digit
\pX           Unicode character class identified by a one-letter name
\p{Greek}     Unicode character class (general category or script)
\PX           Negated Unicode character class identified by a one-letter name
\P{Greek}     negated Unicode character class (general category or script)
Character classes
[xyz]         A character class matching either x, y or z (union).
[^xyz]        A character class matching any character except x, y and z.
[a-z]         A character class matching any character in range a-z.
[[:alpha:]]   ASCII character class ([A-Za-z])
[[:^alpha:]]  Negated ASCII character class ([^A-Za-z])
[x[^xyz]]     Nested/grouping character class (matching any character except y and z)
[a-y&&xyz]    Intersection (matching x or y)
[0-9&&[^4]]   Subtraction using intersection and negation (matching 0-9 except 4)
[0-9--4]      Direct subtraction (matching 0-9 except 4)
[a-g~~b-h]    Symmetric difference (matching `a` and `h` only)
[\[\]]        Escaping in character classes (matching [ or ])
[a&&b]        An empty character class matching nothing
Any named character class may appear inside a bracketed [...] character class. For example, [\p{Greek}[:digit:]] matches any ASCII digit or any codepoint in the Greek script. [\p{Greek}&&\pL] matches Greek letters.
Precedence in character classes, from most binding to least:
1. Ranges: `[a-cd]` == `[[a-c]d]`
2. Union: `[ab&&bc]` == `[[ab]&&[bc]]`
3. Intersection, difference, symmetric difference. All three have equivalent precedence, and are evaluated in left-to-right order.
        For example, `[\pL--\p{Greek}&&\p{Uppercase}]` == `[[\pL--\p{Greek}]&&\p{Uppercase}]`.
4. Negation: `[^a-z&&b]` == `[^[a-z&&b]]`.
Composites
xy concatenation (x followed by y)
x|y alternation (x or y, prefer x)
This example shows how an alternation works, and what it means to prefer a branch in the alternation over subsequent branches.
use regex::Regex;

let haystack = "samwise";
// If 'samwise' comes first in our alternation, then it is
// preferred as a match, even if the regex engine could
// technically detect that 'sam' led to a match earlier.
let re = Regex::new(r"samwise|sam").unwrap();
assert_eq!("samwise", re.find(haystack).unwrap().as_str());
// But if 'sam' comes first, then it will match instead.
// In this case, it is impossible for 'samwise' to match
// because 'sam' is a prefix of it.
let re = Regex::new(r"sam|samwise").unwrap();
assert_eq!("sam", re.find(haystack).unwrap().as_str());
Repetitions
x*zero or more of x (greedy)
x+        one or more of x (greedy)
x?        zero or one of x (greedy)
x*?       zero or more of x (ungreedy/lazy)
x+?       one or more of x (ungreedy/lazy)
x??       zero or one of x (ungreedy/lazy)
x{n,m}    at least n x and at most m x (greedy)
x{n,}     at least n x (greedy)
x{n}      exactly n x
x{n,m}?   at least n x and at most m x (ungreedy/lazy)
x{n,}?    at least n x (ungreedy/lazy)
x{n}?     exactly n x
Empty matches
^               the beginning of a haystack (or start-of-line with multi-line mode)
$               the end of a haystack (or end-of-line with multi-line mode)
\A              only the beginning of a haystack (even with multi-line mode enabled)
\z              only the end of a haystack (even with multi-line mode enabled)
\b              a Unicode word boundary (\w on one side and \W, \A, or \z on other)
\B              not a Unicode word boundary
\b{start}, \<   a Unicode start-of-word boundary (\W|\A on the left, \w on the right)
\b{end}, \>     a Unicode end-of-word boundary (\w on the left, \W|\z on the right))
\b{start-half}  half of a Unicode start-of-word boundary (\W|\A on the left)
\b{end-half}    half of a Unicode end-of-word boundary (\W|\z on the right)
The empty regex is valid and matches the empty string. For example, the empty regex matches abc at positions 0, 1, 2 and 3. When using the top-level Regex on &str haystacks, an empty match that splits a codepoint is guaranteed to never be returned. However, such matches are permitted when using a bytes::Regex. For example:
^               the beginning of a haystack (or start-of-line with multi-line mode)
$               the end of a haystack (or end-of-line with multi-line mode)
\A              only the beginning of a haystack (even with multi-line mode enabled)
\z              only the end of a haystack (even with multi-line mode enabled)
\b              a Unicode word boundary (\w on one side and \W, \A, or \z on other)
\B              not a Unicode word boundary
\b{start}, \<   a Unicode start-of-word boundary (\W|\A on the left, \w on the right)
\b{end}, \>     a Unicode end-of-word boundary (\w on the left, \W|\z on the right))
\b{start-half}  half of a Unicode start-of-word boundary (\W|\A on the left)
\b{end-half}    half of a Unicode end-of-word boundary (\W|\z on the right)
Note that an empty regex is distinct from a regex that can never match. For example, the regex [a&&b] is a character class that represents the intersection of a and b. That intersection is empty, which means the character class is empty. Since nothing is in the empty set, [a&&b] matches nothing, not even the empty string.
Grouping and flags
(exp)          numbered capture group (indexed by opening parenthesis)
(?P<name>exp)  named (also numbered) capture group (names must be alpha-numeric)
(?<name>exp)   named (also numbered) capture group (names must be alpha-numeric)
(?:exp)        non-capturing group
(?flags)       set flags within current group
(?flags:exp)   set flags for exp (non-capturing)
Capture group names must be any sequence of alphanumeric Unicode codepoints, in addition to ., _, [ and ]. Names must start with either an _ or an alphabetic codepoint. Alphabetic codepoints correspond to the Alphabetic Unicode property, while numeric codepoints correspond to the union of the Decimal_Number, Letter_Number and Other_Number general categories.
Flags are each a single character. For example, (?x) sets the flag x and (?-x) clears the flag x. Multiple flags can be set or cleared at the same time: (?xy) sets both the x and y flags and (?x-y) sets the x flag and clears the y flag.
All flags are by default disabled unless stated otherwise. They are:
i     case-insensitive: letters match both upper and lower case
m     multi-line mode: ^ and $ match begin/end of line
s     allow . to match \n
R     enables CRLF mode: when multi-line mode is enabled, \r\n is used
U     swap the meaning of x*and x*?
u     Unicode support (enabled by default)
x     verbose mode, ignores whitespace and allow line comments (starting with `#`)
Note that in verbose mode, whitespace is ignored everywhere, including within character classes. To insert whitespace, use its escaped form or a hex literal. For example, \ or \x20 for an ASCII space.
Flags can be toggled within a pattern. Here’s an example that matches case-insensitively for the first part but case-sensitively for the second part:
use regex::Regex;

let re = Regex::new(r"(?i)a+(?-i)b+").unwrap();
let m = re.find("AaAaAbbBBBb").unwrap();
assert_eq!(m.as_str(), "AaAaAbb");
Notice that the a+ matches either a or A, but the b+ only matches b.
Multi-line mode means ^ and $ no longer match just at the beginning/end of the input, but also at the beginning/end of lines:
use regex::Regex;
let re = Regex::new(r"(?m)^line \d+").unwrap();
let m = re.find("line one\nline 2\n").unwrap();
assert_eq!(m.as_str(), "line 2");
Note that ^ matches after new lines, even at the end of input:
use regex::Regex;

let re = Regex::new(r"(?m)^").unwrap();
let m = re.find_iter("test\n").last().unwrap();
assert_eq!((m.start(), m.end()), (5, 5));
When both CRLF mode and multi-line mode are enabled, then ^ and $ will match either \r and \n, but never in the middle of a \r\n:
use regex::Regex;

let re = Regex::new(r"(?mR)^foo$").unwrap();
let m = re.find("\r\nfoo\r\n").unwrap();
assert_eq!(m.as_str(), "foo");
Unicode mode can also be selectively disabled, although only when the result would not match invalid UTF-8. One good example of this is using an ASCII word boundary instead of a Unicode word boundary, which might make some regex searches run faster:
use regex::Regex;

let re = Regex::new(r"(?-u:\b).+(?-u:\b)").unwrap();
let m = re.find("$$abc$$").unwrap();
assert_eq!(m.as_str(), "abc");
Escape sequences
Note that this includes all possible escape sequences, even ones that are documented elsewhere.
\*              literal *, applies to all ASCII except [0-9A-Za-z<>]
\a              bell (\x07)
\f              form feed (\x0C)
\t              horizontal tab
\n              new line
\r              carriage return
\v              vertical tab (\x0B)
\A              matches at the beginning of a haystack
\z              matches at the end of a haystack
\b              word boundary assertion
\B              negated word boundary assertion
\b{start}, \<   start-of-word boundary assertion
\b{end}, \>     end-of-word boundary assertion
\b{start-half}  half of a start-of-word boundary assertion
\b{end-half}    half of a end-of-word boundary assertion
\123            octal character code, up to three digits (when enabled)
\x7F            hex character code (exactly two digits)
\x{10FFFF}      any hex character code corresponding to a Unicode code point
\u007F          hex character code (exactly four digits)
\u{7F}          any hex character code corresponding to a Unicode code point
\U0000007F      hex character code (exactly eight digits)
\U{7F}          any hex character code corresponding to a Unicode code point
\p{Letter}      Unicode character class
\P{Letter}      negated Unicode character class
\d, \s, \w      Perl character class
\D, \S, \W      negated Perl character class
Perl character classes (Unicode friendly)
These classes are based on the definitions provided in UTS#18:
\d     digit (\p{Nd})
\D     not digit
\s     whitespace (\p{White_Space})
\S     not whitespace
\w     word character (\p{Alphabetic} + \p{M} + \d + \p{Pc} + \p{Join_Control})
\W     not word character
ASCII character classes
These classes are based on the definitions provided in UTS#18:
[[:alnum:]]    alphanumeric ([0-9A-Za-z])
[[:alpha:]]    alphabetic ([A-Za-z])
[[:ascii:]]    ASCII ([\x00-\x7F])
[[:blank:]]    blank ([\t ])
[[:cntrl:]]    control ([\x00-\x1F\x7F])
[[:digit:]]    digits ([0-9])
[[:graph:]]    graphical ([!-~])
[[:lower:]]    lower case ([a-z])
[[:print:]]    printable ([ -~])
[[:punct:]]    punctuation ([!-/:-@\[-`{-~])
[[:space:]]    whitespace ([\t\n\v\f\r ])
[[:upper:]]    upper case ([A-Z])
[[:word:]]     word characters ([0-9A-Za-z_])
[[:xdigit:]]   hex digit ([0-9A-Fa-f])
VS Code
Keyboard shortcuts
- Basic editing
- Rich languages editing
- Navigation
- Editor/Window Management
- File Management
- Display
- Search
- Search Editor
- Preferences
- Debug
- Tasks
- Extensions
Basic editing
| Command | Key |
|---|---|
| Cut line (empty selection) | Ctrl+X |
| Copy line (empty selection) | Ctrl+C |
| Paste | Ctrl+V |
| Delete Line | Ctrl+Shift+K |
| Insert Line Below | Ctrl+Enter |
| Insert Line Above | Ctrl+Shift+Enter |
| Move Line Down | Alt+Down |
| Move Line Up | Alt+Up |
| Copy Line Down | Shift+Alt+Down |
| Copy Line Up | Shift+Alt+Up |
| Undo | Ctrl+Z |
| Redo | Ctrl+Y |
| Add Selection To Next Find Match | Ctrl+D |
| Move Last Selection To Next Find Match | Ctrl+K Ctrl+D |
| Undo last cursor operation | Ctrl+U |
| Insert cursor at end of each line selected | Shift+Alt+I |
| Select all occurrences of current selection | Ctrl+Shift+L |
| Select all occurrences of current word | Ctrl+F2 |
| Select current line | Ctrl+L |
| Insert Cursor Below | Ctrl+Alt+Down |
| Insert Cursor Above | Ctrl+Alt+Up |
| Jump to matching bracket | Ctrl+Shift+\ |
| Indent Line | Ctrl+] |
| Outdent Line | Ctrl+[ |
| Go to Beginning of Line | Home |
| Go to End of Line | End |
| Go to End of File | Ctrl+End |
| Go to Beginning of File | Ctrl+Home |
| Scroll Line Down | Ctrl+Down |
| Scroll Line Up | Ctrl+Up |
| Scroll Page Down | Alt+PageDown |
| Scroll Page Up | Alt+PageUp |
| Fold (collapse) region | Ctrl+Shift+[ |
| Unfold (uncollapse) region | Ctrl+Shift+] |
| Toggle Fold region | Ctrl+K Ctrl+L |
| Fold (collapse) all subregions | Ctrl+K Ctrl+[ |
| Unfold (uncollapse) all subregions | Ctrl+K Ctrl+] |
| Fold (collapse) all regions | Ctrl+K Ctrl+0 |
| Unfold (uncollapse) all regions | Ctrl+K Ctrl+J |
| Add Line Comment | Ctrl+K Ctrl+C |
| Remove Line Comment | Ctrl+K Ctrl+U |
| Toggle Line Comment | Ctrl+/ |
| Toggle Block Comment | Shift+Alt+A |
| Find | Ctrl+F |
| Replace | Ctrl+H |
| Find Next | Enter |
| Find Previous | Shift+Enter |
| Select All Occurrences of Find Match | Alt+Enter |
| Toggle Find Case Sensitive | Alt+C |
| Toggle Find Regex | Alt+R |
| Toggle Find Whole Word | Alt+W |
| Toggle Use of Tab Key for Setting Focus | Ctrl+M |
| Toggle Render Whitespace | unassigned |
| Toggle Word Wrap | Alt+Z |
Rich languages editing
| Command | Key |
|---|---|
| Trigger Suggest | Ctrl+Space |
| Trigger Parameter Hints | Ctrl+Shift+Space |
| Format Document | Shift+Alt+F |
| Format Selection | Ctrl+K Ctrl+F |
| Go to Definition | F12 |
| Show Hover | Ctrl+K Ctrl+I |
| Peek Definition | Alt+F12 |
| Open Definition to the Side | Ctrl+K F12 |
| Quick Fix | Ctrl+. |
| Go to References | Shift+F12 |
| Rename Symbol | F2 |
| Replace with Next Value | Ctrl+Shift+. |
| Replace with Previous Value | Ctrl+Shift+, |
| Expand AST Selection | Shift+Alt+Right |
| Shrink AST Selection | Shift+Alt+Left |
| Trim Trailing Whitespace | Ctrl+K Ctrl+X |
| Change Language Mode | Ctrl+K M |
Navigation
| Command | Key |
|---|---|
| Show All Symbols | Ctrl+T |
| Go to Line... | Ctrl+G |
| Go to File..., Quick Open | Ctrl+P |
| Go to Symbol... | Ctrl+Shift+O |
| Show Problems | Ctrl+Shift+M |
| Go to Next Error or Warning | F8 |
| Go to Previous Error or Warning | Shift+F8 |
| Show All Commands | Ctrl+Shift+P or F1 |
| Navigate Editor Group History | Ctrl+Tab |
| Go Back to last cursor position | Alt+Left |
| Go back to last Edit position | Ctrl+K Ctrl+Q |
| Go back in Quick Input | Alt+Left |
| Go Forward | Alt+Right |
| Focus Breadcrumbs | Ctrl+Shift+; |
| Focus and Select Breadcrumbs | Ctrl+Shift+. |
Editor/Window Management
| Command | Key |
|---|---|
| New Window | Ctrl+Shift+N |
| Close Window | Alt+F4 |
| Close Editor | Ctrl+F4 |
| Close Folder | Ctrl+K F |
| Cycle Between Editor Groups | unassigned |
| Split Editor | Ctrl+\ |
| Focus into First Editor Group | Ctrl+1 |
| Focus into Second Editor Group | Ctrl+2 |
| Focus into Third Editor Group | Ctrl+3 |
| Focus into Editor Group on the Left | unassigned |
| Focus into Editor Group on the Right | unassigned |
| Move Editor Left | Ctrl+Shift+PageUp |
| Move Editor Right | Ctrl+Shift+PageDown |
| Move Active Editor Group Left | Ctrl+K Left |
| Move Active Editor Group Right | Ctrl+K Right |
| Move Editor into Next Group | Ctrl+Alt+Right |
| Move Editor into Previous Group | Ctrl+Alt+Left |
File Management
| Command | Key |
|---|---|
| New File | Ctrl+N |
| Open File... | Ctrl+O |
| Save | Ctrl+S |
| Save All | Ctrl+K S |
| Save As... | Ctrl+Shift+S |
| Close | Ctrl+F4 |
| Close Others | unassigned |
| Close Group | Ctrl+K W |
| Close Other Groups | unassigned |
| Close Group to Left | unassigned |
| Close Group to Right | unassigned |
| Close All | Ctrl+K Ctrl+W |
| Reopen Closed Editor | Ctrl+Shift+T |
| Keep Open | Ctrl+K Enter |
| Copy Path of Active File | Ctrl+K P |
| Reveal Active File in Windows | Ctrl+K R |
| Show Opened File in New Window | unassigned |
| Compare Opened File With | unassigned |
Display
| Command | Key |
|---|---|
| Toggle Full Screen | F11 |
| Toggle Zen Mode | Ctrl+K Z |
| Leave Zen Mode | Escape Escape |
| Zoom in | Ctrl+= |
| Zoom out | Ctrl+- |
| Reset Zoom | Ctrl+Numpad0 |
| Toggle Sidebar Visibility | Ctrl+B |
| Show Explorer / Toggle Focus | Ctrl+Shift+E |
| Show Search | Ctrl+Shift+F |
| Show Source Control | Ctrl+Shift+G |
| Show Run | Ctrl+Shift+D |
| Show Extensions | Ctrl+Shift+X |
| Show Output | Ctrl+Shift+U |
| Quick Open View | Ctrl+Q |
| Open New Command Prompt | Ctrl+Shift+C |
| Toggle Markdown Preview | Ctrl+Shift+V |
| Open Preview to the Side | Ctrl+K V |
| Toggle Integrated Terminal | Ctrl+` |
| Create New Terminal | Ctrl+Shift+` |
Search
| Command | Key |
|---|---|
| Show Search | Ctrl+Shift+F |
| Replace in Files | Ctrl+Shift+H |
| Toggle Match Case | Alt+C |
| Toggle Match Whole Word | Alt+W |
| Toggle Use Regular Expression | Alt+R |
| Toggle Search Details | Ctrl+Shift+J |
| Focus Next Search Result | F4 |
| Focus Previous Search Result | Shift+F4 |
| Show Next Search Term | Down |
| Show Previous Search Term | Up |
Search Editor
| Command | Key |
|---|---|
| Open Results In Editor | Alt+Enter |
| Focus Search Editor Input | Escape |
| Search Again | Ctrl+Shift+R |
| Delete File Results | Ctrl+Shift+Backspace |
Preferences
| Command | Key |
|---|---|
| Open Settings | Ctrl+, |
| Open Workspace Settings | unassigned |
| Open Keyboard Shortcuts | Ctrl+K Ctrl+S |
| Open User Snippets | unassigned |
| Select Color Theme | Ctrl+K Ctrl+T |
| Configure Display Language | unassigned |
Debug
| Command | Key |
|---|---|
| Toggle Breakpoint | F9 |
| Start | F5 |
| Continue | F5 |
| Start (without debugging) | Ctrl+F5 |
| Pause | F6 |
| Step Into | F11 |
Tasks
| Command | Key |
|---|---|
| Run Build Task | Ctrl+Shift+B |
| Run Test Task | unassigned |
Extensions
| Command | Key |
|---|---|
| Install Extension | unassigned |
| Show Installed Extensions | unassigned |
| Show Outdated Extensions | unassigned |
| Show Recommended Extensions | unassigned |
| Show Popular Extensions | unassigned |
| Update All Extensions | unassigned |
Customize settings
Keyboard Settings Via JSON
Open the command palette and find Preferences: Open keyboard shortcuts (JSON) and paste the following:
Switch focus between terminal and editor
Ctrl + `
{
    "key":     "ctrl+`",
    "command": "workbench.action.terminal.focus"
},
{
    "key":     "ctrl+`",
    "command": "workbench.action.focusActiveEditorGroup",
    "when":    "terminalFocus"
}
Adjust font size on terminal
Ctrl + + / Ctrl + -
    {
        "key": "ctrl+=",
        "command": "workbench.action.terminal.fontZoomIn",
        "when": "terminalFocus"
    },
    {
        "key": "ctrl+-",
        "command": "workbench.action.terminal.fontZoomOut",
        "when": "terminalFocus"
    }
New file
Ctrl + n
    {
        "key": "ctrl+n",
        "command": "workbench.action.files.newUntitledFile"
    },
    {
        "key": "ctrl+n",
        "command": "-workbench.action.files.newUntitledFile"
    },
Focus activity bar
The most far left sidebar is the activity bar.
Ctrl + k + a
    {
        "key": "ctrl+k a",
        "command": "workbench.action.focusActivityBar"
    },
Inline suggestions: acceptNextWord
Ctrl + →
    {
        "key": "ctrl+right",
        "command": "editor.action.inlineSuggest.acceptNextWord",
        "when": "inlineSuggestionVisible && !editorReadonly"
    },
Settings Via JSON
Open the command palette and find Preferences: Open User Settings (JSON) and paste the following:
Errorlens
Code
"errorLens.codeLensTemplate": "$severity $message $source",
  "errorLens.statusBarMessageEnabled": true,
  "errorLens.statusBarColorsEnabled": true,
  "errorLens.statusBarMessageTemplate": "$message $severity $source",
  "errorLens.decorations": {
    "errorMessage": {
      "textDecoration": ";background:linear-gradient(to right, #0088ff, #0a9c33);border-radius:0.3em;padding:0 0.5ch;",
      "color": "#fff",
      // "fontWeight": "bold",
    },
    "warningMessage": {
      "textDecoration": ";background:linear-gradient(to right, #f73a00, #65d701);border-radius:0.3em;padding:0 0.5ch;",
      "color": "#fff",
      // "fontWeight": "bold",
    },
  },
  "errorLens.excludeBySource": [
    "markdownlint(MD033)"
  ],
  "errorLens.enabledDiagnosticLevels": [
    "error",
    "warning",
    "info",
    "hint"
  ],
Settings Via UI
Open the command palette and find Preferences: Open Settings UI or press Ctrl + ,
Search in selection
Paste "editor.find.autoFindInSelection" in search settings and choose 'multiline' to enable to search selection.
Customize Theme
  "workbench.colorCustomizations": {
    // "tab.activeBackground": "#92a2c3",
    "tab.activeBorderTop": "#bebe48",
    // "statusBar.border": "#82ccd3",
    "statusBar.foreground":"#82ccd3",
    "statusBarItem.remoteBackground": "#82ccd3",
    "statusBarItem.remoteForeground":"#000",
  },
Commandline Options
code -w - Wait for the files to be closed before returning.
code -n - Force to open a new window.
code . - Opens a new empty window.
code -r - Reuse window. Force to open in an already opened window.
code -a - Add folder(s) to the last active window.
code -g --goto <file:line[:character]> - Open a file at a specific line number.
Get-ChildItem | code - - Opens the output of the command in VS Code.
Essential Shortcuts
| Keyboard shortcut | Action |
|---|---|
| Ctrl + A | Select all content. |
| Ctrl + C | Copy selected items to clipboard. |
| Ctrl + X | Cut selected items to clipboard. |
| Ctrl + V | (or Shift + Insert) Paste content from clipboard. |
| Ctrl + Z | Undo an action, including undelete files (limited). |
| Ctrl + Y | Redo an action. |
| Ctrl + Shift + N | Create new folder on desktop or File Explorer. |
| Alt + F4 | Close active window. (If no active window is present, a shutdown box appears.) |
| Ctrl + D | Delete selected item to the Recycle Bin. |
| Shift + Del | Delete the selected item permanently, skipping Recycle Bin. |
| F2 | Rename selected item. |
| Esc | Close current task. |
| Alt + Tab | Switch between open apps. |
| PrtScn | Take a screenshot and stores it in the clipboard. |
| ⊞ + E | Open File Explorer. |
| ⊞ + I | Open Settings app. |
| ⊞ + A | Open Action center. |
| ⊞ + D | Display and hide the desktop. |
| ⊞ + L | Lock device. |
| ⊞ + V | Open Clipboard bin. |
| ⊞ + . | Open emoji panel. |
| ⊞ + PrtScn | Capture a full screenshot in the "Screenshots" folder. |
| ⊞ + Shift + S | Capture part of the screen with Snip & Sketch. |
| ⊞ + ← | Snap app or window left. |
| ⊞ + → | Snap app or window right. |
Desktop Shortcuts
| Press this key: | To do this action: |
|---|---|
| Alt + A | Set focus to the first icon in the Suggested actions menu. |
| Alt + Esc | Cycle through windows in the order in which they were opened. |
| Alt + F4 | Close the active window. If no windows are open, prompt to shutdown. |
| Alt + F8 | Show your password on the sign-in screen. |
| Alt + Left arrow | Go back. |
| Alt + Page Down | Move down one screen. |
| Alt + Page Up | Move up one screen. |
| Alt + PrtScn | Capture a screenshot of the active window and copy it to the clipboard. |
| Alt + Right arrow | Go forward. |
| Alt + Shift + arrow keys | When a group or tile is in focus on the Start menu, move it in the specified direction. |
| Alt + Spacebar | Open the context menu for the active window. |
| Alt + Tab | Switch between open windows. To cycle through multiple windows, continue to hold the Alt key and press Tab multiple times. |
| Alt + underlined letter | For actions in command or context menus, some windows and apps specify keyboard shortcuts by underlining a character in the action name. Press Alt and then the letter to do that action. |
| Ctrl + A | Select all items in a window. |
| Ctrl + Alt + Del | Switch to the security screen where you can lock the desktop, switch user, sign out, change a password, or open Task Manager. |
| Ctrl + Alt + Tab | View a thumbnail of all open apps. Use the arrow keys to switch between open apps. |
| Ctrl + Esc | Open the Start menu. |
| Ctrl + F4 | In apps that are full-screen and let you have multiple documents open at the same time, close the active document but not the entire app. |
| Ctrl + F5 Ctrl + R | Refresh the current window. |
| Ctrl + Shift | When multiple keyboard layouts are available, switch the keyboard layout. |
| Ctrl + Shift + arrow keys | When a tile is in focus on the Start menu, move it into another tile to create a folder. |
| Ctrl + Shift + Esc | Open Task Manager. |
| Ctrl + Spacebar | Enable or disable the Chinese input method editor (IME). For more information, see Microsoft Simplified Chinese IME and Microsoft Traditional Chinese IME. |
| Ctrl + Y | Redo an action that was previously undone with Ctrl + Z. |
| Ctrl + Z | Undo the previous action. |
| Esc or Escape | Stop or leave the current task, or dismiss a dialog box. |
| F5 | Refresh the active window. |
| F6 | Cycle through elements in a window or on the desktop. |
| F10 | Activate the menu bar in the active window. |
| PrtScn or Print Screen | Select a region of the screen to capture a screenshot to the clipboard. You can then open the Snipping Tool to share or markup the image. Note: You can turn off this default behavior. Select Start > Settings > Accessibility > Keyboard, and set Use the Print Screen button to open screen snipping to Off. Open the Settings app |
Windows Key
| Press this key: | To do this action: |
|---|---|
| ⊞ + A | Open the Windows 11 action center. |
| ⊞ + Alt + B | Turn high dynamic range (HDR) on or off. For more information, see What is HDR in Windows?. |
| ⊞ + Alt + D | Display and hide the date and time on the desktop. |
| ⊞ | Open or close the Start menu. |
| ⊞ + Alt + Down arrow | Snap the active window to the bottom half of the screen. |
| ⊞ + Alt + H | When voice typing is open, set the focus to the keyboard. |
| ⊞ + Alt + K | Mute or unmute the microphone in supported apps. |
| ⊞ + Alt + Up arrow | Snap the active window to the top half of the screen. |
| ⊞ + comma (,) | Temporarily peek at the desktop. |
| ⊞ + Ctrl + C | If turned on in settings, enable or disable color filters. Open the Settings app |
| ⊞ + Ctrl + Enter | Open Narrator. |
| ⊞ + Ctrl + F | Search for devices on a network. |
| ⊞ + Ctrl + Q | Open Quick Assist. |
| ⊞ + Ctrl + Shift + B | Wake up the device when the screen is blank or black. |
| ⊞ + Ctrl + Spacebar | Change to a previously selected input option. |
| ⊞ + Ctrl + V | Open the sound output page of quick settings, which includes settings for the output device, spatial sound, and the volume mixer. |
| ⊞ + D | Display and hide the desktop. |
| ⊞ + Down arrow | Minimize the active window. |
| ⊞ + E | Open File Explorer. |
| ⊞ + Esc | Close Magnifier. |
| ⊞ + F | Open Feedback Hub. |
| ⊞ + forward slash (/) | Start input method editor (IME) reconversion. |
| ⊞ + G | Open the Game Bar. For more information, see Keyboard shortcuts for Game Bar. |
| ⊞ + H | Open voice dictation. |
| ⊞ + Home | Minimize or restore all windows except the active window. |
| ⊞ + I | Open Settings. |
| ⊞ + J | Set focus to a Windows tip when one is available. When a Windows tip appears, bring focus to the tip. Press the keys again to bring focus to the element on the screen to which the Windows tip is anchored. |
| ⊞ + K | Open Cast from Quick Settings to connect to a display. For more information, see Screen mirroring and projecting to your PC or wireless display. |
| ⊞ + L | Lock the computer. |
| ⊞ + Left arrow | Snap the window to the left side of the screen. |
| ⊞ + M | Minimize all windows. |
| ⊞ + Minus (-) | Zoom out in Magnifier. |
| ⊞ + N | Open notification center and calendar. |
| ⊞ + O | Lock the device orientation. |
| ⊞ + P | Open project settings to choose a presentation display mode. |
| ⊞ + Pause | Opens the Settings app to the System > About page. |
| ⊞ + Period (.) Windows key + Semicolon (;) | Open the emoji panel. |
| ⊞ + Plus (+) | Zoom in with the Magnifier. |
| ⊞ + PrtScn | Capture a full screen screenshot and save it to a file in the Screenshots subfolder of the Pictures folder. |
| ⊞ + Q | Open search. |
| ⊞ + R | Open the Run dialog box. |
| ⊞ + Right arrow | Snap the window to the right side of the screen. |
| ⊞ + S | Open search. |
| ⊞ + Shift + Down arrow | If a window is snapped or maximized, restore it. |
| ⊞ + Shift + Enter | If the active window is a Universal Windows Platform (UWP) app, make it full screen. |
| ⊞ + Shift + Left arrow | Move the active window to the monitor on the left. |
| ⊞ + Shift + M | Restore minimized windows. |
| ⊞ + Shift + R | Select a region of the screen to record a video. It then opens the screen recording in the Snipping Tool. By default, this screen recording is automatically saved as an MP4 file in the Screen Recordings subfolder of your Videos folder. |
| ⊞ + Shift + Right arrow | Move the active window to the monitor on the right. |
| ⊞ + Shift + S | Select a region of the screen to capture a screenshot to the clipboard. You can then open the Snipping Tool to share or markup the image. |
| ⊞ + Shift + Spacebar | Switch backward through input languages and keyboard layouts. |
| ⊞ + Shift + Up arrow | Stretch the desktop window to the top and bottom of the screen. |
| ⊞ + Shift + V | Cycle through notifications. |
| ⊞ + Spacebar | Switch forward through input languages and keyboard layouts. |
| ⊞ + Tab | Open Task View. |
| ⊞ + U | Open the Settings app to the Accessibility section. |
| ⊞ + Up arrow | Maximize the active window. |
| ⊞ + V | Open the clipboard history. Note: Clipboard history isn't turned on by default. To turn it on, use this keyboard shortcut and then select the prompt to turn on history. You can also turn it on in the Settings app > System > Clipboard, and set Clipboard history to On. Open the Settings app |
| ⊞ + W | Open Widgets. |
| ⊞ + X | Open the Quick Link menu. This shortcut is the same action as right-click on the Start menu. |
| ⊞ + Y | Switch input between Windows Mixed Reality and your desktop. |
| ⊞ + Z | Open the snap layouts. |
Text Editing Shortcuts
| Press this key: | To do this action: |
|---|---|
| Backspace | Delete characters to the left of the cursor. |
| Ctrl + A | Select all text. |
| Ctrl + B | Apply the bold format to the selected text. |
| Ctrl + Backspace | Delete words to the left of the cursor. |
| Ctrl + C Ctrl + Insert | Copy the selected text. |
| Ctrl + Del | Delete words to the right of the cursor. |
| Ctrl + Down arrow | Move the cursor forward to the beginning of the next paragraph. |
| Ctrl + End | Move the cursor forward to the end of the document. |
| Ctrl + F | Find text. |
| Ctrl + H | Find and replace text. |
| Ctrl + Home | Move the cursor backward to the beginning of the document. |
| Ctrl + I | Apply the italic format to the selected text. |
| Ctrl + Left arrow | Move the cursor backward to the beginning of the previous word. |
| Ctrl + Right arrow | Move the cursor forward to the beginning of the next word. |
| Ctrl + Shift + V | Paste as plain text. |
| Ctrl + U | Apply the underline format to the selected text. |
| Ctrl + Up arrow | Move the cursor backward to the beginning of the previous paragraph. |
| Ctrl + V Shift + Insert | Paste the last item from the clipboard. |
| Ctrl + X | Cut the selected text. |
| Ctrl + Y | Redo typing that was undone with Ctrl + Z. |
| Ctrl + Z | Undo the last typing. |
| Del or Delete | Delete characters to the right of the cursor. |
| Down arrow | Move the cursor forward to the next line. |
| End | Move the cursor forward to the end of the line. |
| Home | Move the cursor backward to the beginning of the line. |
| Left arrow | Move the cursor backward to the previous character. |
| Page down or PgDn | Move the cursor forward by one page. |
| Page up or PgUp | Move the cursor backward by one page. |
| Right arrow | Move the cursor forward to the next character. |
| Shift + Ctrl + Down arrow | Select paragraphs forward from the current cursor position. |
| Shift + Ctrl + End | Select text between the current cursor position and the end of the document. |
| Shift + Ctrl + Home | Select text between the current cursor position and the beginning of the document. |
| Shift + Ctrl + Left | Select words backward from the current cursor position. |
| Shift + Ctrl + Right | Select words forward from the current cursor position. |
| Shift + Ctrl + Up | Select paragraphs backward the current cursor position. |
| Shift + Down arrow | Select lines forward from the current cursor position. |
| Shift + End | Select text from the current cursor position to the end of the current line. |
| Shift + Home | Select text from the current cursor position to the beginning of the current line. |
| Shift + Left arrow | Select characters backward from the current cursor position. |
| Shift + Page Down | Select one page of text forward from the current cursor position. |
| Shift + Page Up | Select one page of text backward from the current cursor position. |
| Shift + Right arrow | Select characters forward from the current cursor position. |
| Shift + Up arrow | Select lines backward from the current cursor position. |
| Tab | Indent the cursor one tab stop. |
| Up arrow | Move the cursor backward to the previous line. |
File Explorer Shortcuts
| Press this key: | To do this action: |
|---|---|
| Alt + D | Select the address bar. |
| Alt + Enter | Display properties for the selected item. |
| Alt + Left arrow Backspace | Navigate to the previous folder. |
| Alt + mouse drag a file | When you drop the file, create a shortcut to the original file in that location. |
| Alt + P | Show or hide the preview pane. |
| Alt + Right arrow | View the next folder. |
| Alt + Shift + P | Show or hide the details pane. |
| Alt + Up arrow | Move up a level in the folder path. |
| Ctrl + Arrow key (to move to an item) + Spacebar | Select multiple individual items. |
| Ctrl + D Delete | Delete the selected item and move it to the Recycle Bin. |
| Ctrl + E Ctrl + F | Select the search box. |
| Ctrl + L | Focus on the address bar. |
| Ctrl + mouse drag a file | When you drop the file, create a copy in that location. |
| Ctrl + mouse scroll wheel | Change the size and appearance of file and folder icons. |
| Ctrl + N | Open a new window. |
| Ctrl + Number (1-9) | Move to that tab number. |
| Ctrl + Plus (+) | Resize all columns to fit text. Note: This shortcut requires using a numeric keypad. |
| Ctrl + Shift + E | Expands all folders from the tree in the navigation pane. |
| Ctrl + Shift + N | Create a new folder. |
| Ctrl + Shift + Number (1-9) | Change the view style. For example, 2 is Large icons and 6 is Details. |
| Ctrl + Shift + Tab | Move to the previous tab. |
| Ctrl + T | Open a new tab and switch to it. |
| Ctrl + W | Closes the active tab. Closes the window if there's only one tab open. |
| Ctrl + Tab | Move to the next tab. |
| End | Scroll to the bottom of the active window. |
| F2 | Rename the selected item. |
| F3 | Search for a file or folder. |
| F4 | Select the address bar to change the current path. |
| F5 | Refresh the window. |
| F6 | Cycle through elements in the window. |
| F11 | Maximize or minimize the active window. |
| Home | Scroll to the top of the active window. |
| Left arrow | Collapse the current selection (if it's expanded), or select the folder that the folder was in. |
| Right arrow | Display the current selection (if it's collapsed), or select the first subfolder. |
| Shift + Arrow keys | Select multiple items. |
| Shift + Delete | Permanently delete the selected item without moving it to the Recycle Bin. |
| Shift + F10 | Display the context menu for the selected item. |
| Shift + mouse drag a file | When you drop the file, move it to that location. |
| Shift + mouse right-click | Display the Show more options context menu for the selected item. |
| ⊞ + E | Open File Explorer. |
CMD Prompt Shortcuts
| Press this key: | To do this action: |
|---|---|
| Ctrl + C Ctrl + Insert | Copy the selected text. |
| Ctrl + V Shift + Insert | Paste the selected text. |
| Ctrl + M | Enter Mark mode. |
| Alt + selection key | Begin selection in block mode. |
| Arrow keys | Move the cursor in the direction specified. |
| Page up | Move the cursor by one page up. |
| Page down | Move the cursor by one page down. |
| Ctrl + Home (Mark mode) | Move the cursor to the beginning of the buffer. |
| Ctrl + End (Mark mode) | Move the cursor to the end of the buffer. |
| Ctrl + Up arrow | Move up one line in the output history. |
| Ctrl + Down arrow | Move down one line in the output history. |
| Ctrl + Home (History navigation) | If the command line is empty, move the viewport to the top of the buffer. Otherwise, delete all the characters to the left of the cursor in the command line. |
| Ctrl + End (History navigation) | If the command line is empty, move the viewport to the command line. Otherwise, delete all the characters to the right of the cursor in the command line. |
Taskbar Shortcuts
| Press this key: | To do this action: |
|---|---|
| Alt + Shift + Arrow | When an app icon is in focus, move its position in the direction of the arrow. |
| Ctrl + select a grouped app icon on the taskbar | When multiple windows for the same app are grouped on the taskbar, press Ctrl as you select the taskbar icon to shift focus through the windows in the app group. |
| Ctrl + Shift + select an app icon on the taskbar | Open the app as an administrator. |
| Shift + right-click an app icon on the taskbar | Show the window menu for the app. |
| Shift + right-click a grouped taskbar button | Show the window menu for the group. |
| Shift + select an app icon on the taskbar | Open another instance of the app. |
| ⊞ + Alt + Enter (on taskbar item focus) | Open taskbar settings. |
| ⊞ + Alt + number (0-9) | Open the jump list for the app pinned to the taskbar in the position indicated by the number. |
| ⊞ + B | Set the focus to the first icon in the notification area of the taskbar. |
| ⊞ + Ctrl + number (0-9) | Switch to the last active window of the app pinned to the taskbar in the position indicated by the number. |
| ⊞ + Ctrl + Shift + number (0-9) | Open as an administrator a new instance of the app located at the given position on the taskbar. |
| ⊞ + number (0-9) | Open the app pinned to the taskbar in the position indicated by the number. If the app is already running, switch to that app. |
| ⊞ + Shift + Number (0-9) | Start a new instance of the app pinned to the taskbar in the position indicated by the number. |
| ⊞ + T | Cycle through apps in the taskbar. |
Settings Shortcuts
| Press this key: | To do this action: |
|---|---|
| Arrow keys | Move focus through the currently selected region. Scroll the page. |
| Backspace | Navigate backwards. |
| Enter Spacebar | Select the current item in focus. |
| Shift + Tab | Cycle backward through regions. |
| Tab | Cycle forward through regions. |
| ⊞ + I | Open the Settings app. |
Multiple Desktops Shortcuts
| Press this key: | To do this action: |
|---|---|
| ⊞ + Tab | Open Task view. |
| ⊞ + Ctrl + D | Create another desktop. |
| ⊞ + Ctrl + Right arrow | Switch between other desktops you've created on the right. |
| ⊞ + Ctrl + Left arrow | Switch between other desktops you've created on the left. |
| ⊞ + Ctrl + F4 | Close the desktop you're using. |
Dialog Box Shortcuts
| Press this key: | To do this action: |
|---|---|
| F4 | Display the items in the active list. |
| Ctrl + Tab | Move forward through tabs. |
| Ctrl + Shift + Tab | Move back through tabs. |
| Ctrl + 1, 2, 3,... | Move to that tab number. |
| Tab | Move forward through options. |
| Shift + Tab | Move back through options. |
| Alt + underlined letter | Perform the command (or select the option) that is used with that letter. |
| Spacebar | Select or clear the check box if the active option is a check box. |
| Backspace | Open a folder one level up if a folder is selected in the Save As or Open dialog box. |
| Arrow keys | Select a button if the active option is a group of option buttons. |
Keyboard Shortcuts and Symbols
Select the symbol you want to copy. Use your mouse or the Ctrl + C shortcut on your keyboard.
- Arrow symbols
- Bullet symbols
- Recycling symbols
- Copyright and trademark symbols
- Temperature symbols
- Hearts, etc. symbols
- Music symbols
- Math symbols
- Currency symbols
- Greek letter symbols (Lower case and capital)
- Star symbols
- Zodiac symbols
- Weather symbols
- Chess symbols
- Engineering symbols
- Numbers and letters in circles symbols
- Windows ALT-Codes and Unicode Symbols
Arrow symbols
↑ ↓ → ← ↔ ▲ ▼ ► ◄ △ ⇿ ⇾ ⇽ ⇼ ⇻ ⇺ ⇹ ⇸ ⇶ ⇵ ⇳ ⇲ ⇱ ⇪ ⇩ ⇨ ⇧ ⇦
⇥ ⇤ ⇣ ⇢ ⇡ ⇠⇛⇚⇙ ⇘ ⇗ ⇖ ⇕ ⇔ ⇓ ⇒ ⇑ ⇐ ⇌ ⇋ ⥊ ⥋ ⇆ ⇅ ⇄ ↻ ↺ ↹
↷ ↶ ↵ ↴ ↳ ↲ ↱ ↰ ↮ ↬ ↫ ↨ ↧ ↦ ↥ ↤ ↛ ↚ ↙ ↘ ↗ ↖ ↕
Bullet symbols
• ‣ ⁃ ◘ ◦ ⦾ ⦿ ✓ ✔ ☑ ☒ ⦿ ⦾ ✪ ☓ ✖ « » ✗ ❞ ❝
Recycling symbols
♲ ♳ ♴ ♵ ♶ ♷ ♸ ♹ ♺ ♻ ♼ ♽
Copyright and trademark symbols
© ℗ ⓒ ® ™
Temperature symbols
℃ ℉ °
Hearts, etc. symbols
♡ ♥ ❤ ∞☺☻♂ ♀ ☯
Music symbols
♩ ♪ ♫ ♭ ♮ ♯ 𝄪 𝄆 𝄇 𝄈 𝄐 𝄑 𝄒 𝆒 𝆓 𝄫 𝄞 𝄢 𝄡
Math symbols
¼ ½ ¾ ⅓ ⅔ ⅛ ⅜ ⅝ ≈ > ≥ ≧ ≩ ≫ ≳ ⋝ ÷ ∕ ± ∓ ≂ ⊟ ⊞ ⨁ ⨤ ⨦ %
∟∠∡ ⊾⟀ ⦜ ⦛ ⦠ √ ∛ ∜ ⍍ ≡ ≢ ⧥ ⩧ ⅀ ◊ ⟠ ⨌⨍⨏ ⨜ ⨛ ◜ ◝ ◞ ◟ ⤸ ⤹
◆ ◇ ❖ ○ ◍ ● ◐ ◑ ◒ ◓ ◔ ◕ ◖ ◗ ⬡ ⬢ ‰ ⁿ ¹ ² ³ § ∞ ㅅ ⌖
◧ ◨ ◩ ◪ ▢ ▣ ▤ ▥ ▦ ▧ ▨ ▩ ▪ ▫ ▬ ▭ ▮ ▯ ▰ ▱ ◆ ◇ ◈ ◉ ◊
○ ◌ ◎ ◘ ◙ ◚ ◛ ◜ ◝ ◞ ◟ ◠ ◡ ◢ ◣ ◤ ◥ ◦ ◫ ◬ ◭ ◮ ◯ ▲ △ ▴ ▵
▶ ▷ ▸ ▹ ► ▻ ▼ ▽ ▾ ▿ ◀ ◁ ◂ ◃ ◄ ◅
Currency symbols
£ € $ ¢ ¥ ƒ ₧ ؋ ₳ ฿ ₵ ₡ ₢ ₫ ₯ ₠ ₣ ₲ ₴ ₭ ₺
ℳ ₥ ₦ ₱ ₰ 元 圆 圓 ﷼ ₹ ₨ ₪ ₸ ₮ ₩ ¥ 円
Greek letter symbols (Lower case and capital)
α Α ß Β γ Γ δ Δ ε Ε ζ Ζ η Η θ ϴ ι Ι κ Κ λ Λ μ
Μ ν Ν ξ Ξ ο Ο π Π ρ Ρ σ Σ τ Τ ϒ Υ φ ϕ ψ Ψ ω Ω
Star symbols
⋆ ✢ ✥ ✦ ✧ ❂ ❉ ✱ ✲ ✴ ✵ ✶ ✷ ✸ ❇ ✹ ✺ ✻ ✼ ❈ ✮ ✡
Zodiac symbols
♒ ♓ ♈ ♉ ♊ ♋ ♌ ♍ ♎ ♏ ♐ ♑
Weather symbols
☼ ☽ ☾ ❅ ❆ ϟ ☀ ☁ ☂ ☃ ☄ ☼
Chess symbols
♔ ♚ ♕ ♛ ♗ ♝ ♘ ♞ ♙ ♟ ♖ ♜
Engineering symbols
⌀⌁⌂⍳⍴ ⍵ ⍶ ⍷ ⍸ ⍹ ⍺ ⌃⌄⌅⌆⌇⌈⌉⌊⌋⌌⌍⌎⌏⌐⌑⌒⌓⌔⌕⌖⌗⌘⌙⌚⌛
⌜⌝⌞⌟⌠⌡⌢⌣⌤ ⌥ ⌦⌧⌫⌬⌭⌮⌯⌰⌱⌲⌳⌴⌵⌶⌿⍀⍁ ⍂ ⍃ ⍄
⍅ ⍆ ⍇ ⍈ ⍉ ⍊ ⍋ ⍌ ⍍ ⍎ ⍏ ⍐ ⍒ ⍓ ⍔ ⍕ ⍖ ⍗
⍘ ⍙ ⍚ ⍜ ⍝ ⍞ ⍟ ⍠ ⍡ ⍢ ⍣ ⍤ ⍥ ⍦ ⍧ ⍨ ⍩ ⍪ ⍫ ⍬
⍭ ⍮ ⍯ ⍰ ⌷ ⌸ ⌹ ⌺ ⌻ ⌼ ⍱ ﹘﹝﹞
Numbers and letters in circles symbols
⓪ ① ② ③ ④ ⑤ ⑥ ⑦ ⑧ ⑨
ⓐ ⓑ ⓒ ⓓ ⓔ ⓕ ⓖ ⓗ ⓘ ⓙ ⓚ ⓛ ⓜ
ⓝ ⓞ ⓟ ⓠ ⓡ ⓢ ⓣ ⓤ ⓥ ⓦ ⓧ ⓨ ⓩ
Ⓐ Ⓑ Ⓒ Ⓓ Ⓔ Ⓕ Ⓖ Ⓗ Ⓘ Ⓙ Ⓚ Ⓛ Ⓜ
Ⓝ Ⓞ Ⓟ Ⓠ Ⓡ Ⓢ Ⓣ Ⓤ Ⓥ Ⓦ Ⓧ Ⓨ Ⓩ
Windows ALT-Codes and Unicode Symbols
| To type this symbol | Press this on your keyboard | Description |
|---|---|---|
| ™ | Alt + 0153 | Trademark |
| © | Alt + 0169 | Copyright |
| ® | Alt + 0174 | Registered |
| ‰ | Alt + 0137 | Per mille (per thousand) |
| ± | Alt + 241 | Plus or Minus |
| ¼ | Alt + 0188 | Quarter |
| ½ | Alt + 0189 | Half |
| ¾ | Alt + 0190 | Three quarters |
| ≡ | Alt + 240 | Exactly Identical |
| ≈ | Alt + 247 | Approximately equal |
| ≥ | Alt + 242 | Greater than or equal |
| ≤ | Alt + 243 | Less than or equal |
| √ | Alt + 251 | Square Root |
| ⁿ | Alt + 252 | Power n |
| ¹ | Alt + 0185 | To the power of 1 |
| ² | Alt + 0178 | Squared |
| ³ | Alt + 0179 | Cubed |
| π | Alt + 227 | Pi |
| ° | Alt + 248 | Degree |
| ∞ | Alt + 2368 | Infinity |
| µ | Alt + 230 | Micro |
| Σ | Alt + 228 | Sum |
| ☺ | Alt + 1 | White Smiley |
| ☻ | Alt + 2 | Black Smiley |
| • | Alt + 7 | Bullet 1 |
| ○ | Alt + 9 | Bullet 2 |
| ♂ | Alt + 11 | Male Sign |
| ♀ | Alt + 12 | Female Sign |
| ↨ | Alt + 23 | Up/Down Arrow |
| ↑ | Alt + 24 | Up Arrow |
| ↓ | Alt + 25 | Down Arrow |
| → | Alt + 26 | Right Arrow |
| ← | Alt + 27 | Left Arrow |
| ↔ | Alt + 29 | Right/Left Arrow |
| £ | Alt + 156 | Pound |
| € | Alt + 0128 | Euro |
| $ | Alt + 36 | Dollar Sign |
| ¢ | Alt + 155 | Cent |
| ¥ | Alt + 157 | Yen |
| ƒ | Alt + 159 | Frank |
| ₧ | Alt + 158 | Peseta |
| ß | Alt + 225 | Beta |
| α | Alt + 224 | Alpha |
| δ | Alt + 235 | Delta |
| Ω | Alt + 234 | Omega |
| ► | Alt + 16 | Point Right |
| ◄ | Alt + 17 | Point Left |
| ■ | Alt + 254 | Stop |
| ▲ | Alt + 30 | Point Up |
| ▼ | Alt + 31 | Point Down |
| § | Alt + 21 | Section |
| ¶ | Alt + 20 | Paragraph |
| “ | Alt + 0147 | Curly double open quote |
| ” | Alt + 0148 | Curly double close quote |
| « | Alt + 174 | Quotation Mark |
| » | Alt + 175 | Quotation Mark |
| ♥ | Alt + 3 | Heart |
| º | Alt + 0176 | Degree symbol |
| œ | Alt + 0156 | Latin small ligature oe |
| • | Alt + 0149 | Bullet |
| ↻ | Alt + 8635 | Clockwise Open Circle Arrow |
| ↺ | Alt + 31 | Counterclockwise Open Circle Arrow |
| Ø | Alt + 0216 | Diameter |
| Ñ | Alt + 0209 | Enye |
Default Keyboard Shortcuts
To view all commands press Ctrl + Shift + p
Application-level Keys
Alt + F4 Terminal.CloseWindow
Alt + Enter Terminal.ToggleFullscreen
F11 Terminal.ToggleFullscreen
Ctrl + Shift + Space Terminal.OpenNewTabDropdown
Ctrl + , Terminal.OpenSettingsUI
Ctrl + Shift + , Terminal.OpenSettingsFile
Ctrl + Alt + , Terminal.OpenDefaultSettingsFile
Ctrl + Shift + F Terminal.FindText
Ctrl + Shift + P Terminal.ToggleCommandPalette
Win + sc(41) Terminal.QuakeMode
Alt + Space Terminal.OpenSystemMenu
Ctrl + Shift + . Terminal.Suggestions
Tab Management
Note: "command": "closeTab" is unbound by default.
The closeTab command closes a tab without confirmation, even if it has multiple panes.
Ctrl + Shift + T Terminal.OpenNewTab
Ctrl + Shift + N Terminal.OpenNewWindow
Ctrl + Shift + 1 Terminal.OpenNewTabProfile0
Ctrl + Shift + 2 Terminal.OpenNewTabProfile1
Ctrl + Shift + 3 Terminal.OpenNewTabProfile2
Ctrl + Shift + 4 Terminal.OpenNewTabProfile3
Ctrl + Shift + 5 Terminal.OpenNewTabProfile4
Ctrl + Shift + 6 Terminal.OpenNewTabProfile5
Ctrl + Shift + 7 Terminal.OpenNewTabProfile6
Ctrl + Shift + 8 Terminal.OpenNewTabProfile7
Ctrl + Shift + 9 Terminal.OpenNewTabProfile8
Ctrl + Shift + D Terminal.DuplicateTab
Ctrl + Tab Terminal.NextTab
Ctrl + Shift + Tab Terminal.PrevTab
Ctrl + Alt + 1 Terminal.SwitchToTab0
Ctrl + Alt + 2 Terminal.SwitchToTab1
Ctrl + Alt + 3 Terminal.SwitchToTab2
Ctrl + Alt + 4 Terminal.SwitchToTab3
Ctrl + Alt + 5 Terminal.SwitchToTab4
Ctrl + Alt + 6 Terminal.SwitchToTab5
Ctrl + Alt + 7 Terminal.SwitchToTab6
Ctrl + Alt + 8 Terminal.SwitchToTab7
Ctrl + Alt + 9 Terminal.SwitchToLastTab
Pane Management
Ctrl + Shift + W Terminal.ClosePane
Alt + Shift + - Terminal.DuplicatePaneDown
Alt + Shift + + Terminal.DuplicatePaneRight
Alt + Shift + Down Terminal.ResizePaneDown
Alt + Shift + Left Terminal.ResizePaneLeft
Alt + Shift + Right Terminal.ResizePaneRight
Alt + Shift + Up Terminal.ResizePaneUp
Alt + Down Terminal.MoveFocusDown
Alt + Left Terminal.MoveFocusLeft
Alt + Right Terminal.MoveFocusRight
Alt + Up Terminal.MoveFocusUp
Ctrl + Alt + Left Terminal.MoveFocusPrevious
Clipboard Integration
Ctrl + Shift + C Terminal.CopyToClipboard
Ctrl + Insert Terminal.CopyToClipboard
Enter Terminal.CopyToClipboard
Ctrl + Shift + V Terminal.PasteFromClipboard
Shift + Insert Terminal.PasteFromClipboard
Ctrl + Shift + A Terminal.SelectAll
Ctrl + Shift + M Terminal.ToggleMarkMode
Menu Terminal.ShowContextMenu
Scrollback
Ctrl + Shift + Down Terminal.ScrollDown
Ctrl + Shift + PgDn Terminal.ScrollDownPage
Ctrl + Shift + Up Terminal.ScrollUp
Ctrl + Shift + PgUp Terminal.ScrollUpPage
Ctrl + Shift + Home Terminal.ScrollToTop
Ctrl + Shift + End Terminal.ScrollToBottom
Visual Adjustments
Ctrl + + Terminal.IncreaseFontSize
Ctrl + - Terminal.DecreaseFontSize
Ctrl + Num+ Terminal.IncreaseFontSize
Ctrl + Num- Terminal.DecreaseFontSize
Ctrl + 0 Terminal.ResetFontSize
Ctrl + Num0 Terminal.ResetFontSize
Settings
Open settings: Ctrl + , Click on the JSON file in the lower left corner to manually edit bound and unbound shortcuts. To view all default settings Alt + click the JSON file.
Terminal Icons
Install Terminal icons:
Install-Module -Name Terminal-Icons -Repository PSGallery
Add Import-Module -Name Terminal-Icons to your PowerShell profile.
More info here
A joke
Two hunters are out in the woods when one collapses.
His friend calls 911: "My friend is dead! What do I do?"
The operator replies: "Calm down. First, make sure he’s dead."
A silence... then a gunshot. The guy comes back: "OK, now what?"
AI
- Regression evaluation metrics
- 1. Mean Absolute Error (MAE)
- 2. Mean Squared Error (MSE)
- 3. Root Mean Squared Error (RMSE)
- Coefficient of Determination (R²)
Regression evaluation metrics
1. Mean Absolute Error (MAE)
-
What it measures:
The average absolute difference between predicted and actual values.- Ignores direction (over- or under-prediction).
- Treats all errors equally.
-
Calculation: MAE=6∣2∣+∣3∣+∣3∣+∣1∣+∣2∣+∣3∣=614≈2.33
- Interpretation: On average, predictions are off by 2.33 ice creams.
-
When to use:
- When all errors (small or large) should be weighted equally.
- Preferred when outliers are not a critical concern.
2. Mean Squared Error (MSE)
-
What it measures:
The average of the squared differences between predicted and actual values.- Emphasizes larger errors (since squaring amplifies them).
-
Calculation: MSE=622+32+32+12+22+32=64+9+9+1+4+9=636=6
- Interpretation: The "score" is 6, but this isn’t in ice cream units (due to squaring).
-
When to use:
- When large errors are particularly undesirable (e.g., in financial models).
- Used as a loss function in machine learning (optimization).
3. Root Mean Squared Error (RMSE)
-
What it measures:
The square root of MSE, converting the metric back to the original units (ice creams). -
Calculation:
-
Interpretation: Predictions are off by ~2.45 ice creams on average, with larger errors weighted more heavily.
-
When to use:
- When you want MSE’s sensitivity to large errors but need interpretability in original units.
Key Differences Summary
| Metric | Units | Outlier Sensitivity | Interpretation |
|---|---|---|---|
| MAE | Original (e.g., ice creams) | Low | "Average error is X units" |
| MSE | Squared (e.g., ice creams²) | High | "Squared error average is X" |
| RMSE | Original (e.g., ice creams) | High | "Error magnitude is ~X units" |
Ice Cream Example Recap
- MAE (2.33): "On average, predictions are off by ~2.3 ice creams."
- MSE (6): "Large errors are penalized; score is 6 (no unit meaning)."
- RMSE (2.45): "After squaring and square-rooting, errors average ~2.5 ice creams, with larger mistakes weighted more."
Which to choose?
- Use MAE for straightforward, outlier-resistant interpretation.
- Use RMSE if large errors are critical (e.g., safety-critical systems).
When to Use
- MAE: When all errors should be treated equally
- MSE/RMSE: When large errors are particularly undesirable
- RMSE: Preferred when you need interpretability in original units
Coefficient of Determination (R²)
Definition
R² (R-Squared) measures the proportion of variance in the dependent variable (e.g., ice cream sales) that is predictable from the independent variable(s) in a regression model. It quantifies how well the model explains the observed data.
Key Formula
$$ R^2 = 1 - \frac{\sum (y - \hat{y})^2}{\sum (y - \bar{y})^2} $$
- ( y ): Actual values
- ( \hat{y} ): Predicted values
- ( \bar{y} ): Mean of actual values actual values
Interpretation
- R² = 1: Perfect fit (100% variance explained).
- R² = 0: Model explains none of the variance (no better than predicting the mean).
- R² < 0: Model performs worse than a horizontal line (rare, indicates severe issues).
Ice Cream Example
- R² = 0.95:
- The model explains 95% of the variance in ice cream sales.
- Only 5% of the variance is due to random/unexplained factors (e.g., festivals, weather anomalies).
Comparison with Other Metrics
| Metric | Purpose | Scale | Focus |
|---|---|---|---|
| MAE | Average absolute error | Original | Magnitude of errors |
| MSE/RMSE | Squared/root-squared error | Squared | Penalizes large errors |
| R² | Proportion of variance explained | 0 to 1 | Model explanatory power |
Why It Matters
- Contextualizes Error:
- Unlike MAE/MSE, R² compares errors to natural variance in the data.
- Model Selection:
- Higher R² indicates a better-fit model (but beware of overfitting!).
- Intuitive Scale:
- 0–1 range simplifies communication of model performance.
Limitations
- Not for All Models: Misleading for non-linear relationships.
- Overfitting Risk: Adding variables can artificially inflate R².
- No Direction: Doesn’t indicate if predictions are biased.
Note: Use R² alongside other metrics (e.g., RMSE) for a complete evaluation.
Cloud Architecture
- As a Service Models
- Shared Responsibility Model
- Resource Availability
- Disaster Recovery
- Multicloud Tenancy
- Connections to the Cloud
- Network Components
- Network Services
- Disk and Storage Types
- Tiered Storage
- Managed Services
- Microservices
- Stand-alone vs Orchestrated
- Supporting Containers
- Key Concepts
- Network Types
- Storage Types
- Billing Models
- Other Cost Topics
- Types of Databases
- Database Deployment Options
- Compute Resources
- Orchestration and Workflows
- Networking and Storage
- Networking and Storage
- Artificial Intelligence
- Internet of Things (IoT)
As a Service Models
IaaS (Infrastructure as a Service):
- IaaS provides virtualized computing resources over the internet. Users can rent servers, storage, networking, and other infrastructure components rather than purchasing and maintaining physical hardware.
- With IaaS, users have control over the operating systems, applications, and development frameworks, while the cloud provider manages the underlying infrastructure.
- Popular examples of IaaS providers include Amazon Web Services (AWS), Microsoft Azure, and Google Cloud Platform (GCP).
PaaS (Platform as a Service):
- PaaS provides a platform allowing customers to develop, run, and manage applications without dealing with the complexity of building and maintaining the underlying infrastructure.
- It typically includes tools and services for application development, such as databases, middleware, development tools, and operating systems.
- PaaS abstracts away much of the underlying infrastructure management, allowing developers to focus more on coding and deploying their applications.
- Examples of PaaS offerings include Heroku, Google App Engine, and Microsoft Azure App Service.
SaaS (Software as a Service):
- SaaS delivers software applications over the internet on a subscription basis. Users access these applications via a web browser or API without needing to install or maintain any software locally.
- SaaS applications are hosted and managed by the service provider, who handles maintenance, updates, security, and scalability.
- Examples of SaaS applications include Salesforce for CRM, Google Workspace for productivity tools, and Netflix for streaming media.
FaaS (Function as a Service):
- FaaS is a cloud computing model where cloud providers manage the infrastructure required to execute code in response to events or triggers.
- Developers write small, single-purpose functions, and the cloud provider dynamically allocates resources to execute these functions as needed.
- FaaS abstracts away the need for developers to manage servers, scaling, and infrastructure, allowing them to focus solely on writing code.
- Examples of FaaS platforms include AWS Lambda, Google Cloud Functions, and Microsoft Azure Functions.
Additional resources
What are IaaS, PaaS, and SaaS: https://www.ibm.com/topics/iaas-paas-saas
Shared Responsibility Model
Shared responsibility model - the shared responsibility model in cloud computing delineates the responsibilities between the cloud service provider (CSP) and the customer in terms of security and management of resources. In this model, the CSP is responsible for securing the underlying infrastructure, including physical data centers, networking, and hypervisors, as well as ensuring the availability and reliability of the cloud services. On the other hand, the customer is responsible for securing their data, applications, identities, and configurations within the cloud environment. This entails tasks such as configuring access controls, implementing encryption, managing user permissions, and securing application code. Essentially, while the CSP manages the security of the cloud infrastructure, the customer is accountable for securing their data and applications within that infrastructure, forming a collaborative approach to ensuring overall security and compliance in the cloud.
Additional resources
Shared Responsibility Model: https://www.crowdstrike.com/cybersecurity-101/cloud-security/shared-responsibility-model/
Resource Availability
Regions - the major public cloud providers (Amazon, Google, Microsoft) offer global infrastructures that span the entire globe. They divide these resources into regions. Customers can place resources in specific regions in order to reduce latency on access.
Availability zones - an availability zone is a distinct and isolated location within a geographic region that houses data centers equipped with independent power, cooling, and networking infrastructure. Availability zones are designed to provide redundancy and fault tolerance, enabling applications and services to remain operational even in the event of failures or disruptions affecting one availability zone.
Cloud bursting - cloud bursting is a dynamic and flexible cloud computing strategy that allows organizations to seamlessly scale their workloads from a private cloud to a public cloud environment during periods of peak demand. In essence, it enables businesses to augment their existing on-premises infrastructure with additional computing resources from a public cloud provider when local capacity is exceeded. This burst capacity can accommodate sudden spikes in user activity, seasonal variations, or other unforeseen surges in demand without requiring significant upfront investments in infrastructure expansion. By leveraging cloud bursting, organizations can optimize resource utilization, maintain performance levels, and ensure uninterrupted service delivery, all while minimizing costs and maximizing operational efficiency.
Edge computing - Edge computing is a distributed computing paradigm that brings computational resources closer to the data source or end-user devices, thereby reducing latency and improving real-time processing capabilities. Unlike traditional cloud computing, where data is processed in centralized data centers, edge computing decentralizes computing power to the "edge" of the network, such as IoT devices, routers, or local servers. This approach enables faster data processing, analysis, and response times, making it ideal for applications requiring low latency, high bandwidth, and efficient use of network resources. Edge computing is particularly valuable in scenarios like IoT deployments, autonomous vehicles, and industrial automation, where timely decision-making and local data processing are critical. By pushing computing closer to where data is generated and consumed, edge computing enhances scalability, reliability, and security while unlocking new opportunities for innovation and efficiency in diverse industries.
Availability monitoring - cloud computing makes it easy to provide availability monitoring for both your own cloud workloads, as well as the services of the cloud provider. While availability monitoring for your resources in the cloud requires some level of configuration, the major cloud providers all provide web pages (and even APIs) that provide availability information for their resources and services.
Additional resources
Cloud Bursting: https://www.vmware.com/topics/glossary/content/cloud-bursting.html
Disaster Recovery
Recovery Time Objective (RTO) - A Recovery Time Objective (RTO) is the targeted duration within which a business process or service must be restored after a disruption or outage. It represents the maximum acceptable downtime tolerated by an organization and is typically defined in terms of hours, minutes, or seconds.
Recovery Point Objective (RPO) - Recovery Point Objective (RPO) is the maximum tolerable amount of data loss measured in time before a disruption or outage. It represents the point in time to which data must be recovered after an incident, and is typically expressed in terms of minutes, hours, or days.
Hot site - A hot site is a fully operational backup facility equipped with necessary infrastructure and systems to resume business operations immediately after a disaster. It typically mirrors the primary site's computing environment and data in real-time or near-real-time, ensuring minimal downtime and data loss in the event of a disruption.
Warm site - A warm site is a backup facility that contains some of the necessary infrastructure and data required to resume business operations after a disaster, but it is not fully operational in real-time like a hot site. It requires additional setup and configuration before it can become fully functional, leading to a longer recovery time compared to a hot site.
Cold site - A cold site is a backup facility that provides only basic infrastructure such as power and physical space, with no pre-installed equipment or data. It requires substantial setup and configuration in the event of a disaster, resulting in the longest recovery time compared to hot and warm sites.
Additional resources
Cloud DR: https://www.techtarget.com/searchdisasterrecovery/definition/cloud-disaster-recovery-cloud-DR
Multicloud Tenancy
Multicloud tenancy is when you use the services of multiple public or private cloud providers. This provides you with many potential advantages, including:
- Optimal service selection you can choose the solution that features the parameters you need; possible parameters include speed, performance, reliability, geographical location, and security and compliance requirements
- Avoid vendor lock-in thanks to using multiple cloud providers, you are not locked in to a single vendor
- Cost efficiency you can take advantage of the best possible price for services as you have multiple providers to choose from
- Innovative technology you can take advantage of new technologies that might not yet be offered by other cloud providers
- Advanced security you can take advantage of the latest in security and compliance technologies
- Increased reliability since there is not single point of failure, your reliability posture improves
Some classic use cases for multicloud include:
- Disaster recovery
- Improved latency
- Regional requirements
- Reduction in shadow IT
Additional resources
What is Multicloud: https://cloud.google.com/learn/what-is-multicloud
Connections to the Cloud
There are many options when needing connectivity to your cloud resources - these include:
- Public Internet connection A public Internet connection to the public cloud utilizes the existing infrastructure of the internet to establish connectivity between the user's local network and the cloud provider's data centers, offering accessibility and convenience for accessing cloud resources from virtually any location. While cost-effective and widely available, public Internet connections may present security and performance challenges compared to dedicated or private connectivity options.
- Software VPN solution A software VPN connection to the public cloud creates a secure, encrypted tunnel over the internet, enabling users to securely access cloud resources from remote locations with authentication and encryption protocols. This flexible and scalable solution offers cost-effective connectivity while ensuring data privacy and integrity for organizations leveraging cloud services.
- Hardware VPN solution A hardware VPN solution for connecting to the public cloud involves deploying dedicated networking appliances or routers equipped with VPN capabilities at both the on-premises and cloud ends, ensuring secure communication via encrypted tunnels over the internet. This approach offers enhanced performance, scalability, and reliability compared to software VPNs, making it suitable for organizations with high-volume traffic and stringent security requirements.
- Private, dedicated connection A private, dedicated connection to the public cloud establishes a direct physical link between the organization's on-premises infrastructure and the cloud provider's data centers, bypassing the public internet for enhanced security and reliability. This high-bandwidth, low-latency connection ensures consistent performance and enables seamless integration of on-premises and cloud resources, ideal for mission-critical applications and sensitive workloads.
Additional resources
Amazon Virtual Private Cloud Connectivity Options: https://docs.aws.amazon.com/whitepapers/latest/aws-vpc-connectivity-options/introduction.html
Network Components
Application load balancer - A cloud-based application load balancer is a scalable, resilient service deployed in the cloud environment that distributes incoming traffic across multiple backend servers or instances to optimize performance and ensure high availability. By intelligently routing requests based on factors such as server health, proximity, and application-specific rules, it enhances the overall reliability and responsiveness of cloud-based applications.
Network load balancer - A cloud-based network load balancer is a virtual appliance or service deployed in the cloud environment that evenly distributes incoming network traffic across multiple backend resources, such as virtual machines or containers, to ensure efficient utilization and high availability. Leveraging advanced routing algorithms and monitoring capabilities, it dynamically adjusts traffic flow to maintain optimal performance and minimize downtime, enhancing the scalability and reliability of cloud-based networks.
Application gateway - A cloud-based application gateway serves as a centralized entry point for accessing web applications hosted in the cloud, providing secure and controlled access to these applications from external networks. By offering features such as SSL termination, web application firewall (WAF), and content caching, it enhances security, accelerates performance, and simplifies application delivery for users accessing cloud-hosted services.
Content delivery network (CDN) - A content delivery network (CDN) is a distributed network of servers strategically placed across various geographic locations to deliver web content, such as images, videos, and static files, to users with optimal speed and reliability. By caching content closer to end-users and dynamically routing requests based on proximity and server availability, CDNs reduce latency, alleviate network congestion, and improve the overall performance and scalability of websites and web applications.
Firewalls - A cloud-based firewall is a security service deployed in the cloud environment to monitor, filter, and control incoming and outgoing network traffic based on predefined security policies. By inspecting traffic at the application layer and enforcing security rules, it protects cloud-hosted resources from unauthorized access, malicious attacks, and data breaches, providing enhanced security posture and compliance assurance for organizations leveraging cloud infrastructure.
Additional resources
Azure Front Door: https://azure.microsoft.com/en-us/products/frontdoor
Network Services
Virtual Private Cloud - A Virtual Private Cloud (VPC) is a logically isolated section of a public cloud provider's infrastructure where users can deploy their virtual networks, subnets, and resources with customizable network configurations. By offering dedicated resources and network segmentation, VPCs enable organizations to create secure and scalable environments within the public cloud, ensuring data privacy, network isolation, and controlled access to cloud resources.
VPC Peering - VPC peering in cloud networking enables direct communication between Virtual Private Clouds (VPCs) within the same cloud provider's infrastructure, allowing seamless exchange of traffic without traversing the public internet. This facilitates interconnectivity between different VPCs, enabling organizations to build complex architectures and share resources while maintaining network isolation and security boundaries.
VPC Transit Gateway - A VPC transit gateway in cloud networking acts as a centralized hub that facilitates communication between multiple Virtual Private Clouds (VPCs) and on-premises networks, streamlining network connectivity and management across complex architectures. By providing scalable and efficient routing between interconnected networks, VPC transit gateways simplify network configuration, improve performance, and enhance security in cloud environments.
Subnets - A subnet in cloud networking is a segmented portion of an IP network, typically within a Virtual Private Cloud (VPC), that contains a subset of available IP addresses reserved for specific purposes or resource allocation. Subnets enable organizations to organize and manage their cloud resources efficiently, facilitating network segmentation, security, and efficient resource utilization within the cloud environment.
VLANs - VLANs, or Virtual Local Area Networks, in cloud networking are logical segmentation of a physical network into distinct broadcast domains, allowing for isolation and control of network traffic within a cloud environment. By assigning devices to VLANs based on their function, VLANs facilitate efficient resource utilization, security policies, and network management in cloud-based infrastructures.
SDN - Software-Defined Networking (SDN) is a networking approach that separates the control plane from the data plane, allowing network administrators to centrally manage and orchestrate network resources through software-based controllers. By decoupling network intelligence from physical infrastructure, SDN enables dynamic and programmable network configurations, improving agility, scalability, and automation in modern network environments.
BGP - BGP, or Border Gateway Protocol, is a standardized routing protocol used to exchange routing information between different autonomous systems (ASes) on the internet. It enables routers to dynamically learn and advertise the best paths to reach destination networks, facilitating scalable and efficient routing across diverse network topologies.
Static routes - Static routes are manually configured routes in a network device's routing table that specify how to reach specific destination networks. Unlike dynamic routing protocols, static routes do not dynamically adapt to changes in network topology and require manual intervention to update, making them suitable for simple network configurations with stable routes.
Route tables - Route tables are tables maintained by network devices that contain information about the best paths to reach destination networks, including next-hop routers and interface associations. By using routing protocols or static configurations, route tables enable routers to make forwarding decisions and efficiently route packets through the network.
Additional resources
Amazon Virtual Private Cloud: https://aws.amazon.com/vpc/
Disk and Storage Types
Storage types:
- Object storage Object-based storage is a data storage architecture that organizes and manages data as objects, each with a unique identifier, metadata, and data, providing scalability, flexibility, and simplified management for handling vast amounts of unstructured data.
- Block storage Block-based storage is a data storage approach that divides data into fixed-sized blocks, typically accessed via protocols like iSCSI or Fibre Channel, allowing for direct and low-level access to storage volumes and enabling highperformance storage solutions for applications like databases and virtualization.
- File storage File-based storage is a data storage method where data is organized into files and directories, accessible via file protocols such as NFS or SMB, offering a hierarchical structure for storing and accessing data in a shared environment.
Disk types
- Solid-state drive (SSD) SSD is a storage device that uses flash memory technology to store data persistently, offering faster access times, lower latency, and higher reliability compared to traditional hard disk drives (HDDs).
- Hard disk drive (HDD) HDD is a storage device that uses rotating magnetic disks and mechanical read/write heads to store and retrieve data persistently, providing high-capacity storage at a lower cost per gigabyte compared to solid-state drives (SSDs).
Performance implications - Choosing between different cloud-based storage options such as object-based storage, block-based storage, and file-based storage can significantly impact performance, as each option offers distinct characteristics tailored to specific workload requirements. Object-based storage excels in handling large amounts of unstructured data with scalability, while block-based storage provides high-performance storage for transactional workloads, and file-based storage offers compatibility with legacy applications and file-sharing capabilities.
Cost implications - Selecting different cloud-based storage options, like object-based storage, block-based storage, and file-based storage, can influence costs based on factors such as storage capacity, data access frequency, and additional features like redundancy and data replication. Object-based storage typically offers cost-effective scalability for large volumes of data, while block-based storage may incur higher costs for provisioned storage and data transfer, and file-based storage often includes pricing based on capacity and access frequency.
Additional resources
What is Cloud Storage: https://aws.amazon.com/what-is/cloud-storage/
Tiered Storage
Storage tiering in cloud environments involves categorizing data based on its access frequency and performance requirements, with different tiers offering varying levels of performance and cost. By dynamically moving data between tiers based on usage patterns, organizations can optimize storage costs while ensuring that data remains accessible and responsive to application needs.
Typical storage tiers include:
- Hot A hot storage tier refers to a high-performance storage layer optimized for frequently accessed data that requires lowlatency access and high throughput.
- Warm A warm storage tier denotes a storage layer designed for data that is accessed less frequently than hot data but still requires moderate performance and relatively fast access times.
- Cold A cold storage tier is a low-cost storage layer intended for long-term retention of infrequently accessed data that prioritizes cost-efficiency over immediate accessibility or performance.
- Archive An archive storage tier is a cost-effective storage solution designed for long-term retention of data that is rarely accessed and requires minimal performance, often with additional features for compliance and data preservation.
Additional resources
Storage Classes: https://cloud.google.com/storage/docs/storage-classes
Managed Services
Managed services in cloud environments refer to outsourced cloud computing solutions where cloud providers assume responsibility for the operation, maintenance, and management of specific IT functions or applications. This allows organizations to offload tasks such as database management, security monitoring, and infrastructure provisioning to cloud providers, reducing operational overhead, improving scalability, and enabling focus on core business activities.
Using managed services in cloud architectures offers several advantages:
- Reduced Operational Overhead: Managed services offload routine tasks such as infrastructure management, patching, and backups to cloud providers, freeing up internal resources to focus on strategic initiatives and core business activities.
- Scalability and Flexibility: Managed services typically offer scalable resources and flexible pricing models, allowing organizations to quickly adapt to changing workload demands without upfront investment in hardware or infrastructure.
- Improved Performance and Reliability: Cloud providers leverage their expertise and economies of scale to deliver managed services with high availability, reliability, and performance, backed by service level agreements (SLAs) that ensure uptime and quality of service.
- Enhanced Security and Compliance: Managed services often include built-in security features, compliance certifications, and regular security updates, helping organizations mitigate security risks, adhere to regulatory requirements, and protect sensitive data.
- Access to Advanced Technologies: Cloud providers continuously innovate and introduce new technologies and features to their managed services offerings, enabling organizations to leverage cutting-edge tools and capabilities without the burden of managing and maintaining them internally.
- Streamlined Management and Automation: Managed services typically come with centralized management consoles, automation tools, and APIs that simplify deployment, monitoring, and management of cloud resources, reducing complexity and improving operational efficiency.
- Cost Optimization: By leveraging managed services, organizations can benefit from pay-as-you-go pricing models, cost-effective resource utilization, and economies of scale offered by cloud providers, resulting in lower total cost of ownership (TCO) compared to traditional on-premises solutions.
- Focus on Core Competencies: Outsourcing non-core functions to managed services allows organizations to focus on their core competencies and strategic objectives, driving innovation, growth, and competitive advantage in their respective industries.
Additional resources
Managed Cloud Services - Pros and Cons: https://cloudian.com/guides/hybrid-cloud/managed-cloud-services/
Microservices
Microservices architecture is a software development approach where applications are composed of small, independent services that communicate with each other through well-defined APIs. Each service is focused on a specific business function and can be developed, deployed, and scaled independently. This modular approach allows for greater flexibility, resilience, and scalability compared to monolithic architectures. Microservices promote agility by enabling teams to work on different services simultaneously, using diverse technologies and programming languages best suited to each task. Additionally, they facilitate continuous integration and delivery practices, allowing for faster and more frequent updates with minimal disruption. However, managing a distributed system of microservices requires robust orchestration, monitoring, and governance to ensure seamless operation and maintainability.
Loosely coupled architecture in microservices allows each service to operate independently, minimizing dependencies between components. This enhances flexibility and scalability, enabling rapid development and deployment of new features without impacting other parts of the system.
A fan-out architecture in microservices involves distributing a single request to multiple services to perform parallel processing. This approach improves system performance and scalability by allowing each service to focus on its specialized task, thereby reducing overall response time and increasing throughput.
Service discovery in a microservices architecture is the process of dynamically finding and locating available services within the system. It involves mechanisms and tools that enable services to register themselves and discover other services they depend on. This allows for seamless communication and interaction between services, regardless of their location or deployment status, fostering flexibility, resilience, and scalability in the overall system.
Additional resources
Microservices: https://aws.amazon.com/microservices/
Stand-alone vs Orchestrated
In a standalone container infrastructure, each application or service runs within its isolated container, managed and operated individually. This means that each container must be manually configured, deployed, and scaled, typically without coordination with other containers. While standalone containers offer simplicity and flexibility, they require more manual effort to manage and lack advanced features like automated scaling and load balancing.
On the other hand, an orchestrated container infrastructure utilizes a container orchestration platform such as Kubernetes to automate the management, deployment, scaling, and networking of containers across a cluster of machines. With container orchestration, administrators can define desired states for the application, such as the number of instances, resource requirements, and networking rules. The orchestration platform then handles the deployment and scaling of containers to meet these requirements automatically. This approach simplifies operations, improves resource utilization, and enhances fault tolerance by automatically redistributing workloads and restarting containers in case of failures.
While standalone containers offer simplicity and are suitable for smaller deployments or environments where manual management is acceptable, orchestrated container infrastructures are preferred for larger-scale deployments, where automation, scalability, and reliability are critical requirements. They provide more advanced features and capabilities to manage complex distributed applications efficiently.
Additional resources
What is a Container: https://www.docker.com/resources/what-container/
Supporting Containers
Container networking involves establishing communication between containers running on the same host or across multiple hosts. One essential aspect of container networking is port mapping, which allows containers to expose and access services running inside them or in other containers.
Port mapping works by mapping a port on the host system to a port inside the container. This allows external traffic to reach the containerized service by accessing the corresponding port on the host. Conversely, it enables services inside containers to communicate with each other or with services running on the host or other containers.
For example, if a web server container exposes port 80 internally for HTTP traffic, you can map port 80 of the container to port 8080 on the host. Any requests made to port 8080 on the host will be forwarded to port 80 inside the container, allowing external users to access the web server.
Port mapping is typically configured during container creation using containerization platforms like Docker or Kubernetes. In Docker, you can specify port mappings using the -p or --publish flag when running a container. In Kubernetes, you define port mappings in the pod or service configurations.
Port mapping plays a vital role in container networking by enabling containers to expose services to the outside world and facilitating communication between containers and external systems. It allows for flexible and secure deployment of containerized applications while ensuring seamless connectivity and interoperability in distributed environments.
In a typical cloud infrastructure, container storage involves managing data persistence and storage for containerized applications. This includes two main components: persistent volumes and ephemeral storage.
Persistent Volumes: Persistent volumes are storage volumes that exist independently of containers and can be dynamically provisioned and attached to containers as needed. They provide a way to store and persist data beyond the lifecycle of individual containers. Persistent volumes are commonly used for storing application data, databases, or shared files that need to be retained even if the container is restarted or recreated. Cloud providers offer various options for persistent volumes, including block storage (e.g., AWS EBS, Azure Disk), file storage (e.g., AWS EFS, Azure Files), or object storage (e.g., AWS S3, Azure Blob Storage). Kubernetes, for example, allows administrators to define persistent volume claims (PVCs) that specify storage requirements, and the underlying infrastructure dynamically provisions and attaches the appropriate persistent volume to the container.
Ephemeral Storage: Ephemeral storage refers to temporary storage that is directly associated with the container instance and exists only for the duration of the container's lifecycle. Ephemeral storage is typically used for storing transient data, such as application logs, temporary files, or cache data, that does not need to be preserved beyond the container's lifetime. Ephemeral storage is usually provided as part of the container runtime environment and is stored on the underlying host's filesystem. In cloud environments, ephemeral storage may be backed by local SSDs or instance storage, offering fast access and low latency.
Image repositories (or registries) play a central role in a container-based infrastructure by serving as a centralized location for storing, distributing, and managing container images. These repositories store the immutable images that contain everything needed to run a containerized application, including the application code, runtime environment, dependencies, and configurations. Here's how image repositories are used in a container-based infrastructure:
Image Distribution: Container images are typically built and stored in a registry or repository, such as Docker Hub, Google Container Registry, or Amazon Elastic Container Registry. These repositories provide a secure and scalable platform for storing and distributing container images globally. Developers can push newly built images to the repository, making them available for deployment across different environments.
Version Control: Image repositories support versioning, allowing developers to track changes and updates to container images over time. Each image version is tagged with a unique identifier, such as a version number or a git commit hash, enabling precise control and management of image versions. Versioning ensures consistency and reproducibility in deployments, as developers can deploy specific versions of container images with confidence.
Image Lifecycle Management: Image repositories facilitate the management of the container image lifecycle, including image creation, storage, deletion, and garbage collection. Administrators can define policies and rules for image retention and cleanup, ensuring efficient use of storage resources and compliance with organizational requirements. Automated tools and workflows can be integrated with the repository to streamline image management tasks and enforce best practices.
Access Control and Security: Image repositories support access control mechanisms to regulate who can push, pull, or modify images stored in the repository. Role-based access control (RBAC), authentication, and authorization mechanisms help enforce security policies and prevent unauthorized access or tampering with images. Additionally, image repositories may offer scanning and vulnerability
detection features to identify and mitigate security risks in container images before deployment.
Integration with Orchestration Platforms: Container orchestration platforms like Kubernetes or Docker Swarm seamlessly integrate with image repositories to deploy and manage containerized applications at scale. Orchestration platforms pull container images from the repository based on deployment specifications, ensuring consistent and reliable deployments across clusters of nodes. Continuous integration and continuous deployment (CI/CD) pipelines can also leverage image repositories to automate the build, test, and deployment of containerized applications.
Additional resources
Container Networking: https://www.vmware.com/topics/glossary/content/container-networking.html
Key Concepts
Additional resources
Emulation, Paravirtualization, and Pass-Through: https://www.techtarget.com/searchvirtualdesktop/opinion/Emulation-paravirtualization-and-pass-through-what-you-need-to-know
Network Types
Overlay network - a virtual network that is built on top of an existing physical network infrastructure, enabling the creation of logical connections and the implementation of network services without altering the underlying hardware. This is achieved by encapsulating the overlay network's data packets inside the standard packets of the underlying network, allowing for features such as enhanced security, improved scalability, and efficient resource management. Overlay networks are commonly used in applications such as virtual private networks (VPNs), content delivery networks (CDNs), and peer-to-peer (P2P) networks, providing a flexible and adaptable way to optimize network performance and functionality beyond the capabilities of the base infrastructure.
Virtual machine (VM) networks - specialized network configurations that enable communication between virtual machines within a virtualized environment. These networks are established through software-defined networking (SDN) within a hypervisor, allowing VMs to interact as if they were part of a physical network, despite being hosted on a single or multiple physical servers. VM networks provide isolation, security, and flexibility, supporting various network topologies and facilitating the management of network resources dynamically. They allow for advanced features such as VLANs (Virtual Local Area Networks), which segment traffic to enhance security and efficiency, and virtual network interfaces, which enable VMs to connect to both internal and external networks seamlessly. This setup is crucial in data centers and cloud computing environments, where resource optimization and agility are paramount.
Additional resources
Overlay Networks: https://www.techtarget.com/searchnetworking/definition/overlay-network
Storage Types
Local storage - in a virtualized server environment, local storage refers to the use of physical storage devices, such as hard drives or SSDs, that are directly attached to the physical servers hosting the virtual machines (VMs). This type of storage is leveraged to store VM images, data, and applications, offering high performance and low latency due to its proximity to the compute resources. Local storage is particularly beneficial for workloads that require fast data access and minimal latency, such as databases and high-performance applications. However, it lacks the flexibility and redundancy provided by network-attached storage (NAS) or storage area networks (SANs). To mitigate this, virtualization platforms often incorporate features like storage virtualization and replication to enhance reliability and availability, ensuring that VMs can maintain continuity and performance even if a single physical storage device fails.
Network attached storage (NAS) - in a virtualized server environment, a Network-Attached Storage (NAS) system provides centralized, shared storage accessible over the network, enabling multiple virtual machines (VMs) to store and retrieve data efficiently. NAS offers several advantages, including simplified storage management, enhanced data sharing, and improved scalability, as storage capacity can be easily expanded without disrupting the VMs. This centralized approach also facilitates data backup, disaster recovery, and high availability, ensuring that critical data remains accessible and protected. By decoupling storage from individual physical servers, NAS helps optimize resource utilization and supports dynamic workload management in virtualized environments.
Storage area network (SAN) - in a virtualized server environment, a Storage Area Network (SAN) provides a high-performance, highly available, and scalable storage solution by connecting multiple servers to a centralized pool of storage devices over a dedicated network. SANs are designed for speed and efficiency, supporting demanding applications and large-scale virtual machine (VM) deployments with minimal latency and high throughput. They enable advanced storage management features such as snapshots, replication, and thin provisioning, which enhance data protection, disaster recovery, and resource utilization. By decoupling storage from individual physical servers, SANs facilitate flexible and dynamic allocation of storage resources, improving overall system efficiency and scalability in virtualized infrastructures.
Additional resources
What is a SAN: https://www.snia.org/education/storage_networking_primer/san/what_san
Billing Models
Pay As You Go: The pay-as-you-go (PAYG) cloud cost model is a flexible and scalable pricing strategy where users are billed based on their actual consumption of cloud resources, such as computing power, storage, and data transfer. This model eliminates the need for upfront investments and allows for dynamic scaling, making it cost-efficient and adaptable to fluctuating workloads. Users benefit from granular billing, detailed usage monitoring, and the ability to manage costs precisely, encouraging efficient resource utilization. This approach supports business agility, enabling quick deployment and experimentation with minimal financial risk, as seen in services like AWS EC2, Google Compute Engine, and Azure Virtual Machines.
Spot instance: The spot instance cost model in cloud pricing offers users the ability to bid on and use spare computing capacity at significantly reduced rates compared to standard on-demand instances. This model is designed to utilize idle resources in a cloud provider's data center, providing a cost-effective option for users who have flexible and non-urgent workloads. Spot instances can be interrupted by the cloud provider with short notice if the capacity is needed for other users willing to pay higher prices. This makes them ideal for batch processing, data analysis, CI/CD pipelines, and other fault-tolerant tasks that can handle interruptions. While spot instances offer substantial savings—often up to 90% off on-demand prices—they require applications to be resilient and able to manage sudden terminations. This pricing model is used by major cloud providers, such as AWS Spot Instances, Google Cloud Preemptible VMs, and Azure Spot VMs, offering users a cost-efficient way to leverage excess capacity in the cloud.
Reserved resources: The reserved resources cloud pricing model allows users to commit to using specific cloud resources, such as compute instances or storage, for a set period, typically one or three years, in exchange for a significant discount compared to ondemand pricing. By making an upfront payment or committing to a usage term, users benefit from predictable costs and substantial savings, often ranging from 30% to 75% off standard rates. This model is ideal for stable, long-term workloads where resource requirements are predictable, providing financial advantages while ensuring the availability of the reserved capacity. Major cloud providers, including AWS Reserved Instances, Google Cloud Committed Use Contracts, and Azure Reserved VM Instances, offer this model to support cost-effective, reliable resource planning for businesses.
Dedicated host: The dedicated host cloud pricing model provides users with physical servers exclusively allocated to them, offering enhanced control, compliance, and performance benefits. Unlike shared infrastructure, where resources are virtualized across multiple customers, dedicated hosts ensure that all server resources are available solely to the renting organization. This model is particularly advantageous for meeting regulatory requirements, managing software licenses that are tied to physical servers, and optimizing resource allocation without the "noisy neighbor" effect. Typically, dedicated hosts come with a premium price, reflecting the exclusivity and control they offer. Cloud providers such as AWS, Azure, and Google Cloud offer dedicated hosts, enabling businesses to achieve higher security, compliance, and customization tailored to their specific needs.
Additional resources
Cloud Cost: https://spot.io/resources/cloud-cost/cloud-cost-models-management-strategies/
Other Cost Topics
Resource metering - Resource metering in cloud environments is the process of tracking and measuring the usage of various cloud resources such as computing power, storage, bandwidth, and application services. This data collection is essential for billing, performance monitoring, and capacity planning, providing detailed insights into how resources are being utilized over time. Metering enables cloud providers to implement pay-as-you-go pricing models by accurately charging users based on their actual consumption. It also helps users optimize their resource usage, identify inefficiencies, and manage costs effectively. Comprehensive metering tools and dashboards are typically offered by cloud providers like AWS, Azure, and Google Cloud, allowing users to monitor their usage patterns, set usage alerts, and make informed decisions about scaling and resource allocation.
Tagging - Resource tagging in cloud environments is a powerful management feature that involves assigning metadata, in the form of key-value pairs, to cloud resources like instances, storage buckets, and databases. These tags facilitate better organization, tracking, and automation by enabling users to categorize and filter resources based on attributes such as purpose, owner, environment (e.g., development, testing, production), and cost center. Effective tagging helps in optimizing resource utilization, enhancing security, and simplifying the implementation of policies and permissions. Additionally, it aids in detailed cost management and reporting, as tags can be used to allocate costs accurately across different projects or departments. Major cloud providers, including AWS, Azure, and Google Cloud, support resource tagging, making it an essential practice for efficient cloud infrastructure management.
Rightsizing - Rightsizing in cloud environments refers to the process of optimizing cloud resources to match the actual workload requirements, thereby improving efficiency and reducing costs. This involves analyzing the performance and utilization metrics of resources such as virtual machines, databases, and storage, and then adjusting their configurations—either scaling up or down—to eliminate underutilization or overprovisioning. Rightsizing ensures that the allocated resources are neither too large, incurring unnecessary costs, nor too small, leading to performance bottlenecks. Cloud providers like AWS, Azure, and Google Cloud offer tools and recommendations to assist in rightsizing, helping businesses achieve an optimal balance between cost and performance, and ultimately maximizing the value derived from their cloud investments.
Additional resources
Tagging: https://www.economize.cloud/glossary/tagging
Types of Databases
Relational databases - relational databases are a type of database management system (DBMS) that store data in structured formats using tables, which are composed of rows and columns. Each table, representing a specific entity type, can be linked to others through foreign keys, establishing relationships between different data entities. This model supports SQL (Structured Query Language) for defining, manipulating, and querying data, enabling efficient organization, retrieval, and integrity of data. Relational databases ensure data accuracy and consistency through constraints, such as primary keys, and support transactions to maintain data integrity in multi-user environments. Examples include MySQL, PostgreSQL, and Oracle Database.
NoSQL databases - NoSQL databases are a class of database management systems designed to handle large volumes of unstructured or semi-structured data, providing flexible schemas and scalability beyond the capabilities of traditional relational databases. They eschew the fixed table structure of relational databases, instead offering diverse data models including document, key-value, column-family, and graph formats. NoSQL databases are optimized for distributed systems, enabling horizontal scaling across many servers, which makes them ideal for big data applications and real-time web analytics. They prioritize performance, availability, and fault tolerance, often at the expense of immediate consistency.
Time-based databases - time-based databases, also known as time series databases, are specialized databases optimized for storing, querying, and analyzing time-stamped data points, which are typically generated sequentially over time. These databases are designed to efficiently handle large volumes of time series data, which can come from various sources such as IoT devices, financial transactions, server logs, and monitoring systems. They provide advanced features for time-based queries, such as aggregations, downsampling, and time windowing, which are essential for analyzing trends, patterns, and anomalies over time. Time-based databases often support high write and query performance, retention policies to manage data lifecycle, and seamless integration with data visualization tools.
Graph databases - a graph database is a type of database designed to store and query data modeled as nodes (entities) and edges (relationships), making it ideal for handling complex, interconnected data structures such as social networks, recommendation systems, and fraud detection.
Memory cache databases - memory cache databases are high-performance data storage systems that temporarily hold frequently accessed data in memory (RAM) to accelerate read and write operations, thereby reducing latency and improving application performance. Unlike traditional disk-based databases, memory cache databases prioritize speed and are typically used to store transient data that can be quickly retrieved or updated, such as session information, user profiles, and temporary computational results. They support various caching strategies, such as Least Recently Used (LRU) and time-to-live (TTL) policies, to manage data lifecycle efficiently. Common use cases include web caching, database query results caching, and in-memory data grids. Examples of memory cache databases include Redis, Memcached, and Apache Ignite.
Additional resources
Types of Databases: https://www.geeksforgeeks.org/types-of-databases/
Database Deployment Options
Self-managed - Using a self-managed database in the cloud involves deploying, configuring, and maintaining a database instance on cloud infrastructure, giving organizations full control over the database environment, including performance tuning, security configurations, and backup strategies. This approach allows for customization to meet specific application requirements and can leverage cloud benefits such as scalability, geographic distribution, and high availability. However, it also demands significant administrative effort, including regular updates, patching, monitoring, and ensuring compliance with data governance policies. While it provides flexibility and control, it can be resource-intensive compared to managed database services where the cloud provider handles much of the operational overhead. Examples include setting up MySQL, PostgreSQL, or MongoDB on cloud platforms like AWS, Azure, or Google Cloud.
Provider-managed - Using a provider-managed database in the cloud involves leveraging a cloud provider's fully managed database services, which handle the deployment, configuration, maintenance, and scaling of the database infrastructure. This option simplifies database management by offloading routine tasks such as backups, patching, monitoring, and high availability configurations to the cloud provider, allowing development teams to focus on application development and business logic. Managed databases offer automated scaling to handle varying workloads, built-in security features, and integrated support for disaster recovery, ensuring robust performance and reliability. Examples include Amazon RDS, Google Cloud SQL, Azure SQL Database, and MongoDB Atlas, which support a wide range of database engines and provide seamless integration with other cloud services.
Additional resources
What are Database Deployment Options: https://www.oracle.com/database/what-is-database/deployment-options/
Compute Resources
Virtual machines (VMs) - cloud-based virtual machines (VMs) are virtualized computing resources provided by cloud service providers that mimic the functionality of physical servers, allowing users to run operating systems and applications as if they were on dedicated hardware. These VMs offer flexibility in terms of configuration, scalability, and resource allocation, enabling users to easily scale up or down based on demand. They are typically billed on a pay-as-you-go basis, providing cost-efficiency by charging only for the resources consumed. Cloud-based VMs can be quickly deployed, managed, and integrated with other cloud services, supporting a wide range of use cases such as application hosting, development and testing environments, and disaster recovery solutions. Examples of cloud-based VM services include Amazon EC2, Google Compute Engine, and Microsoft Azure Virtual Machines.
Containers - cloud-based containers are lightweight, portable computing environments that package applications and their dependencies into a single unit, ensuring consistency across various computing environments. Managed by container orchestration platforms like Kubernetes, these containers run on cloud infrastructure, enabling efficient scaling, deployment, and management of applications. Unlike traditional virtual machines, containers share the host system's OS kernel, making them more resource-efficient and faster to start. They are ideal for microservices architectures, facilitating continuous integration and deployment (CI/CD) by allowing developers to build, test, and deploy applications in isolated environments. Examples of cloud-based container services include AWS Elastic Kubernetes Service (EKS), Google Kubernetes Engine (GKE), and Azure Kubernetes Service (AKS).
Serverless - serverless compute in cloud technology allows developers to build and run applications without managing the underlying infrastructure, as the cloud provider automatically handles the provisioning, scaling, and maintenance of servers. In this model, code is executed in response to events or requests, with resources allocated dynamically, ensuring efficient utilization and billing based only on the actual compute time consumed. This abstraction enables developers to focus solely on writing and deploying code, enhancing productivity and speeding up development cycles. Serverless compute is highly scalable, automatically adjusting to meet demand, and supports various use cases, including web applications, APIs, data processing, and real-time file processing. Prominent examples of serverless compute services include AWS Lambda, Azure Functions, and Google Cloud Functions.
Additional resources
Choosing the Right Compute Option in GCP: https://cloud.google.com/blog/products/compute/choosing-the-right-compute-option-in-gcp-a
Orchestration and Workflows
Orchestration - Orchestration in the cloud refers to the automated management and coordination of various cloud resources and services to deploy, configure, scale, and manage complex applications and infrastructure. This involves defining the desired state of the system through code or configuration files and using orchestration tools like Kubernetes, Docker Swarm, or AWS ECS to ensure that the actual state matches the desired state. Orchestration abstracts away the underlying complexities of cloud infrastructure, enabling efficient resource utilization, high availability, fault tolerance, and scalability while promoting consistency, repeatability, and automation in application deployment and management processes across distributed environments.
Workflow - In cloud orchestration, a workflow represents a sequence of interconnected tasks or steps that automate and streamline the execution of complex processes or operations within a cloud environment. These workflows define the flow of data, actions, and dependencies between different components or services, orchestrating the deployment, configuration, monitoring, and scaling of cloud resources and applications. Workflow automation tools such as Apache Airflow, AWS Step Functions, or Azure Logic Apps enable developers and operations teams to design, schedule, and manage workflows visually or through code, allowing for the creation of sophisticated automation pipelines. Workflows in cloud orchestration facilitate collaboration, improve efficiency, and ensure consistency in executing tasks across diverse cloud environments, enhancing agility and accelerating time-to-market for cloud-based solutions.
Additional resources
What is Cloud Orchestration: https://www.vmware.com/topics/glossary/content/cloud-orchestration.html
Networking and Storage
Networking and Storage
Network latency - network latency is the time delay experienced in the transmission of data over a network, encompassing the time it takes for a data packet to travel from its source to its destination and back again. This delay can be influenced by various factors including the physical distance between the source and destination, the speed and quality of the transmission medium, the number of intermediary devices like routers and switches, and the overall network congestion. High latency can result in slower data transfer rates and noticeable lag in real-time applications like video conferencing and online gaming, impacting the user experience significantly. Reducing latency involves optimizing the network infrastructure, minimizing the number of hops, and enhancing data routing efficiency.
Throughput - network throughput refers to the rate at which data is successfully transmitted and received over a network in a given time period, typically measured in bits per second (bps). It indicates the actual data transfer performance of a network, as opposed to the theoretical maximum capacity. Throughput is influenced by factors such as network bandwidth, latency, packet loss, and protocol overhead. High throughput is crucial for efficient network performance, enabling faster data exchange and smoother operation of applications and services. Notice that throughput is also used in the storage discipline. In that context, it refers to the rate at which data is successfully written to and read from storage media.
IOPS - IOPS (Input/Output Operations Per Second) is a performance measurement used in IT storage to quantify the number of read and write operations a storage device or system can handle per second. It is a critical metric for assessing the efficiency and speed of storage solutions, particularly in environments with high transaction rates like databases and enterprise applications. Higher IOPS values indicate better performance, enabling quicker data access and processing. Factors affecting IOPS include the type of storage media (e.g., HDDs, SSDs), the workload pattern, and the storage system's configuration and optimization.
Additional resources
What is Network Latency: https://aws.amazon.com/what-is/latency/
Artificial Intelligence
Text recognition - text recognition in AI, also known as Optical Character Recognition (OCR), involves using machine learning models to convert different types of documents, such as scanned paper documents, PDFs, or images, into editable and searchable data. Advanced OCR systems today utilize deep learning techniques to achieve high accuracy in recognizing diverse fonts, languages, and complex layouts, significantly enhancing automation in data entry and document management processes.
Text translation - text translation in AI employs advanced neural network models, such as transformers, to automatically translate text between different languages with high accuracy and fluency. These models, exemplified by systems like Google Translate and DeepL, continually improve through extensive training on diverse multilingual datasets, enabling real-time and contextually nuanced translations.
Visual recognition - visual recognition in AI leverages deep learning, particularly convolutional neural networks (CNNs), to identify and classify objects, scenes, and activities within images and videos with high accuracy. This technology powers applications like facial recognition, autonomous driving, and medical image analysis, continually improving through large-scale annotated datasets and advanced training algorithms.
Sentiment analysis - sentiment analysis in AI uses natural language processing (NLP) and machine learning techniques to automatically detect and interpret the emotional tone of textual data, categorizing it as positive, negative, or neutral. Advanced models analyze context, sarcasm, and nuanced expressions, making sentiment analysis a valuable tool for businesses in understanding customer opinions and market trends.
Voice-to-text - voice-to-text in AI employs advanced speech recognition algorithms and deep learning models to convert spoken language into written text with high accuracy. These systems, exemplified by services like Google's Speech-to-Text and Apple's Siri, support multiple languages and dialects, facilitating applications in transcription, voice commands, and real-time communication.
Text-to-voice - text-to-voice in AI utilizes neural text-to-speech (TTS) models to convert written text into natural-sounding speech, achieving high levels of realism and expressiveness. These advancements enable applications in virtual assistants, audiobooks, and accessibility tools, providing clear and human-like vocal outputs across various languages and accents.
Generative AI - generative AI employs models like Generative Adversarial Networks (GANs) and Transformers to create new, original content, including text, images, and music, by learning patterns from large datasets. This technology underpins applications such as deepfake creation, automated content generation, and creative assistance, pushing the boundaries of machine creativity and innovation.
Additional resources
The Role of AI in Cloud Computing: https://www.nutanix.com/theforecastbynutanix/technology/ai-in-the-cloud
Internet of Things (IoT)
Sensors - sensors in IoT collect and transmit data on various physical parameters such as temperature, humidity, motion, and light, enabling real-time monitoring and automation. These sensors form the backbone of smart systems in homes, cities, and industries, enhancing efficiency, safety, and decision-making through continuous data streams and connectivity.
Gateways - gateways in IoT serve as critical intermediaries that connect edge devices and sensors to the cloud or central systems, facilitating data aggregation, processing, and secure transmission. They enable seamless communication across diverse protocols and networks, enhancing the efficiency, scalability, and security of IoT ecosystems.
Communication - communication in IoT involves the exchange of data between interconnected devices using various wireless and wired protocols like Wi-Fi, Bluetooth, Zigbee, and MQTT. This connectivity enables real-time data sharing, remote monitoring, and automation, driving the functionality and intelligence of smart environments and systems.
Transmission protocols - transmission protocols in IoT facilitate efficient and reliable communication between devices and networks, ensuring data is transmitted securely and with minimal latency. Common protocols include MQTT, CoAP, and HTTP, each optimized for specific use cases such as low-power devices, real-time updates, or large-scale deployments.
Additional resources
IoT and Cloud Computing: https://www.geeksforgeeks.org/iot-and-cloud-computing/
FFmpeg
- Example with an explanation of switches
- Basic Examples
- Video Encoding Examples
- Audio Encoding Examples
- Resizing and Scaling Examples
- Padding Examples
- Rotation and Flipping Examples
- Time Manipulation Examples
- Frame Rate Manipulation Examples
- Audio Manipulation Examples
- Image and Video Examples
- Stitch multiple videos together
- Encode .gif to .mp4 (ScreenToGif)
- Subtitle Examples
- Watermark Examples
- Complex Filtergraph Examples
- Streaming Examples (Basic)
- Miscellaneous Examples
- Other resources
Example with an explanation of switches
ffmpeg -y -i Input_File.mkv -strict experimental -loglevel error -stats -map 0:v? -map 0:a? -dn -map_chapters -1 -movflags +faststart -c:v copy -c:a copy -strict -2 Output_File.mp4
Remux 2160p .mkv to .mp4
Explanation
ffmpeg:
This is the command to run the FFmpeg program, a widely used tool to handle multimedia data.
-y:
Automatically overwrite output files without asking.
-i Input_File.mkv:
Specifies the input file, in this case, "Input_File.mkv."
-strict experimental:
Enables experimental features. This is required for some codecs that are marked as experimental.
-loglevel error:
Sets the logging level to "error" to suppress informational and warning messages.
-stats:
Prints encoding progress/statistics to the console.
-map 0:v?:
Maps all video streams from the input file (0 refers to the first input file). The ? ensures it doesn't fail if there are no video streams.
-map 0:a?:
Maps all audio streams from the input file, similar to the video mapping.
-dn:
Disables data streams (such as subtitle streams).
-map_chapters -1:
Excludes chapters from the output file.
-movflags +faststart:
Moves the moov atom to the beginning of the file, which can help in streaming scenarios.
-c:v copy:
Copies the video codec from the input to the output without re-encoding.
-c:a copy:
Copies the audio codec from the input to the output without re-encoding.
-strict -2:
Another way to enable experimental features. This might be redundant with -strict experimental.
Output_File.mp4:
Specifies the output file name, "Output_File.mp4."
Summary:
This FFmpeg command reads an input MKV file (Input_File.mkv), and outputs it as an MP4 file (Output_File.mp4). It copies both the video and audio streams without re-encoding, excludes data streams and chapters, sets specific logging and progress options, and ensures the output file is ready for streaming with faststart.
Basic Examples
ffmpeg -i input.avi output.mp4
Convert input.avi to output.mp4 (using default codecs).
ffmpeg -i input.mov -c:v libx264 -c:a aac output.mp4
Convert input.mov to H.264 video and AAC audio in an MP4 container.
ffmpeg -i input.wmv -c:v libx265 -c:a aac output.mp4
Convert input.wmv to HEVC (H.265) video and AAC audio in an MP4 container.
ffmpeg -i input.flv -vn -acodec libmp3lame output.mp3
Extract audio from input.flv to an MP3 file.
ffmpeg -i input.wav -acodec aac output.aac
Convert a WAV audio file to an AAC audio file.
Video Encoding Examples
ffmpeg -i input.mp4 -c:v libx264 -b:v 2000k output.mp4
Encode video with H.264 at a bitrate of 2000 kbps.
ffmpeg -i input.mp4 -c:v libx265 -b:v 3000k -preset medium output.mp4
Encode video with HEVC at a bitrate of 3000 kbps using the medium preset.
ffmpeg -i input.mp4 -c:v libx264 -crf 23 output.mp4
Use Constant Rate Factor (CRF) encoding for H.264 (lower CRF values mean higher quality, typically 18-28).
ffmpeg -i input.mp4 -c:v libx264 -pass 1 -an -f null NUL && ffmpeg -i input.mp4 -c:v libx264 -pass 2 -c:a aac -b:a 128k output.mp4
Two-pass encoding for better quality (Windows). Replaces /dev/null with NUL. First pass analyzes the video, second pass encodes it.
Audio Encoding Examples
ffmpeg -i input.mp3 -acodec aac -b:a 192k output.aac
Convert audio to AAC at a bitrate of 192 kbps.
ffmpeg -i input.wav -acodec libmp3lame -b:a 128k output.mp3
Convert audio to MP3 at a bitrate of 128 kbps.
ffmpeg -i input.flac -acodec copy output.flac
Copy the audio stream without re-encoding (lossless).
Resizing and Scaling Examples
ffmpeg -i input.mp4 -vf scale=640:480 output_640x480.mp4
Scale the video to 640x480 resolution.
ffmpeg -i input.mp4 -vf scale=1280:-1 output_1280w.mp4
Scale the video to 1280 pixels wide, automatically calculating the height to maintain aspect ratio.
ffmpeg -i input.mp4 -vf scale=-1:720 output_720h.mp4
Scale the video to 720 pixels high, automatically calculating the width to maintain aspect ratio.
ffmpeg -i "input.mp4" -vf "scale=iw*0.5:ih*0.5" "output_halfsize.mp4"
Reduce the video to half its original size.
Cropping Examples
ffmpeg -i "input.mp4" -vf "crop=640:480:100:50" "output_cropped.mp4"
Crop the video to 640x480, starting at coordinates (100, 50).
ffmpeg -i input.mp4 -vf "crop=in_w/2:in_h/2:(in_w-out_w)/2:(in_h-out_h)/2" output_center_cropped.mp4
Crop the center half of the video.
Padding Examples
ffmpeg -i "input.mp4" -vf "pad=1280:720:0:0:black" "output_padded.mp4"
Pad the video to 1280x720 with black bars.
ffmpeg -i "input.mp4" -vf "pad=1280:720:(ow-iw)/2:(oh-ih)/2:white" "output_centered_padded.mp4"
Center the video within a 1280x720 frame with white padding.
Rotation and Flipping Examples
ffmpeg -i "input.mp4" -vf "transpose=1" "output_rotated.mp4"
Rotate the video 90 degrees clockwise. transpose=2 is 90 degrees counterclockwise, transpose=3 is 180 degrees.
ffmpeg -i "input.mp4" -vf "hflip" "output_hflipped.mp4"
Flip the video horizontally.
ffmpeg -i "input.mp4" -vf "vflip" "output_vflipped.mp4"
Flip the video vertically.
Time Manipulation Examples
ffmpeg -i "input.mp4" -ss 00:01:00 -to 00:02:00 -c copy "output_cut.mp4"
Cut a clip from 1 minute to 2 minutes (fast, using stream copy).
ffmpeg -i "input.mp4" -ss 60 -t 30 -c copy "output_cut.mp4"
Cut a clip starting at 60 seconds with a duration of 30 seconds (fast, using stream copy).
ffmpeg -i "input.mp4" -ss 00:00:30 "output_start_30s.mp4"
Start playback at 30 seconds (doesn't cut the video, just sets the starting point).
ffmpeg -i "input.mp4" -itsoffset 5 -i "input.mp4" -map 1:a -map 0:v -c copy "output_delayed_audio.mp4"
Delay the audio by 5 seconds (adjust the offset value as needed).
Frame Rate Manipulation Examples
ffmpeg -i "input.mp4" -r 24 "output_24fps.mp4"
Change the frame rate to 24 fps.
ffmpeg -i "input.mp4" -filter:v "minterpolate=mi_mode=mci,framerate=60" "output_60fps.mp4"
Increase the frame rate to 60 fps using motion interpolation (can introduce artifacts).
Audio Manipulation Examples
ffmpeg -i "input.mp4" -af "volume=0.5" "output_quieter.mp4"
Reduce the volume to 50%.
ffmpeg -i "input.mp4" -af "volume=10dB" "output_louder.mp4"
Increase the volume by 10 dB.
ffmpeg -i "input.mp4" -ac 2 "output_stereo.mp4"
Convert audio to stereo.
ffmpeg -i "input.mp4" -ac 1 "output_mono.mp4"
Convert audio to mono.
ffmpeg -i "input.mp4" -af "aresample=44100" "output_44100hz.mp4"
Change the sample rate to 44100 Hz.
Image and Video Examples
ffmpeg -i input.mp4 -s 1280x720 -c:a copy output.mp4
Change resolution of video
ffmpeg -i input.mp4 -vn -ab 320k output.mp3
Removing video stream from a media file
ffmpeg -i input.mp4 -r 1 -f image2 image-%2d.png
Extracting images from video
-r - Set the frame rate. I.e. the number of frames to be extracted into images per second. The default value is 25.
-f - Indicates the output format i.e, image format in our case.
image-%2d.png - Indicates how we want to name the extracted images. In this case, the names should start like image-01.png, image-02.png, image-03.png and so on. If you use %3d, then the name of images will start like image-001.png, image-002.png and so on.
ffmpeg -i input.mp4 -filter:v "crop=w:h:x:y" output.mp4
Crop video
-filter:v - Indicates the video filter.
crop - Indicates crop filter.
w - Width of the rectangle that we want to crop from the source video.
h - Height of the rectangle.
x - x coordinate of the rectangle that we want to crop from the source video.
y - y coordinate of the rectangle.
Let us say you want to a video with a width of 640 pixels and a height of 480 pixels, from the position (200,150), the command would be:
ffmpeg -i input.mp4 -filter:v "crop=640:480:200:150" output.mp4`
ffmpeg -i input_file.mp4 -ss 00:01:30 -to 00:01:55 -c copy output.mp4
Clip sections of a video
-i input_file.mp4 - Specifies the input video file
-ss 00:01:30 - Sets the start time (1 minute and 30 seconds into the video)
-to 00:01:55 - Sets the end time of the video
-c copy - Copies the streams without re-encoding (faster)
output.mp4 - Name of the output file
For a more accurate cut encoding can be used but will be slower.
ffmpeg -ss 00:01:30 -i input_file.mp4 -t 00:00:30 -c:v libx264 -c:a aac output.mp4
Stitch multiple videos together
First create a list of files. cmd:
(for %i in (*.mp4) do @echo file '%i') > files.txt
Powershell:
foreach ($i in Get-ChildItem .\*.mp4) {echo "file '$i'" >> files.txt}
Bash:
for f in *.mp4; do echo "file '$f'" >> videos.txt; done
or
printf "file '%s'\n" * > files.txt
Once your text file is ready it should contain all the names of files you want to concatenate in this format:
file 'file2.mp4'
file 'file3.mp4'
file 'file1.mp4'
Now you can enter the following command to concatenate the files:
ffmpeg -f concat -safe 0 -i files.txt -c copy output.mp4
With transcoding:
ffmpeg -f concat -safe 0 -i input.txt -c:v libx264 -c:a aac output.mp4
-f concat - Specifies the concat format
-safe 0 - Allows ffmpeg to read files in the current directory
-i input.txt - Input file containing the list of videos
-c copy - Copies the codecs without re-encoding (faster)
-c:v libx264 - uses the x264 (H.264) video encoder
-c:a aac - uses the AAC audio encoder
output.mp4 - Name of the output file
Method 2: Using the concat filter
ffmpeg -i input_file.mp4 -i input2.mp4 -i input3.mp4 -filter_complex "[0:v][0:a][1:v][1:a][2:v][2:a]concat=n=3:v=1:a=1[outv][outa]" -map "[outv]" -map "[outa]" output.mp4
-i input1.mp4 -i input2.mp4 -i input3.mp4 - Input video files
-filter_complex - Applies complex filtering
concat=n=3:v=1:a=1 - Concatenates 3 inputs with 1 video and 1 audio stream each
[outv][outa] - Labels for the output video and audio streams
-map "[outv]" -map "[outa]" - Map the labeled streams to the output
ffmpeg -i input.mp4 -aspect 16:9 output.mp4
Set aspect ratio. The commonly used aspect ratios are:
16:9
4:3
16:10
5:4
2:21:1
2:35:1
2:39:1
ffmpeg -i "input.jpg" -c:v libx264 -loop 0 -t 10 "output.mp4"
Create a 10-second video from a still image (loop the image).
ffmpeg -loop 1 -i "input.png" -c:v libx264 -t 5 -pix_fmt yuv420p "output.mp4"
Create a 5-second video from a still image (loop the image), specifying pixel format.
ffmpeg -i "input.mp4" -vf "thumbnail" -frames:v 1 "output.jpg"
Create a thumbnail image from a video.
ffmpeg -i "input.mp4" -vf "select=eq(n\,100)" -vframes 1 "output.png"
Extract a specific frame (frame 100) as an image.
ffmpeg -i input.mp4 -vn -ar 44100 -ac 2 -ab 320k -f mp3 output.mp3
Extract and convert audio from media file
-vn - Indicates that we have disabled video recording in the output file.
-ar - Set the audio frequency of the output file. The common values used are 22050, 44100, 48000 Hz.
-ac - Set the number of audio channels.
-ab - Indicates the audio bitrate.
-f - Output file format. In our case, it's mp3 format.
Encode .gif to .mp4 (ScreenToGif)
ffmpeg -i example.gif -movflags faststart -pix_fmt yuv420p -vf "crop=trunc(iw/2)*2:trunc(ih/2)*2" video.mp4
-movflags faststart - This flag optimizes the video file for web playback by moving the moov atom (metadata for the video) to the beginning of the file. This allows the video to start playing before it is fully downloaded.
-pix_fmt yuv420p - Sets the pixel format to yuv420p, which is widely supported by most video players and is optimal for web playback.
-vf - This applies a video filter (-vf) to crop the input video.
"crop=trunc(iw/2)*2:trunc(ih/2)*2 - Ensures the width (iw) and height (ih) of the cropped video are both even numbers, which is often a requirement for video encoding.
trunc(iw/2)*2 - This calculates half of the input width, truncates the decimal, and multiplies it by 2 to get an even number.
trunc(ih/2)*2 - Similarly, this does the same for the input height.
Subtitle Examples
ffmpeg -i "input.mp4" -vf "subtitles=subtitles.srt" "output_with_subs.mp4"
Add subtitles from a .srt file to the video (burn-in subtitles).
ffmpeg -i "input.mp4" -i "subtitles.srt" -c copy -map 0 -map 1 "output_with_subs.mkv"
Add subtitles as a separate stream in an MKV container (subtitles can be turned on/off).
Watermark Examples
ffmpeg -i "input.mp4" -i "watermark.png" -filter_complex "overlay=10:10" "output_watermarked.mp4"
Add a watermark image to the video at position (10, 10).
ffmpeg -i "input.mp4" -i "watermark.png" -filter_complex "overlay=(main_w-overlay_w-10):(main_h-overlay_h-10)" "output_bottom_right_watermarked.mp4"
Add a watermark to the bottom right corner.
Complex Filtergraph Examples
ffmpeg -i "input.mp4" -vf "split[main][tmp];[tmp]scale=640:480,deshake[shake];[main][shake]overlay=x=W-w-10:y=10" "output_deshaked_watermarked.mp4"
Deshake the video and add a watermark (requires the deshake filter, which may need to be enabled during compilation).
ffmpeg -i "input.mp4" -vf "chromakey=0x3CB371:0.1:0.1" "output_chromakeyed.mp4"
Apply chromakey (green screen) effect. Adjust the color and similarity/blend values as needed.
Streaming Examples (Basic)
Note: Streaming examples require a streaming server setup (e.g., using nginx with the RTMP module).
ffmpeg -re -i "input.mp4" -c copy -f flv "rtmp://your_streaming_server/live/stream_key"
Stream a video to an RTMP server (replace with your server address and stream key).
Miscellaneous Examples
ffmpeg -i "concat:input1.ts|input2.ts|input3.ts" -c copy "output.ts"
Concatenate multiple Transport Stream (TS) files (alternative to the text file method). May not always work reliably.
ffmpeg -i "input.mp4" -map 0:v -map 0:a -c copy "output.mkv"
Remux to MKV container (copy all video and audio streams).
ffmpeg -i "input.mp4" -an "output_no_audio.mp4"
Remove audio from a video file.
ffmpeg -i "input.mp4" -vn "output_audio_only.mp4"
Remove video from a video file (leaving only audio).
ffmpeg -i "input.mp4" -f image2 "output\_%03d.png"
Extract each frame as a separate image (output001.png, output002.png, etc.).
ffmpeg -framerate 24 -i "image%03d.png" -c:v libx264 "output.mp4"
Create a video from a sequence of images (image001.png, image002.png, etc.) at 24 fps.
Other resources
Google Search Operators
Working
| Search operator | What it does | Example |
|---|---|---|
“ ” | Search for results that mention a word or phrase. | “steve jobs” |
OR | Search for results related to X or Y. | jobs OR gates |
| | Same as OR: | jobs | gates |
AND | Search for results related to X and Y. | jobs AND gates |
- | Search for results that don’t mention a word or phrase. | jobs -apple |
* | Wildcard matching any word or phrase. | steve * apple |
( ) | Group multiple searches. | (ipad OR iphone) apple |
define: | Search for the definition of a word or phrase. | define:entrepreneur |
cache: | Find the most recent cache of a webpage. | cache:apple.com |
filetype: | Search for particular types of files (e.g., PDF). | apple filetype:pdf |
ext: | Same as filetype: | apple ext:pdf |
site: | Search for results from a particular website. | site:apple.com |
related: | Search for sites related to a given domain. | related:apple.com |
intitle: | Search for pages with a particular word in the title tag. | intitle:apple |
allintitle: | Search for pages with multiple words in the title tag. | allintitle:apple iphone |
inurl: | Search for pages with a particular word in the URL. | inurl:apple |
allinurl: | Search for pages with multiple words in the URL. | allinurl:apple iphone |
intext: | Search for pages with a particular word in their content. | intext:apple iphone |
allintext: | Search for pages with multiple words in their content. | allintext:apple iphone |
weather: | Search for the weather in a location. | weather:san francisco |
stocks: | Search for stock information for a ticker. | stocks:aapl |
map: | Force Google to show map results. | map:silicon valley |
movie: | Search for information about a movie. | movie:steve jobs |
in | Convert one unit to another. | $329 in GBP |
source: | Search for results from a particular source in Google News. | apple source:the_verge |
before: | Search for results from before a particular date. | apple before:2007-06-29 |
after: | Search for results from after a particular date. | apple after:2007-06-29 |
Sidenote. You can also use the _ operator, which acts as a wildcard in Google Autocomplete.
Unreliable
| Search operator | What it does | Example |
|---|---|---|
#..# | Search within a range of numbers. | iphone case $50..$60 |
inanchor: | Search for pages with backlinks containing specific anchor text. | inanchor:apple |
allinanchor: | Search for pages with backlinks containing multiple words in their anchor text. | allinanchor:apple iphone |
AROUND(X) | Search for pages with two words or phrases within X words of one another. | apple AROUND(4) iphone |
loc: | Find results from a given area. | loc:”san francisco” apple |
location: | Find news from a certain location in Google News. | location:”san francisco” apple |
daterange: | Search for results from a particular date range. | daterange:11278-13278 |
Examples with combinations of operators
Exact Phrase + Content Search + Filetype
“deep learning” allintext:neural networks filetype:pdf before:2020-01-01
Exact Phrase + Related Sites Search
“artificial intelligence” related:openai.com after:2022-01-01
Links
https://www.zombo.com/
https://zoomquilt.org/
MPV Player: Keyboard Shortcuts and Scripts
- Keyboard Shortcuts
- Popular MPV Scripts
- How to Install Scripts
- Custom Keybindings
- All Keyboard Shortcuts
Keyboard Shortcuts
Playback Controls
| Shortcut | Action |
|---|---|
| Space | Play/Pause |
| Enter | Play/Pause |
| P | Pause |
| . (Period) | Frame-step (move forward 1 frame) |
| , (Comma) | Frame-back (move backward 1 frame) |
| → (Right Arrow) | Seek forward 5 seconds |
| ← (Left Arrow) | Seek backward 5 seconds |
| ↑ (Up Arrow) | Seek forward 1 minute |
| ↓ (Down Arrow) | Seek backward 1 minute |
| Ctrl + → | Seek forward 10 seconds |
| Ctrl + ← | Seek backward 10 seconds |
| [ | Decrease playback speed by 10% |
| ] | Increase playback speed by 10% |
| { | Halve playback speed |
| } | Double playback speed |
| Backspace | Reset playback speed to normal |
Volume and Audio
| Shortcut | Action |
|---|---|
| ↑ (Up Arrow) | Increase volume |
| ↓ (Down Arrow) | Decrease volume |
| 9 | Decrease volume |
| 0 | Increase volume |
| M | Mute/Unmute |
| # | Cycle through audio tracks |
| Ctrl + + | Increase audio delay |
| Ctrl + - | Decrease audio delay |
Video and Subtitles
| Shortcut | Action |
|---|---|
| F | Toggle fullscreen |
| T | Toggle stay-on-top |
| V | Toggle subtitle visibility |
| J | Cycle through subtitle tracks |
| Z | Adjust subtitle delay forward |
| X | Adjust subtitle delay backward |
| Ctrl + + | Zoom in |
| Ctrl + - | Zoom out |
| Alt + ↑ | Move subtitles up |
| Alt + ↓ | Move subtitles down |
Playlist and Files
| Shortcut | Action |
|---|---|
| > | Next file in playlist |
| < | Previous file in playlist |
| Ctrl + P | Show playlist |
| Ctrl + L | Load a file |
Screenshots and Recording
| Shortcut | Action |
|---|---|
| S | Take a screenshot (without subs) |
| s | Take a screenshot (with subs) |
| Ctrl + S | Take a screenshot (original size) |
| Ctrl + R | Start/stop recording |
Miscellaneous
| Shortcut | Action |
|---|---|
| Q | Quit and save playback position |
| Ctrl + Q | Force quit |
| I | Show file information |
| O | Show progress bar and time |
| Tab | Show on-screen stats |
| ~ (Tilde) | Show console |
Popular MPV Scripts
MPV supports Lua and JavaScript scripts for advanced functionality. Here are some popular scripts:
1. mpv-quality-menu
- Description: Adds a menu to easily switch between video/audio quality options (e.g., 1080p, 720p) for streaming services like YouTube.
- GitHub: mpv-quality-menu
2. autoload
- Description: Automatically loads and plays the next file in the directory.
- GitHub: autoload
3. thumbfast
- Description: Generates and displays thumbnails while seeking.
- GitHub: thumbfast
4. mpv-webm
- Description: Allows you to create WebM clips from videos.
- GitHub: mpv-webm
5. mpv-scripts
- Description: A collection of useful scripts, including:
- auto-profiles: Automatically applies profiles based on media properties.
- reload: Reloads the current file.
- stats: Displays detailed playback statistics.
- GitHub: mpv-scripts
6. mpv-history
- Description: Keeps a history of played files and allows you to resume playback.
- GitHub: mpv-history
7. mpv-playlistmanager
- Description: A playlist manager with a graphical interface.
- GitHub: mpv-playlistmanager
8. mpv-osc-tethys
- Description: A modern on-screen controller (OSC) for MPV.
- GitHub: mpv-osc-tethys
How to Install Scripts
- Download the script file (usually a
.luaor.jsfile). - Place it in the
scriptsdirectory:- Windows:
%APPDATA%\mpv\scripts\ - Linux/macOS:
~/.config/mpv/scripts/
- Windows:
- Restart MPV to load the script.
Custom Keybindings
You can add custom keybindings in your input.conf file (located in the same directory as mpv.conf). This file allows you to define your own keyboard shortcuts for MPV. Here’s how to set it up:
Location of input.conf
- Windows:
%APPDATA%\mpv\input.conf - Linux/macOS:
~/.config/mpv/input.conf
Example Keybindings
Here are some examples of custom keybindings you can add to input.conf:
# Cycle through audio tracks
a cycle audio

# Cycle through subtitle tracks
s cycle sub

# Toggle mute
m cycle mute

# Take a screenshot (without subtitles)
Ctrl+s screenshot video

# Take a screenshot (with subtitles)
Ctrl+Shift+s screenshot

# Increase volume by 10
+ add volume 10

# Decrease volume by 10
- add volume -10

# Seek forward by 30 seconds
Shift+Right seek 30

# Seek backward by 30 seconds
Shift+Left seek -30

# Toggle fullscreen
f cycle fullscreen

# Quit and save playback position
q quit
All Keyboard Shortcuts
Keyboard Control
-
LEFT and RIGHT
- Seek backward/forward 5 seconds. Shift+arrow does a 1 second exact seek (see --hr-seek).
-
UP and DOWN
- Seek forward/backward 1 minute. Shift+arrow does a 5 second exact seek (see --hr-seek).
-
Ctrl+LEFT and Ctrl+RIGHT
- Seek to the previous/next subtitle. Subject to some restrictions and might not always work; see sub-seek command.
-
Ctrl+Shift+LEFT and Ctrl+Shift+RIGHT
- Adjust subtitle delay so that the previous or next subtitle is displayed now. This is especially useful to sync subtitles to audio.
-
[ and ]
- Decrease/increase current playback speed by 10%.
-
{ and }
- Halve/double current playback speed.
-
BACKSPACE
- Reset playback speed to normal.
-
Shift+BACKSPACE
- Undo the last seek. This works only if the playlist entry was not changed. Hitting it a second time will go back to the original position. See revert-seek command for details.
-
Shift+Ctrl+BACKSPACE
- Mark the current position. This will then be used by Shift+BACKSPACE as revert position (once you seek back, the marker will be reset). You can use this to seek around in the file and then return to the exact position where you left off.
-
< and >
- Go backward/forward in the playlist.
-
ENTER
- Go forward in the playlist.
-
Shift+HOME and Shift+END
- Go to the first/last playlist entry.
-
p and SPACE
- Pause (pressing again unpauses).
-
.
- Step forward. Pressing once will pause, every consecutive press will play one frame and then go into pause mode again.
-
,
- Step backward. Pressing once will pause, every consecutive press will play one frame in reverse and then go into pause mode again.
-
q
- Stop playing and quit.
-
Q
- Like q, but store the current playback position. Playing the same file later will resume at the old playback position if possible. See RESUMING PLAYBACK.
-
/ and *
- Decrease/increase volume.
-
KP_DIVIDE and KP_MULTIPLY
- Decrease/increase volume.
-
9 and 0
- Decrease/increase volume.
-
m
- Mute sound.
-
_
- Cycle through the available video tracks.
-
#
- Cycle through the available audio tracks.
-
E
- Cycle through the available Editions.
-
f
- Toggle fullscreen (see also --fs).
-
ESC
- Exit fullscreen mode.
-
T
- Toggle stay-on-top (see also --ontop).
-
w and W
- Decrease/increase pan-and-scan range. The e key does the same as W currently, but use is discouraged. See --panscan for more information.
-
o and P
- Show progression bar, elapsed time and total duration on the OSD.
-
O
- Toggle OSD states between normal and playback time/duration.
-
v
- Toggle subtitle visibility.
-
j and J
- Cycle through the available subtitles.
-
z and Z
- Adjust subtitle delay by -/+ 0.1 seconds. The x key does the same as Z currently, but use is discouraged.
-
l
- Set/clear A-B loop points. See ab-loop command for details.
-
L
- Toggle infinite looping.
-
Ctrl++ and Ctrl+-
- Adjust audio delay (A/V sync) by +/- 0.1 seconds.
-
Ctrl+KP_ADD and Ctrl+KP_SUBTRACT
- Adjust audio delay (A/V sync) by +/- 0.1 seconds.
-
G and F
- Adjust subtitle font size by +/- 10%.
-
u
- Switch between applying only --sub-ass-* overrides (default) to SSA/ASS subtitles, and overriding them almost completely with the normal subtitle style. See --sub-ass-override for more info.
-
V
- Cycle through which video data gets used for ASS rendering. See --sub-ass-use-video-data for more info.
-
r and R
- Move subtitles up/down. The t key does the same as R currently, but use is discouraged.
-
s
- Take a screenshot.
-
S
- Take a screenshot, without subtitles. (Whether this works depends on VO driver support.)
-
Ctrl+s
- Take a screenshot, as the window shows it (with subtitles, OSD, and scaled video).
-
HOME
- Seek to the beginning of the file.
-
PGUP and PGDWN
- Seek to the beginning of the previous/next chapter. In most cases, "previous" will actually go to the beginning of the current chapter; see --chapter-seek-threshold.
-
Shift+PGUP and Shift+PGDWN
- Seek backward or forward by 10 minutes. (This used to be mapped to PGUP/PGDWN without Shift.)
-
b
- Activate/deactivate debanding.
-
d
- Cycle the deinterlacing filter.
-
A
- Cycle aspect ratio override.
-
Ctrl+h
- Toggle hardware video decoding on/off.
-
Alt+LEFT, Alt+RIGHT, Alt+UP, Alt+DOWN
- Move the video rectangle (panning).
-
Alt++ and Alt+-
- Change video zoom.
-
Alt+KP_ADD and Alt+KP_SUBTRACT
- Change video zoom.
-
Alt+BACKSPACE
- Reset the pan/zoom settings.
-
F8
- Show the playlist and the current position in it.
-
F9
- Show the list of audio and subtitle streams.
-
Ctrl+v
- Append the file or URL in the clipboard to the playlist. If nothing is currently playing, it is played immediately. Only works on platforms that support the clipboard property.
-
i and I
- Show/toggle an overlay displaying statistics about the currently playing file such as codec, framerate, number of dropped frames and so on. See STATS for more information.
-
?
- Toggle an overlay displaying the active key bindings. See STATS for more information.
-
DEL
- Cycle OSC visibility between never / auto (mouse-move) / always
-
`
- Show the console. (ESC closes it again. See CONSOLE.)
(The following keys are valid only when using a video output that supports the corresponding adjustment.)
- 1 and 2
- Adjust contrast.
- 3 and 4
- Adjust brightness.
- 5 and 6
- Adjust gamma.
- 7 and 8
- Adjust saturation.
- Alt+0 (and Command+0 on macOS)
- Resize video window to half its original size.
- Alt+1 (and Command+1 on macOS)
- Resize video window to its original size.
- Alt+2 (and Command+2 on macOS)
- Resize video window to double its original size.
- Command + f (macOS only)
- Toggle fullscreen (see also --fs).
(The following keybindings open a menu in the console that lets you choose from a list of items by typing part of the desired item, by clicking the desired item, or by navigating them with keybindings: Down and Ctrl+n go down, Up and Ctrl+p go up, Page down and Ctrl+f scroll down one page, and Page up and Ctrl+b scroll up one page.)
In track menus, selecting the current tracks disables it.
- g-p
- Select a playlist entry.
- g-s
- Select a subtitle track.
- g-S
- Select a secondary subtitle track.
- g-a
- Select an audio track.
- g-v
- Select a video track.
- g-t
- Select a track of any type.
- g-c
- Select a chapter.
- g-e
- Select an MKV edition or DVD/Blu-ray title.
- g-l
- Select a subtitle line to seek to. This currently requires ffmpeg in PATH, or in the same folder as mpv on Windows.
- g-d
- Select an audio device.
- g-h
- Select a file from the watch history. Requires --save-watch-history.
- g-w
- Select a file from watch later config files (see RESUMING PLAYBACK) to resume playing. Requires --write-filename-in-watch-later-config.
- g-b
- Select a defined input binding.
- g-r
- Show the values of all properties.
- g-m, MENU, Ctrl+p
- Show a menu with miscellaneous entries.
See SELECT for more information.
(The following keys are valid if you have a keyboard with multimedia keys.)
- PAUSE
- Pause.
- STOP
- Stop playing and quit.
- PREVIOUS and NEXT
- Seek backward/forward 1 minute.
- ZOOMIN and ZOOMOUT
- Change video zoom.
If you miss some older key bindings, look at etc/restore-old-bindings.conf in the mpv git repository.
Mouse Control
- Left double click
- Toggle fullscreen on/off.
- Right click
- Toggle pause on/off.
- Forward/Back button
- Skip to next/previous entry in playlist.
- Wheel up/down
- Decrease/increase volume.
- Wheel left/right
- Seek forward/backward 10 seconds.
- Ctrl+Wheel up/down
- Change video zoom.
yt-dlp
- yt-dlp User Guide (Windows) - Basic
- Introduction
- Installation
- Basic Usage
- Common Options
- Examples
- Updating yt-dlp
- Troubleshooting
yt-dlp User Guide (Windows) - Basic
Introduction
yt-dlp is a command-line program to download videos from YouTube and other video sites. It's a fork of youtube-dl, with a focus on new features, fixes, and speed. This guide covers basic usage on Windows.
Installation
-
Download yt-dlp.exe: Download the latest Windows executable (
yt-dlp.exe) from the official GitHub releases page: https://github.com/yt-dlp/yt-dlp/releases. Look for theyt-dlp.exefile. -
Optional (but Recommended): Add yt-dlp to your PATH. This allows you to run
yt-dlpfrom any command prompt or PowerShell window.
- Search for "Edit the system environment variables" in the Windows Start Menu.
- Click "Environment Variables...".
- Under "System variables", find the "Path" variable and click "Edit...".
- Click "New" and add the directory where you saved
yt-dlp.exe(e.g.,C:\yt-dlp). - Click "OK" on all windows.
- Optional (but Recommended): Install FFmpeg. yt-dlp uses FFmpeg for merging audio and video, and for certain conversions. Download FFmpeg from https://ffmpeg.org/download.html. Download the Windows builds (usually a
.zipfile). Extract the contents, and add thebindirectory inside the extracted folder to your PATH, similar to how you added yt-dlp. For example, if you extracted FFmpeg toC:\ffmpeg, you would addC:\ffmpeg\binto your PATH.
Basic Usage
Downloading a Video
-
Open Command Prompt or PowerShell: Press
Win + R, typecmd(for Command Prompt) orpowershell(for PowerShell), and press Enter. -
Run yt-dlp: Type the following command and press Enter:
yt-dlp "URL_OF_THE_VIDEO"Replace
"URL_OF_THE_VIDEO"with the actual URL of the YouTube video or other supported video site. For example:yt-dlp https://www.youtube.com/watch?v=dQw4w9WgXcQIf you added yt-dlp to your PATH, you can run this command from any directory. Otherwise, you'll need to navigate to the directory where you saved
yt-dlp.exefirst. -
Progress and Output: yt-dlp will display progress information in the console window as it downloads the video. The downloaded video file will be saved in the current directory by default.
Common Options
yt-dlp has many options to customize the download process. Here are some of the most common
| Option | Description |
|---|---|
-F, --list-formats | List all available formats for the video. Use this to find the format code you want to download (e.g., 137 for 1080p video without audio). |
-f, --format <format> | Specify the format to download. Use the format code from --list-formats. You can specify multiple formats separated by + to merge video and audio (e.g., -f 137+140 for 1080p video and high-quality audio). |
-o, --output <template> | Specify the output filename template. Use placeholders like %title (video title), %id (video ID), %ext (file extension). For example: -o "%(title)s-%(id)s.%(ext)s". |
-P, --paths <paths> | Specify the download path. For example: -P "C:\Downloads". |
--merge-output-format <format> | Specify the container format to use when merging video and audio (e.g., --merge-output-format mp4, --merge-output-format mkv). Requires FFmpeg. |
--extract-audio | Extract the audio from the video. |
--audio-format <format> | Specify the audio format to extract (e.g., --audio-format mp3, --audio-format aac). Requires FFmpeg. |
--audio-quality <quality> | Specify the audio quality to extract (e.g., --audio-quality 0 for best, --audio-quality 5 for good). |
--write-sub | Download subtitles (if available). |
--write-auto-sub | Download automatically generated subtitles (if available). |
--sub-lang <languages> | Specify the subtitle language(s) to download (e.g., --sub-lang en,es). |
--embed-subs | Embed subtitles into the video file. Requires FFmpeg. |
--cookies <file> | Load cookies from a file. Useful for downloading age-restricted content or content that requires login. You can typically export cookies from your browser using a browser extension. |
--username <username> | Specify a username for sites that require login. |
--password <password> | Specify a password for sites that require login. |
--ignore-errors | Continue downloading even if some videos in a playlist or a batch fail. |
--no-overwrites | Do not overwrite existing files. |
--update | Update yt-dlp to the latest version. |
Examples
Downloading the Best Available Video and Audio
yt-dlp https://www.youtube.com/watch?v=dQw4w9WgXcQ
Listing Available Formats
yt-dlp -F https://www.youtube.com/watch?v=dQw4w9WgXcQ
Downloading a Specific Format (Video and Audio) and Merging with FFmpeg
First, list the formats to find the video and audio format codes. Then
yt-dlp -f 137+140 --merge-output-format mp4 https://www.youtube.com/watch?v=dQw4w9WgXcQ
This downloads format 137 (1080p video) and 140 (high-quality audio) and merges them into an MP4 file using FFmpeg
Downloading Only Audio in MP3 Format
yt-dlp --extract-audio --audio-format mp3 --audio-quality 0 https://www.youtube.com/watch?v=dQw4w9WgXcQ
This extracts the audio as an MP3 file with the best available quality
Downloading Subtitles
yt-dlp --write-sub --sub-lang en https://www.youtube.com/watch?v=dQw4w9WgXcQ
This downloads English subtitles (if available)
Setting the Output Filename and Directory
yt-dlp -o "%(title)s-%(id)s.%(ext)s" -P "C:\Downloads" https://www.youtube.com/watch?v=dQw4w9WgXcQ
This saves the video to C:\Downloads with a filename like Video Title-dQw4w9WgXcQ.mp4
Configuration File (yt-dlp.conf)
yt-dlp can also be configured using a configuration file
- Location: The
yt-dlp.conffile should be placed in one of the following locations (yt-dlp will search in this order)
-
The current working directory
-
%APPDATA%\yt-dlp(usuallyC:\Users\[Your Username]\AppData\Roaming\yt-dlp). Create theyt-dlpdirectory if it doesn't exist -
%LOCALAPPDATA%\yt-dlp(usuallyC:\Users\[Your Username]\AppData\Local\yt-dlp) -
~/.config/yt-dlp(This is more relevant for Linux/macOS but might work in a Cygwin/MSYS2 environment)
-
Creating the File: Create a new text file named
yt-dlp.confin one of the above directories -
Example Configuration:
# Always extract audio as mp3

--extract-audio

--audio-format mp3

--audio-quality 0

# Set a default output directory

-P "C:\Downloads"

# Set a default output filename template

-o "%(title)s-%(id)s.%(ext)s"

# Always download subtitles in English

--write-sub

--sub-lang en

# Use a proxy (replace with your proxy address)

--proxy "http://127.0.0.1:8080"
- Uncomment the
--proxyline and replace the address with your proxy server if needed
- Using the Configuration File: yt-dlp will automatically load the configuration file when it runs. You can still override options from the command line
Updating yt-dlp
Use the --update option to update yt-dlp to the latest version
yt-dlp --update
Troubleshooting
-
"yt-dlp is not recognized as an internal or external command": This means yt-dlp is not in your PATH. Double-check the installation instructions
-
"FFmpeg not found": This means FFmpeg is not in your PATH, or yt-dlp cannot find it. Double-check the FFmpeg installation instructions
-
Download errors: Try updating yt-dlp. Some sites change their structure frequently, requiring updates to yt-dlp. Also, check your internet connection
-
Age-restricted content: You may need to pass cookies to yt-dlp using the
--cookiesoption